Sign In
Upload
Manuals
Brands
Epson Manuals
Digital Camera
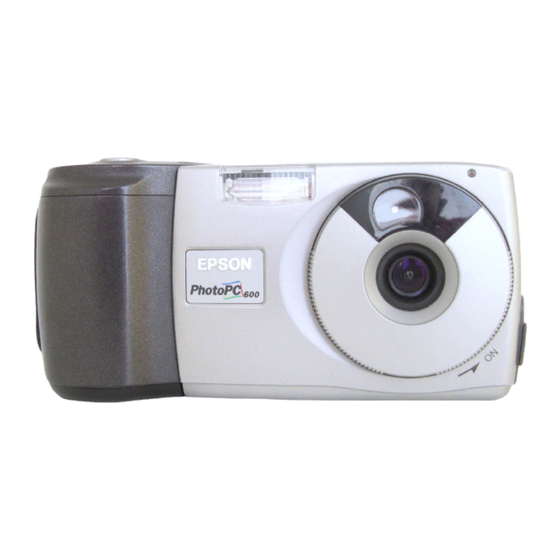
PhotoPC600
Epson PhotoPC600 Manuals
Manuals and User Guides for Epson PhotoPC600. We have
2
Epson PhotoPC600 manuals available for free PDF download: User Manual, Service Manual
Epson PhotoPC600 User Manual (144 pages)
XGA color Digital Camera
Brand:
Epson
| Category:
Digital Camera
| Size: 2.45 MB
Table of Contents
Table of Contents
4
Introduction
9
Photopc 600 Features
9
Optional Accessories
10
Minimum System Requirements
10
Windows Systems
10
Macintosh Systems
11
Where to Get Help
11
Software Support
12
Registration
12
Safety Instructions
13
1 Getting Started
15
Unpacking Your Photopc 600
15
Identifying Camera Parts
16
Using Rechargeable Nimh Batteries
18
Charging Batteries
18
Installing Batteries
20
Handling Batteries
22
Attaching the Hand Strap
23
Installing Your Photopc 600 Software
24
Installing for Windows 95 or
24
Windows NT 4.0
24
Installing for Windows 3.1X or Windows NT
25
Installing on a Macintosh
25
Making Software Installation Diskettes
25
Setting the Language
26
Setting the Date and Time
27
2 Taking Pictures
29
Getting Ready to Take Pictures
30
Turning the Camera on and off
30
Saving Power with Auto Shut-Off
30
Using the Display Panel
31
Checking the Battery
31
Taking Pictures with the Viewfinder
31
Taking Pictures with the LCD Screen
33
Using Macro Mode to Take Close-Ups
34
Using the Flash
34
Taking Pictures with the Timer
35
Setting Image Quality and Color Mode
36
Fine
36
Super Fine
36
Monochrome Fine
36
Monochrome Super Fine
36
Standard
36
Taking Special Format Pictures
38
Digital Zoom
38
Panorama
39
Multi-Frame
40
Checking the Picture Counter
40
3 Playing Back Photos
41
Using the Playback Mode
42
Playing Back Pictures One by One
43
Playing Back Multiple Pictures
44
Playing Your Pictures as a Slide Show
45
Turning off Picture Information
45
Erasing Images
46
Erasing the Currently Displayed Picture
46
Selecting Pictures to Erase
47
Locking Photos
49
Unlocking Photos
50
Playing Back Pictures on TV
52
4 Getting Photos into Your Computer
53
Connecting the Camera
53
Connecting to a Windows PC
54
Connecting to a Macintosh
55
Transferring Photos with Image Expert
56
What to Do if You See an Error Message
59
Getting Images into TWAIN Applications
61
Getting Images that You Can Import
62
What to Do if the Camera Is Not Responding
64
5 Getting Your Photos into Documents
66
Importing Images into Documents
67
Getting Images with Copy and Paste
68
Using Drag and Drop from an Album (Windows Only)
69
Getting Images with the Camio Viewer (Windows 95)
70
To Drag and Drop a Picture into a Document
72
To Transfer Images before Placing Them
73
6 Working with Photos and Albums
74
Using Albums
75
Organizing Pictures in Albums
75
Viewing Picture Information
76
Printing an Image
77
Printing an Album
78
Additional Options for Windows
79
Displaying Albums as Slide Shows
80
Copying to Diskette
81
Using an Album as a Screen Saver
82
Setting an Image as Wallpaper
83
Sending Pictures by E-Mail
84
7 Editing Images
85
Viewing and Selecting
86
Applying Quick Fix
86
Correcting
87
Cropping
88
Resizing and Changing Resolution
89
Rotating
90
Flipping
91
Applying Special Effects
91
Changing the Number of Colors
92
8 Using Custom and Advanced Features
93
Taking Pictures from Your Computer
93
Using the Self Timer
95
Setting the Shutter Speed
96
Taking Pictures with EPSON Photo!2
96
Adjusting Camera Settings from Your Computer
97
Changing Settings with Image Expert
97
Changing Settings with EPSON Photo!2
99
Customizing Settings with the LCD Screen
100
Setting the Camera Clock
101
Setting the Alert Beep
102
Setting the LCD Brightness
102
Setting the Multi-Frame Shooting Time
103
Uploading Programs into the Camera
103
Using Your Camera for Presentations
104
Uploading Images to the Camera
104
Uploading Existing Images from Your Windows PC
105
Uploading Images from Your Macintosh
107
Converting Presentations
109
Capturing Windows Screens
109
Capturing Macintosh Screens
111
Projecting Your Presentation
112
10 Using Compactflash Memory Cards
113
Installing a Memory Card
114
Removing a Memory Card
115
Getting Images from a Card to Your Computer
115
Using a PCMCIA Adapter
116
Transferring Photos
116
Formatting a Memory Card
116
Getting Memory Information
118
Copying to and from a Memory Card
119
11 Maintenance and Troubleshooting
121
Caring for the Camera and Battery Charger
121
Cleaning the Camera and Battery Charger
121
Storing the Camera
122
Solving Camera Problems
122
Solving Picture Problems
127
A Optional Accessories
130
Using a Tripod
130
Using the AC Adapter
131
Using a Tripod
132
Camera
133
Physical Dimensions
133
Power
133
Safety Specifications
133
Environmental
134
Technical
134
Photographic
135
Nimh Battery Charger
136
Optional AC Adapter
136
Physical Dimensions
136
Technical
136
Index
137
Advertisement
Epson PhotoPC600 Service Manual (116 pages)
Color Still Digital Camera
Brand:
Epson
| Category:
Digital Camera
| Size: 2.1 MB
Table of Contents
Table of Contents
6
Product Description
10
Features
10
Specification
11
Environmental Conditions
15
Electrical Specification
15
EMI and Safety Standard
15
Reliability
15
Operating Conditions
15
Interface
16
Specification
16
Control Panel (Display Panel)
17
Camera Operation
18
Control Buttons
18
LED Specification
20
Operation Specification
21
Basic Operation
21
Photo Format Setting
23
Macro Mode (Close Range Shooting)
24
Basic LCD Settings
27
Setting the Language
29
Setting the Playback Mode
30
Other Settings
31
Erasing Photos
32
Copying Photos
34
Operating Principles
37
Troubleshooting
43
Overview
44
The Camera Has no Power
45
Red LED Light Blinking
46
Shutter Does Not Work
46
Image Is Taken out of Cross Mark in the Viewfinder (Not Using LCD Monitor)
46
Nothing Appears on the Camera and Computer Screens (All Black)
47
Unable to Transfer Image Data to PC
47
No Images on the LCD Screen
48
Unable to Use Optional Compact Flash Card
48
Picture Is Blurry or out of Focus
48
Disassembly and Assembly
49
Overview
50
Precautions
50
Tools
51
Specification for Screws
51
Procedure for Disassembly
52
Removing the Cabinet Parts
53
Removing SY1 Board and ST1 Board
54
Removing CA1 Board, CA2 Board, LCD and CCD
55
Procedure for Assembly
56
Installing the Parts to the Front Cabinet
57
Installing the Parts to the Rear Cabinet
63
Connecting Holder Chassis and Lens Viewfinder
67
Installing CCD and Lens Unit to the CA1 Board
67
Connecting CA1 Board and CA2 Board
69
Connecting Holder Chassis and CA1 Board
75
Connecting LCD Monitor and LCD Holder
75
Connecting LCD Holder and CA2 Board
77
Connecting ST1 Board and CA2 Board
79
Connecting SY1 Board and CA2 Board
83
Installing the Top Cover and Front Cabinet
87
Installing the Rear Cabinet and Battery Cover
91
Adjustment
93
Adjsutment Overview
94
Preparation for Adjustment
95
Initialization
97
Downloading Firmware
99
5100K AWB Adjustment
100
Flange-Back Adjustment
101
LCD H AFC Adjustment
102
LCD RGB Offset Adjustment
104
LCD Gain Adjustment
105
LCD Blue Brightness Adjustment
106
LCD Red Brightness Adjustment
107
Maintenance
109
Preventive Maintenance
109
Check Point
109
Appendix
110
Overview
111
Connection between Boards
111
Connector Signals
112
Major Connector Signals on the SY1 Board
112
Major Connector Signals on the ST1 Board
113
Major Connector Signals on the CA2 Board
114
Major Connector Signals on the TB1 Board
114
Cable Connection Diagram
115
Advertisement
Related Products
Epson PhotoPC 600
Epson PhotoPC - Color Digital Camera
Epson PhotoPC 500
Epson PhotoPC P-1000
Epson PhotoPC 800
Epson PhotoPC PhotoPC
Epson PhotoPC750Z
Epson PhotoPC3100Z
Epson PhotoPC700
Epson PhotoPC2100Z
Epson Categories
Printer
Projector
All in One Printer
Scanner
Printer Accessories
More Epson Manuals
Login
Sign In
OR
Sign in with Facebook
Sign in with Google
Upload manual
Upload from disk
Upload from URL