Sign In
Upload
Manuals
Brands
Quatech Manuals
Server
SSEW-100D
Quatech SSEW-100D Manuals
Manuals and User Guides for Quatech SSEW-100D. We have
4
Quatech SSEW-100D manuals available for free PDF download: User Manual, Quick Start Manual, Specifications
Quatech SSEW-100D User Manual (98 pages)
Quatech Serial Device Server User's Manual
Brand:
Quatech
| Category:
Server
| Size: 3.03 MB
Table of Contents
Table of Contents
3
Figures
4
Introduction
7
Understanding How Virtual Communication Ports Work
8
Understanding MAC and IP Addresses and Port Numbers
8
Identifying Operating Modes
9
Identifying Quatech's SDS Product Line
10
System Requirements
10
Table 1 - SDS Models
10
Features
11
Protocol Support
11
Wi-Fi Implementation
12
TCP Socket Services - Intellisock
12
Getting Started
13
Unpacking Your SDS
13
Identifying Parts
14
Figure 1 - Connectors and Indicators
14
Understanding LED Codes
15
Table 2 - SDS LED Codes
15
Locating Serial and Network Ports
16
Figure 2 - DB-9 Pinouts
16
Table 3 - RS-232 Signals on DB-9 Connector
16
Table 4 - RS-422/485 Signals on DB-9 Connector
16
Figure 3 - RJ-45 Pinouts (DB-9 to RJ-45 Adapter)
17
Table 5 - RS-232 Signals on RJ-45 Connector (DB-9 to RJ-45 Adapter)
17
Table 6 - RS-422/485 Signals on RJ-45 Connector (DB-9 to RJ-45 Adapter)
17
Figure 4 - RJ-45 Ethernet Port Pinout
18
Table 7 - RJ-45 Ethernet Port Signals
18
Making Connections
19
Figure 5 - Connecting an SDS to a Serial Device
19
Enabling Wi-Fi Device Servers
20
Installing the Device Drivers
22
Figure 6 - Main Menu Screen
22
Figure 7 - Welcome Screen
23
Figure 8 - Prepare to Install Screen
23
Figure 9 - Search Network for Serial Device Server(S) Screen
24
Figure 10 - Where Is the Serial Device Server Attached Screen
25
Figure 11 - Network Connectivity Test Screen
26
Figure 12 - Retrieving Unit Configuration Pop-Up Box
26
Figure 13 - TCP/IP Network Configuration Parameters Screen
27
Figure 14 - Internet Protocol (TCP/IP) Properties Dialog Box
28
Figure 15 - Restart Confirmation Pop-Up Box
29
Figure 16 - Information Pop-Up Box
29
Figure 17 - TCP/IP Network Configuration Parameters Screen
30
Figure 18 - Rerun Network Connectivity Test Pop-Up Box
30
Figure 19 - Network Connectivity Test Screen
31
Figure 20 - Retrieving Unit Configuration Pop-Up Box
31
Figure 21 - TCP/IP Network Configuration Parameters Screen
32
Figure 22 - Install the Device Drivers Screen
32
Figure 23 - Installation Complete Screen
33
Win NT Device Manager
34
Win NT - Changing Port Numbers
34
Uninstalling Your SDS
35
Uninstalling from Windows XP/2000
35
Uninstalling from Windows NT4
35
Alternative Installation Steps
36
Figure 24 - Reconfigure the Serial Device Server Screen
36
Figure 25 - Serial Device Server Is Configured for a Remote Subnet
37
Figure 26 - Internet Protocol (TCP/IP) Properties Dialog Box
38
Figure 27 - Restart Confirmation Pop-Up Box
39
Figure 28 - Information Pop-Up Box
39
Figure 29 - TCP/IP Network Configuration Parameters Screen
40
Figure 30 - Rerun Network Connectivity Test Pop-Up Box
40
Figure 31 - DHCP Confirmation Pop-Up Box
41
Figure 32 - SDS Wizard Information DHCP Screen
41
Figure 33 - Locate the Serial Device Server Screen
42
Figure 34 - Locate the Serial Device Server Using Direct Discovery Screen
43
Figure 35 - Locate the Serial Device Server on a Remote Subnet Screen
44
Figure 36 - Describe the Remote Subnet Screen
45
Figure 37 - Locate the Serial Device Server Options Screen
46
Figure 38 - Locate the Serial Device Server Local Discovery Screen
47
Figure 39 - Select Desired Serial Device Server from List Screen
48
Figure 40 - Specify IP Address Screen
49
Figure 41 - Network Connectivity Test Failed Screen
50
Configuring the SDS Using the Web Interface
51
Figure 42 - Home Page Screen
52
Setting Network Parameters
53
Setting TCP/IP (LAN) and Wi-Fi (Wireless) Parameters
53
Figure 43 - Network Setup Screen
54
Table 8 - Class A, B, and C Address Masks
55
Table 9 - Complete List of Address Masks
55
Figure 44 - IP Address Successful Screen
57
Figure 45 - Remote Reset Screen
57
Figure 46 - SDS Is Now Resetting Screen
57
Setting SNMP Parameters
58
Figure 47 - SNMP Setup Screen
58
Figure 48 - SNMP Address Update Successful Screen
60
Figure 49 - Remote Reset Screen
60
Figure 50 - SDS Is Now Resetting Screen
60
Setting Serial Port Parameters
61
Setting Normal Operating Mode Parameters
61
Figure 51 - Serial Port Status Screen
61
Figure 52 - Serial Port Setup Screen for Normal Mode
62
Setting Tunneling Operating Mode Parameters
64
Figure 53 - Serial Port Setup Screen for Tunneling Mode
65
Setting Raw TCP Operating Mode Parameters
67
Figure 54 - Serial Port Setup Screen for Raw TCP Mode
68
Setting Auto TCP Operating Mode Parameters
70
Figure 55 - Serial Port Setup Screen for Auto TCP Mode
72
Setting Raw UDP Operating Mode Parameters
74
Figure 56 - Serial Port Setup Screen for Raw UDP Mode
76
Viewing the Serial Port Parameters
61
Running Diagnostic Tests
79
Using the Port Status Screen
79
Running the Ping Test
79
Figure 57 - Port Status Screen
79
Figure 58 - Ping Test Screen
79
Checking Wireless Status
80
Figure 59 - Ping Results Screen
80
Figure 60 - Wireless Status Screen
80
Performing Administrative Functions
81
Managing Users
81
Figure 61 - Show Users Screen
81
Figure 62 - Add/Del Users Screen
82
Figure 63 - Network Confirmation Prompt
82
Giving the SDS a Descriptive Name
83
Figure 64 - Add/Del Users Screen
83
Figure 65 - Show Users Screen
83
Figure 66 - Set Descriptive Name Screen
83
Upgrading Firmware
84
Figure 67 - Firmware Upgrade Screen
84
Figure 68 - Remote Reset
84
Contacting Quatech
85
Figure 69 - Contact Us Screen
85
Troubleshooting and Maintaining an SDS
86
Troubleshooting an SDS
86
Maintaining an SDS
89
Operating Conditions
89
Handling the SDS
89
Moving the SDS
89
Cleaning the SDS
89
Servicing the SDS
89
Appendix
90
Specifications
90
Appendix
95
Declaration of Conformity
95
Appendix
97
Warranty Information
97
Advertisement
Quatech SSEW-100D User Manual (98 pages)
Serial Device Server
Brand:
Quatech
| Category:
Server
| Size: 2.55 MB
Table of Contents
Table of Contents
3
Figures
4
Introduction
7
Understanding How Virtual Communication Ports Work
8
Understanding MAC and IP Addresses and Port Numbers
8
Identifying Operating Modes
9
Identifying Quatech's SDS Product Line
10
System Requirements
10
Table 1 - SDS Models
10
Features
11
Protocol Support
11
Wifi Implementation
12
TCP Socket Services - Intellisock
12
Getting Started
13
Unpacking Your SDS
13
Identifying Parts
14
Figure 1 - Connectors and Indicators
14
Understanding LED Codes
15
Table 2 - SDS LED Codes
15
Locating Serial and Network Ports
16
Figure 2 - DB-9 Pinouts
16
Table 3 - RS-232 Signals on DB-9 Connector
16
Table 4 - RS-422/485 Signals on DB-9 Connector
16
Figure 3 - RJ-45 Pinouts (DB-9 to RJ-45 Adapter)
17
Table 5 - RS-232 Signals on RJ-45 Connector (DB-9 to RJ-45 Adapter)
17
Table 6 - RS-422/485 Signals on RJ-45 Connector (DB-9 to RJ-45 Adapter)
17
Figure 4 - RJ-45 Ethernet Port Pinout
18
Table 7 - RJ-45 Ethernet Port Signals
18
Making Connections
19
Figure 5 - Connecting an SDS to a Serial Device
19
Enabling Wifi Device Servers
20
Installing the Device Drivers
22
Figure 6 - Main Menu Screen
22
Figure 7 - Welcome Screen
23
Figure 8 - Prepare to Install Screen
23
Figure 9 - Search Network for Serial Device Server(S) Screen
24
Figure 10 - Where Is the Serial Device Server Attached Screen
25
Figure 11 - Network Connectivity Test Screen
26
Figure 12 - Retrieving Unit Configuration Pop-Up Box
26
Figure 13 - TCP/IP Network Configuration Parameters Screen
27
Figure 14 - Internet Protocol (TCP/IP) Properties Dialog Box
28
Figure 15 - Restart Confirmation Pop-Up Box
29
Figure 16 - Information Pop-Up Box
29
Figure 17 - TCP/IP Network Configuration Parameters Screen
30
Figure 18 - Rerun Network Connectivity Test Pop-Up Box
30
Figure 19 - Network Connectivity Test Screen
31
Figure 20 - Retrieving Unit Configuration Pop-Up Box
31
Figure 21 - TCP/IP Network Configuration Parameters Screen
32
Figure 22 - Install the Device Drivers Screen
32
Figure 23 - Installation Complete Screen
33
Win NT Device Manager
34
Win NT - Changing Port Numbers
34
Uninstalling Your SDS
35
Uninstalling from Windows XP/2000
35
Uninstalling from Windows NT4
35
Alternative Installation Steps
36
Figure 24 - Reconfigure the Serial Device Server Screen
36
Figure 25 - Serial Device Server Is Configured for a Remote Subnet
37
Figure 26 - Internet Protocol (TCP/IP) Properties Dialog Box
38
Figure 27 - Restart Confirmation Pop-Up Box
39
Figure 28 - Information Pop-Up Box
39
Figure 29 - TCP/IP Network Configuration Parameters Screen
40
Figure 30 - Rerun Network Connectivity Test Pop-Up Box
40
Figure 31 - DHCP Confirmation Pop-Up Box
41
Figure 32 - SDS Wizard Information DHCP Screen
41
Figure 33 - Locate the Serial Device Server Screen
42
Figure 34 - Locate the Serial Device Server Using Direct Discovery Screen
43
Figure 35 - Locate the Serial Device Server on a Remote Subnet Screen
44
Figure 36 - Describe the Remote Subnet Screen
45
Figure 37 - Locate the Serial Device Server Options Screen
46
Figure 38 - Locate the Serial Device Server Local Discovery Screen
47
Figure 39 - Select Desired Serial Device Server from List Screen
48
Figure 40 - Specify IP Address Screen
49
Figure 41 - Network Connectivity Test Failed Screen
50
Configuring the SDS Using the Web Interface
51
Figure 42 - Home Page Screen
52
Setting Network Parameters
53
Setting TCP/IP (LAN) and Wifi (Wireless) Parameters
53
Figure 43 - Network Setup Screen
54
Table 8 - Class A, B, and C Address Masks
55
Table 9 - Complete List of Address Masks
55
Figure 44 - IP Address Successful Screen
57
Figure 45 - Remote Reset Screen
57
Figure 46 - SDS Is Now Resetting Screen
57
Setting SNMP Parameters
58
Figure 47 - SNMP Setup Screen
58
Figure 48 - SNMP Address Update Successful Screen
60
Figure 49 - Remote Reset Screen
60
Figure 50 - SDS Is Now Resetting Screen
60
Setting Serial Port Parameters
61
Setting Normal Operating Mode Parameters
61
Figure 51 - Serial Port Status Screen
61
Figure 52 - Serial Port Setup Screen for Normal Mode
62
Setting Tunneling Operating Mode Parameters
64
Figure 53 - Serial Port Setup Screen for Tunneling Mode
65
Setting Raw TCP Operating Mode Parameters
67
Figure 54 - Serial Port Setup Screen for Raw TCP Mode
68
Setting Auto TCP Operating Mode Parameters
70
Figure 55 - Serial Port Setup Screen for Auto TCP Mode
72
Setting Raw UDP Operating Mode Parameters
74
Figure 56 - Serial Port Setup Screen for Raw UDP Mode
76
Viewing the Serial Port Parameters
61
Running Diagnostic Tests
79
Using the Port Status Screen
79
Running the Ping Test
79
Figure 57 - Port Status Screen
79
Figure 58 - Ping Test Screen
79
Checking Wireless Status
80
Figure 59 - Ping Results Screen
80
Figure 60 - Wireless Status Screen
80
Performing Administrative Functions
81
Managing Users
81
Figure 61 - Show Users Screen
81
Figure 62 - Add/Del Users Screen
82
Figure 63 - Network Confirmation Prompt
82
Giving the SDS a Descriptive Name
83
Figure 64 - Add/Del Users Screen
83
Figure 65 - Show Users Screen
83
Figure 66 - Set Descriptive Name Screen
83
Upgrading Firmware
84
Figure 67 - Firmware Upgrade Screen
84
Figure 68 - Remote Reset
84
Contacting Quatech
85
Figure 69 - Contact Us Screen
85
Troubleshooting and Maintaining an SDS
86
Troubleshooting an SDS
86
Maintaining an SDS
89
Operating Conditions
89
Handling the SDS
89
Moving the SDS
89
Cleaning the SDS
89
Servicing the SDS
89
Appendix
90
Specifications
90
Appendix
95
Declaration of Conformity
95
Appendix
97
Warranty Information
97
Quatech SSEW-100D Quick Start Manual (4 pages)
High Performance Serial Device Servers
Brand:
Quatech
| Category:
Server
| Size: 0.24 MB
Table of Contents
Quick Start Guide
1
Getting Started
3
Unpacking Your Sds
3
Identifying Parts
4
Making Connections
4
Advertisement
Quatech SSEW-100D Specifications (2 pages)
Wireless Device Servers
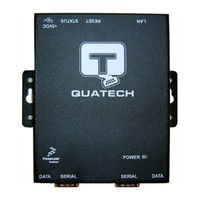
Brand:
Quatech
| Category:
Server
| Size: 0.62 MB
Advertisement
Related Products
Quatech SSEW-100D-5V
Quatech SSEW-400D
Quatech SSE-100D
Quatech SSE-400D
Quatech Serial Device Server
Quatech SSE-100M
Quatech SSE-400M
Quatech SSCLP-100
Quatech SSPR-100
Quatech SSPXP-300
Quatech Categories
Adapter
Computer Hardware
Server
Media Converter
Network Router
More Quatech Manuals
Login
Sign In
OR
Sign in with Facebook
Sign in with Google
Upload manual
Upload from disk
Upload from URL