Sign In
Upload
Manuals
Brands
Siemens Manuals
DC Drives
6SL38503UM114PA0Z
Siemens 6SL38503UM114PA0Z Manuals
Manuals and User Guides for Siemens 6SL38503UM114PA0Z. We have
1
Siemens 6SL38503UM114PA0Z manual available for free PDF download: Operating Instructions & Installation Instructions
Siemens 6SL38503UM114PA0Z Operating Instructions & Installation Instructions (150 pages)
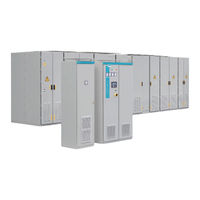
Medium-Voltage Drive
Brand:
Siemens
| Category:
DC Drives
| Size: 2.78 MB
Table of Contents
Table of Contents
5
1 Introduction
13
About These Operating Instructions
13
Text Format Features
13
2 Safety Information
15
Warning Symbol on the Device
15
Qualified Personnel
15
The 5 Safety Rules
15
Safe Handling
16
Electromagnetic Fields in Electrical Power Engineering Installations
18
Components that Can be Destroyed by Electrostatic Discharge (ESD)
19
Information for Nominated Persons in Control of an Electrical Installation
20
Proper Usage
20
Grounding Concept
22
Installation Site Safety
22
Instructions for Inverters with no Grounding Switch
23
Measures for Operator Protection in Electromagnetic Fields
23
Residual Risks
23
Security Information
25
3 Description
27
Area of Application
27
Safety Concept
27
Safety Components and Functions
28
Safety Information for IEC 61800-5
28
External Safety Components
28
Protection and Monitoring Functions of Internal Components
29
Protection and Monitoring Functions for External Components
29
Power Unit
29
Product Features
29
Power Unit Components
30
Design of the Thyristor Stack
30
Figure 3-1 Components of a Starting Converter for a 6/6-Pulse Drive System
30
Figure 3-2 Schematic Diagram: Clamped Thyristor Assembly
31
Design of the Thyristor Modules
32
DC-Link Reactor
32
AVT Combination Module
32
Figure 3-3 AVT Combination Module
32
Power Stack Adapter
33
Current Transformer
33
Figure 3-4 Example: Power Stack Adapter
33
Fans
34
Differential-Pressure Switch
34
Surge Arresters
34
Door Limit Switches
34
Principle of Operation
34
Fuseless Technology
34
Figure 3-5 Short-Circuiting Sequence
35
Thyristor Electronics
36
Voltage Actual Value Sensing
37
Figure 3-6 Example: Components of the Motor Voltage Sensing
37
Ground Fault Detection
38
Figure 3-7 Overview of the Voltage Sensing Circuit
38
Closed-Loop Control
39
Fan in the Door
39
Mushroom Pushbutton
39
Figure 3-8 Operator Protection, Ground Fault Detection
39
Description of the Components
40
SINAMICS Control Unit
40
DRIVE-Cliq Interface
40
Voltage Sensing Module
40
Table 3-1 DRIVE-Cliq Interface
40
DC/DC Converter
41
SITOP Select
41
Power Supply Unit
41
Sirius Safety Relay
41
Options
41
Internal Synchronizing Voltage Detection (Option A11)
41
Damping Switch for 1.4 Kv (Option C50)
42
Duty Cycle (Option C61)
42
Black Start (Option E05)
43
Brake after Phase Shifter Operation (Option E08)
43
Plug Connection between the Starting Converter and Excitation Equipment (Option G57)
43
Table 3-2 Connector Assignment for Voltages Less than 60 V
43
Temperature Evaluation of the MV Transformer (Option K63)
44
Control Unit CU320-2 PN (Option K95)
44
Inductive Cable Attenuation (Option L05)
44
Table 3-3 Connector Assignment for Battery and Voltages Greater than 60 V (1AC)
44
Table 3-4 Connector Assignment for Voltages Greater than 60 V (3 AC)
44
Cabinet Anti-Condensation Heating for the Power Unit (Option L55)
45
Temperature-Controlled and Air-Humidity-Controlled Anti-Condensation Heating (Option L58)
45
Dust Protection (Option M11)
45
Lock Barrel (Option M40)
45
Degree of Protection IP41 (Option M41)
45
Separate Installation (M49)
45
Low-Noise Fan (Option M65)
46
Customer-Specific Door Stop for Control Cabinets (Option M76)
46
Line-Side Surge Arresters (Option N54)
46
Machine-Side Surge Arresters (Option N56)
46
Line-Side Fuses (Option N58)
46
Cabinet Lighting in the Power Unit (Option N86)
46
Customized Locking System (Option Y41)
47
Customized Duty Cycle (Option Y45)
47
4 Preparations for Use
49
Notes for System Integrators
49
Requirements for Transformers
49
Selection and Configuration of Multi-Winding Transformers
50
Figure 4-1 Two-Tier Design
50
Requirements for the Circuit Breaker Provided by the Customer
51
Figure 4-2 Example: Circuit-Breaker Control
53
Requirements for Cables
54
Figure 4-3 Laying Cables
54
Requirements When Mounting and Installing the Device
55
Requirements for Installation Location
55
Requirements Placed on the Levelness of the Floor
56
Inspections When Receiving the Delivery
56
Checking Shock and Tilt Indicators
56
Checking the Load Handling Attachments
57
Figure 4-4 Example of Attaching and Displaying the Shock and Tilt Indicators
57
Transportation
58
Transport Markings
58
Transport Requirements
58
Observe Center of Gravity
59
Transport with a Fork-Lift Truck
59
Figure 4-5 Example Illustration of Centers of Gravity
59
Transport with a Crane
60
Using Lifting Rods
60
Figure 4-6 Lifting Bar Label
61
Figure 4-7 Securing the Lifting Rods
61
Transporting Transportation Units Packed in Boxes
62
Unpacking
63
Removing the Packaging
63
Figure 4-8 Transporting a Transportation Unit (Still in Packaging) with a Crane
63
Removing Load Securing Devices
64
Lifting the Cabinet off the Transport Pallet
64
Opening Doors in Preparation for Use
65
Checking the Shock and Tilt Indicators Inside the Cabinet
65
Figure 4-9 Example: Cover Screw for Manual Door Interlocking
65
Storage
66
Storing a Device
66
Storing Fans
67
5 Mounting
69
Safety Instructions for Installation
69
Tools Required
70
Torques
70
Table 5-1 Tightening Torque for Screws
70
Screwing the Transport Units Together
71
Table 5-2 Tightening Torques for Screw Terminals for Copper Cables Without Cable Lug 1)
71
Connect to the Foundation
72
Mounting Fans
72
Figure 5-1 Screwing the Transport Units Together
72
Ensuring Cooling Air
73
6 Electrical Connection
75
Safety Instructions for Electrical Connection
75
Note on Shielded Cables
77
Electromagnetic Compatibility
77
Figure 6-1 Shield Connection Using a Clip
79
Figure 6-2 Bridging Shield Gaps
79
Potential Concept
80
Connecting Equipotential-Bonding Conductors
80
Figure 6-3 Potential Concept
80
Figure 6-4 Equipotential Bonding Conductor
80
Using the Equipotential Bonding Strip and Shield Bus
81
Connecting the Protective Grounding
81
Figure 6-5 Equipotential Bonding Strip
81
Laying the Signal Lines
82
Laying the Cable Shields
82
Separating Adjacent Cabinets Using Unsuppressed Contactors
82
Laying Additional Wiring
83
Connecting the Power Unit
83
Connecting Power Cables
83
Figure 6-6 Shield Support
83
Figure 6-7 Example: Equipotential Bonding Conductor
83
Connecting the Signal Cables
85
Connecting the Closed-Loop Control
86
Connecting Ground
86
Connecting the Auxiliary Voltage
86
Connecting Circuit Breakers
86
Connecting the External Safety Loop
87
Interconnecting Optional Connections
87
Fastening the Cable Ducts with Cable Ties
88
Figure 6-8 Schematic Diagram: Fastening the Cable Ties
88
7 Commissioning
89
8 Operation
91
Safety Instructions for Operation
91
Parameters
92
Figure 8-1 Parameter Types
92
Setpoint Channel and Closed-Loop Control
93
Setpoint Addition
93
Direction of Rotation Changeover
93
Suppression Bandwidths
94
Speed Limitation
94
Ramp-Function Generator
94
Vector Control
95
Monitoring and Protection Functions
96
Safety Shutdown of the Converter
96
Speed Monitoring with Incremental Encoder
96
Uncontrolled Stop, EMERGENCY STOP Category 0
96
Fault and System Messages
97
External Warnings and Faults
98
Diagnostics
98
Diagnostics Via Leds
98
Diagnostics Via Parameters
99
Indicating and Rectifying Faults
102
9 Maintenance
103
Safety Instructions for Maintenance
103
Grounding the System
105
Opening the Device
106
Preventive Maintenance
107
Visual Inspections
107
Equipment for Visual Inspections
107
Checking the Isolating Clearances
108
Checking Hoisting Solenoids and Security Bolts
108
Checking the Plug Connections
108
Checking the Cable and Screw Terminals
109
Checking the Thyristor Electronics
109
Checking the Filter Mats
109
Maintenance
110
Replacing a Fan
110
Replacing Filter Mats
113
Replacing the Back-Up Battery of the AOP30 Operator Panel
114
Cleaning
115
Cleaning Aluminum Parts
116
Repairs
116
Replacing the AVT Combination Module
118
Replacing the Snubber Circuit Capacitor
119
Replacing the Compactflash Card
119
Replacing the Differential Pressure Monitor
120
Replacing Line-Side Fuses
121
Replacing Contactors
121
Replacing the Current Transformer
122
Replacing the Thyristor Electronics and Thyristors
123
Check Components of the Thyristor Assembly
123
Replacing Thyristor Electronics
124
Replacing a Thyristor
125
Disconnecting the Fiber-Optic Cables
128
Replacing Surge Arresters
129
Replacing the DC-Link Reactor
130
10 Spare Parts
131
11 Disposal
133
Disposing of Packaging Material
133
Removing Device Components and Old Devices
133
Service & Support
135
Siemens Industry Online Support
135
SIOS App
136
Technical Specifications and Drawings
137
Standards and Regulations
137
Environmental Conditions
138
Index
141
Advertisement
Advertisement
Related Products
Siemens 6SL3825
Siemens 6SL3860
Siemens 6SL38502UM114PA0Z
Siemens 6SL38253AE412AA1-Z
Siemens 6SL3845-2NN41-8AD2
Siemens 6SL3845-7NN46-7AA2
Siemens 6SE7034-2HE85-1AA0
Siemens 6SE7036-1EE85-1AA0
Siemens 6SE7037-7HH85-1AA0
Siemens 6SE7041-8FK85-1AA0
Siemens Categories
Industrial Equipment
Controller
Control Unit
Oven
Washer
More Siemens Manuals
Login
Sign In
OR
Sign in with Facebook
Sign in with Google
Upload manual
Upload from disk
Upload from URL