Sign In
Upload
Manuals
Brands
Siemens Manuals
Gateway
SIMATIC TI505
Siemens SIMATIC TI505 Manuals
Manuals and User Guides for Siemens SIMATIC TI505. We have
6
Siemens SIMATIC TI505 manuals available for free PDF download: User Manual, Installation And Operation Manual
Siemens SIMATIC TI505 User Manual (127 pages)
High Speed Counter Encoder Module
Brand:
Siemens
| Category:
Control Unit
| Size: 0.96 MB
Table of Contents
Table of Contents
5
Preface
15
About this Manual
15
Related Manuals
15
Agency Approvals
16
Technical Assistance
16
Conventions
16
Chapter 1 Product Overview
18
Physical Features of the Module
18
Physical Features
18
Figure 1-1 Physical Features of the High Speed Counter Encoder Module
18
LED Indicators
19
Figure 1-2 LED Indicators
19
Functional Features of the Module
20
Summary of Counters and Outputs
20
Features of the 24-Bit Counters
20
Features of the 16-Bit Counters
20
Additional Module Features
21
Quadrature Modes of Counting
23
Quadrature Mode Overview
23
Quadrature Counting Mode
23
Figure 1-4 1X Quadrature Mode
23
Quadrature Counting Mode
24
Figure 1-5 2X Quadrature Mode
24
Figure 1-6 4X Quadrature Mode
24
Non-Quadrature Modes of Counting
25
Up/Down Counting Overview
25
Direction Counting Overview
25
Figure 1-8 Direction Counting
25
Counting with the 24-Bit Counters
26
Binary Counting, Recycle Mode
26
Binary Counting, Non-Recycle Mode
26
Divide-By-N Counting, Recycle Mode
26
Divide-By-N Counting, Non-Recycle Mode
27
24-Bit Counters Quadrature Mode Outputs
28
Outputs in Quadrature Modes
28
Carry Toggle Output
28
Borrow Toggle Output
28
Compare Toggle Output
28
Compare Latch Output
28
Figure 1-9 24-Bit Quadrature Mode Outputs
29
24-Bit Counters Non-Quadrature Mode Outputs
30
Non-Quadrature Modes
30
Carry Toggle Output
30
Borrow Toggle Output
30
Rollover Output
30
Compare Output
30
Compare Toggle Output
30
Latch Output
30
Figure 1-10 24-Bit Counter Output up Counting
31
Figure 1-11 24-Bit Counter Output down Counting
31
Outputs in Non-Recycle Mode
32
Outputs in Divide-By-N Mode
32
Table 1-1 Binary Counting Outputs
32
Table 1-2 Divide-By-N Counting Outputs
32
Counting with 16-Bit Counters
33
16-Bit Counter General Description
33
Figure 1-12 Clock and Trigger for 16-Bit Counters
33
16-Bit Counter Modes
34
Retriggerable One-Shot
35
Figure 1-13 Retriggerable One-Shot
35
Divide-By-N
36
Figure 1-14 Divide-By-N
36
Triggered Strobe
37
Figure 1-15 Triggered Strobe
37
Square-Wave Generator Even Preset Value
38
Figure 1-16 Square-Wave Generator (Even Preset Value)
38
Square Wave Generator Odd Preset Value
39
Figure 1-17 Square-Wave Generator (Odd Preset Value)
39
Chapter 2 Installing the Module
41
Overview of Installation
41
Flow of Tasks
41
Handling the Module
41
Visual Inspection
41
Figure 2-1 Flowchart of Installation
41
Inserting the Module into the Base
42
Inserting the Module
42
Figure 2-2 Inserting the Module into the I/O Base
42
Wiring the Module
43
I/O Connections
43
Wiring 24 V User Power
43
Wiring 12 V Back-Up Power
43
Table 2-1 I/O Connections
43
Figure 2-3 Terminal Blocks and I/O Connections
44
Wiring the Terminal Block
45
Wiring Guidelines
45
Wiring the Inputs
46
Figure 2-4 Non-Inverted Input Drive
46
Figure 2-5 Inverted Input Drive
46
Figure 2-6 Differential Line Drive
47
Table 2-2 Features of Electronic Drives
47
Figure 2-7 Mechanical Switches
48
Wiring the Outputs
49
Figure 2-8 Output Wiring
49
Connecting the Terminal Block
50
Figure 2-9 Connecting the Terminal Block
50
Powering up the Base
51
Supplying Power to the I/O Base
51
LED Status after Power-Up
51
Configuring I/O Addresses in the Controller
52
Figure 2-11 Sample I/O Module Definition Chart
52
Chapter 3 Understanding Module Operation
54
Module I/O Map
54
I/O Word Definitions
54
Table 3-1 I/O Configuration Table
54
Understanding Module Operation
54
I/O Words Grouped by Counter
55
Figure 3-1 Word Inputs and Word Outputs Grouped by Counter
55
Data Formats
56
Current Count and Holding Register Count Value Formats
56
Table 3-2 24-Bit Count Value Format
56
24-Bit Preset and Configuration Formats
57
16-Bit Count and Preset Value Formats
57
Table 3-3 24-Bit Preset Value Format
57
Table 3-4 16-Bit Value Format
57
Reading Module Status
58
Module Status Words
58
Table 3-5 Module Status Words
58
Table 3-6 Bit Definitions for Status Words WX17 and WX18
58
WX18.01, RUN Mode
59
WX18.02, Presets Updated
59
WX18.03, Error Detected
59
WX18.04, Power Failure Detected
59
WX18.05, Interrupt Function Enabled
59
WX18.06, Interrupt Request Active
59
WX18.07, Outputs Disabled
59
WX18.08, Count Format for Counters 1 and
59
WX18.09 through WX18.16
59
Configuring Program Mode Setup Words
60
Setup Words: Program Mode
60
Table 3-7 Module Setup Words
60
Table 3-8 Bit Definitions for the Program Mode Setup Words
60
Program Mode Definitions
61
Program Mode Flag Bit: WY20.01
61
User Power Supply Fault Bit: WY20.02
61
Read Values at Power-Up Bit: WY20.03
61
Data Format Bit: WY20.04
61
Up/Down Counting Bit: WY20.07
61
Up/Down Counting Bit: WY20.08
61
Figure 1-7 Up/Down Counting
61
Configuring Run Mode Setup Words
62
Setup Words: Run Mode
62
Table 3-9 Bit Definitions for the Run Mode Setup Words
62
Reset Bits: WY19.03, 04 and WY19.07
63
Force Output Bits: WY19.09 through WY19.16
63
Program Mode Flag Bit: WY20.01
63
Update Preset Values Bit: WY20.02
63
Latch Holding Registers Bit: WY20.03
63
Disable Outputs Bit: WY20.04
63
Enable Interrupt Mode Bit: WY20.05
63
Clear Interrupt Bit: WY20.06
63
Clear Output Latches Bits: WY20.07 and WY20.08
63
Setting Preset Values and Programming Options for Channel 1
64
Channel 1, 24-Bit Counter 1, Preset
64
Table 3-10 Channel 1, 24-Bit Counter: Preset 1 Value
64
Table 3-11 Channel 1, 24-Bit Counter: WY21 Programming Bit Values
64
Channel 1, 24-Bit Counter 1, Preset
65
Table 3-12 Channel 1, 24-Bit Counter: Preset 2 Value
65
Table 3-13 Channel 1, 24-Bit Counter: WY23 Programming Bit Values
65
Channel 1, 16-Bit Counter Presets
66
Setting Preset Values and Programming Options for Channel 1
66
Table 3-14 Channel 1, 16-Bit Counter 2: Preset 3 Value
66
Table 3-15 Channel 1, 16-Bit Counter 3: Preset 4 Value
66
Channel 2, 24-Bit Counter 4, Preset
67
Setting Preset Values and Programming Options for Channel 2
66
Setting Preset Values and Programming Options for Channel 2
67
Table 3-16 Channel 2, 24-Bit Counter: Preset 5 Value
67
Table 3-17 Channel 2, 24-Bit Counter: WY27 Programming Bit Values
67
Channel 2, 24-Bit Counter 4, Preset
68
Table 3-18 Channel 2, 24-Bit Counter: Preset 6 Value
68
Table 3-19 Channel 2, 24-Bit Counter: WY29 Programming Bit Values
68
Channel 2, 16-Bit Counter Presets
69
Table 3-20 Channel 2, 16-Bit Counter 5: Preset 7 Value
69
Table 3-21 Channel 2, 16-Bit Counter 6: Preset 8 Value
69
Chapter 4 Using the Default Configurations
71
Default Hardware Modes
71
Factory Jumper Settings
71
Figure 4-1 Factory Default Jumper Settings
71
24-Bit Counter Inputs
72
24-Bit Counter Control Signals
72
Input Signal Filtering
72
Module Failure or PLC Output Disable Signal
72
24-Bit Counter Outputs 1 and 5
72
Output Polarity
72
Default Software Modes
73
Programming Optional Modes
73
24-Bit Counter Default Modes
73
16-Bit Counter Default Mode
73
Table 4-1 24-Bit Counter Programming Modes
73
Basic Programming Steps
74
Writing the Presets
74
Setting RUN Mode
74
Table 4-2 Word Outputs for Preset Values
74
Table 4-3 Setting Bit 1 to Program the Module
74
24-Bit Counter Input Jumper Selection
75
Input a Jumper
75
Figure 5-1 Jumper Locations
77
Figure 5-2 Configuration Map
78
Figure 5-3 Basic Configuration Jumpers
80
Table 5-1 Input Filtering Jumper Options
81
Counter 2 [5] or Counter 3 [6] Jumpers
83
Input B Jumper
83
Up Count Only Jumper
83
Chapter 5 Optional Configurations
75
Overview
75
Required Tasks for Setting up Optional Configurations
75
Configuration Jumpers
75
Configuration Map
75
Basic Configuration Options
75
Input Filtering Options
75
Output Disable Jumpers
75
Output Polarity Jumpers
75
Control and Output Jumper Selections
84
External Index or Internal Period Jumper
84
Figure 5-5 Control and Output Jumpers
84
Latch or Reset-And-Go Jumper
85
Inhibit Jumper
85
Compare Jumper
85
Rollover Jumper
85
Compare Toggle Jumper
85
Latch Jumper
85
24-Bit Counter Software Setup Options
86
24-Bit Counter Programming Options
86
Figure 5-6 Flow of Programming Options for 24-Bit Counter
86
Table 5-3 Channel 1, 24-Bit Counter: Preset 1 Value
87
Table 5-4 Channel 1, 24-Bit Counter: WY21 Programming Bit Values
87
Table 5-5 Channel 1, 24-Bit Counter: Preset 2
88
Table 5-6 Channel 1, 24-Bit Counter: WY23 Programming Bit Values
88
Table 5-7 Bit Definitions for the Run Mode Setup Words
89
Table 5-8 Bit Definitions for the Program Mode Setup Words
89
16-Bit Counter Options
90
Figure 5-7 16-Bit Counter Jumpers
90
Holding Position
91
Input a Jumper
91
Input B Jumper
91
C/D Input Jumper
91
16-Bit Counter Software Setup Options
92
Channel 1, 16-Bit Counter Presets
92
Table 5-9 16-Bit Counter Presets 3, 4, 7, and 8 (WY25, 26, 31, and 32)
92
Figure 5-8 16-Bit Counter Mode Setup
93
Table 5-10 Bit Definitions for the Program Mode Setup Words
93
Table 5-11 Bit Definitions for the Run Mode Setup Words
93
Basic Programming Steps
94
Writing the Presets to the Counters
94
Table 5-12 Word Outputs for Preset Values
94
Setting the Program Bit
95
Clearing the Program Bit
95
Table 5-13 Setting Bit 1 to Program the Module
95
Appendix A Applications
96
Using Counters 1 and 4
96
Using Gated Counting
97
Using Sampled Cumulative Counting
97
Using Period Measurement Counting
97
Using Time Sampled Rate Counting
98
Using Frequency Counting
98
Using Counters 2, 3, 5, and 6
99
Using Retriggerable One-Shot Mode
99
Using Divide-By-N Mode
100
Using Triggered Strobe Mode
100
Cascade Counting Applications
101
32-Bit Cascade Counting
101
Prescale Counting Applications
102
16-Bit Prescale 16-Bit Counting
102
16-Bit Prescale 24-Bit Counting
103
Appendix B Troubleshooting
104
LED Status and Error Code Descriptions
104
Table B-1 LED Indicator Status Chart
105
Table B-2 Error Codes in I/O Words
105
Troubleshooting
106
Table B-3 Troubleshooting Suggestions
106
Figure B-1 Typical Side-Accessible Terminal Block
107
Terminal Block Worksheets
107
Figure B-2 Terminal Block Worksheet
108
Figure B-3 Typical Front-Accessible Terminal Block
109
Figure B-4 Terminal Block Worksheet
110
Figure B-5 Jumper Configuration Worksheet
111
Jumpers Worksheet
111
Appendix C Specifications
112
Environmental Specifications
112
Input Specifications
112
Input Voltage and Current Specifications
114
Input Filter Characteristics
115
Minimum Pulse Width for Quadrature Mode
116
Output Specifications
118
Output Voltage and Current Specifications
118
Output Power Supply Specifications
118
Module Response Times
119
Backup Power Supply Specifications
119
Advertisement
Siemens SIMATIC TI505 User Manual (94 pages)
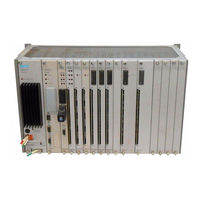
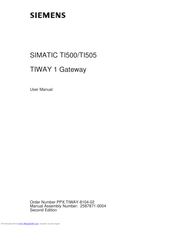
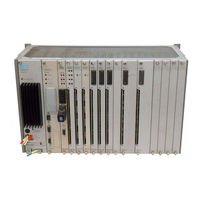
TIWAY 1
Brand:
Siemens
| Category:
Gateway
| Size: 0.43 MB
Table of Contents
Table of Contents
5
Preface
11
TIWAY I Gateway Models
11
Chapter 1 Product Overview
14
Introduction
14
The Gateway Interface
14
Distributed Control Systems
14
TIWAY I Gateway as Interface between PLC Network and Host System
14
Basic Operating Features
15
Interface Ports
15
TIWAY I Gateway
15
Translating Commands between Host and PLC Network
16
Data Transmission Rates Supported
16
Types of Data Accessed
16
Chapter 2 Network Installation
18
TIWAY I Network and Gateway Installation Checklist
18
Quick Reference Installation Steps
18
Basic Installation and Set-Up Steps
18
Basic Installation Procedures
19
Requirements for Installing the Gateway
19
Network Media Installation - Local Line
20
Overview
20
Local Line Cable Characteristics
20
Pin Assignments for Local Line Connector
20
TIWAY I Network Characteristics
21
Number of Local Line Secondaries Vs. Cable Distance
21
Local Line Hardware Components
22
TIWAY I Tap Housing
22
Tap Housing
23
Terminating the Main Line Cable
23
Twisted-Pair Cabling
23
Important Planning Considerations
23
Terminating the Local Line
23
Local Line Tap Spacing Rules
24
Basic Considerations
24
Primary Rule
24
Basic Tap Spacing Rules
24
Double Drops
25
Short Drops
25
Multidrop Taps
25
Additional Tap Spacing Rules
25
Cable Routing
26
Obstructions
27
Noise Avoidance
27
Network Media Installation - RS-232-C Modem Interface
28
Data Transmission Characteristics
28
RS-232 Pin Assignments
28
RS-232-C Connector Pin Assignments
28
Chapter 3 Gateway Installation and Configuration
30
Installing the TIWAY I Gateway
30
Basic Mounting Guidelines
30
Possible Bracket Locations for Mounting Gateway
30
Power Connections and Initialization
31
AC Power Connections
31
Dipswitch Settings for the Network and Host Ports
33
Dipswitch Configuration and Function
34
Overview
34
Host Port Dipswitch Configuration
34
Network Port Dipswitch Configuration
34
Dipswitch Settings for the Host Interface Port
35
Data Transmission Rates Supported
35
Dipswitch Settings for the Network Interface Port
36
Dipswitch Settings for Network Data Transmission Rates
36
Switches and Indicator Lights
38
Online/Offline Switch
38
Self-Test Button
38
Reset Button
38
Gateway Operation Switches
38
Status Indicator Lights
39
Gateway Good
39
Comm Active
39
Online
39
Receive
39
Transmit
39
Test Mode
39
Indicator Lights
39
Diagnostic Tests
40
Built-In Diagnostic Tests
40
Power-On Test
40
Operational Diagnostic Test
40
User-Initiated Test
41
RS-232-C/423 Loopback Connections
41
Burn-In and Final Tests
42
Indicator Status
42
Indicator Status after User-Initiated Test
42
Appendix A Data Type Identification
43
Corresponding Data Types
43
SIMATIC TI Plcs Supported by TIWAY I Gateway
43
TIWAY I Gateway Specifications
43
A.1 Corresponding Data Types
44
Data Type Identification
44
A.2 SIMATIC TI Plcs Supported by TIWAY I Gateway
45
SIMATIC TI Plcs Supported and Accessible Data
45
TIWAY I Gateway Features
46
TIWAY I Gateway Physical and Environmental Specifications
46
Appendix B System Configuration Forms
47
System Configuration
47
V-Memory Offset Tables
47
System Configuration Form
48
V-Memory Offset Table (Resident Information
49
V-Memory Offset Table (Received Information
49
Appendix C Modbus Commands
51
Modbus Protocol Overview
51
The RTU Transmission Frame
51
RTU Transmission Frame
51
Modbus Functions Supported
51
Message Delineation
52
The Address Field
52
The Function Field
52
The Data Field
52
Checksum
52
RTU Timing
52
C-2 RTU Timing
52
Invalid Characters and Messages
53
Modbus Functions
53
Bit Orientation
53
Addressing
54
Address Limits
54
Terminology Differences
54
C-3 Terminology Differences
54
Modbus Function Descriptions
55
Introduction
55
Code 01 - Read Coil Status
55
Read Coil Status Example - Request
55
C-3 Read Coil Status Example — Request
55
Read Coil Status Example - Response
56
Read Coil Status Example - Data Field
56
Code 02 - Read Input Status
57
Read Input Status Example - Request
57
Read Input Status Example - Response
57
Read Input Status Example - Data Field
58
Code 03 - Read Output Registers
59
Read Output Register Example - Request
59
Read Output Register Example - Response
59
Code 04 - Read Input Registers
60
Read Input Register Example - Request
60
Read Input Register Example - Response
60
Code 05 - Write a Single Coil
61
Write a Single Coil Example - Request
61
Read Input Register Example - Response
62
Code 06 - Write a Single Register
63
Write a Single Register Example - Request
63
Write a Single Register Example - Response
63
Code 07 - Read Exception Status
64
Read Exception Status Example - Request
64
Read Exception Status Example - Response
64
Exception Status Bits
65
Code 08 - Execute Diagnostics
66
Execute Diagnostics Example - Request
66
Execute Diagnostics Example - Response
66
Diagnostic Codes Supported
67
Code 11 - Get Comms Event Counter
69
Get Comms Event Counter Example - Request
69
Get Comms Event Counter Example - Response
69
Code 12 - Get Comms Event Log
70
Get Comms Event Log Example - Request
70
Get Comms Event Log Example - Response
70
Event Byte Types
71
Code 15 - Write Multiple Coils
72
C-26 Write Multiple Coils Example — Request
72
C-27 Coil Bit Pattern
72
C-28 Write Multiple Coils Example — Response
73
Code 16 - Write Multiple Registers
74
C-29 Write Multiple Registers Example — Request
74
C-30 Write Multiple Registers Example — Response
74
User-Defined Modbus Commands
75
Command 65 - Read C Memory
75
C-31 Command 65 — Request
75
C-32 Command 65 — Response
75
Command 66 - Read K Memory
76
Command 67 - Read WY Memory
76
C-33 Command 66 — Request
76
C-34 Command 66 — Response
76
C-35 Command 67 — Request
76
C-36 Command 67 — Response
76
Error Responses
77
C-37 Exception Response Frame
77
C.4 Error Responses
77
Exception Responses
77
Appendix D Configuring the PLC for Fisher PROVOX
79
Considerations for Configuring a TIWAY I/PROVOX System
79
PLC Configuration Requirements
79
Network Design Considerations
79
PLC Programming Considerations
80
Blocking Network Data
80
Writing to Integer Registers
80
Writing to Discrete Points
80
PLC Status Register
80
PLC Programming Example
81
Data to be Accessed
81
PLC Data to be Accessed
81
V-Memory Block
81
Relay Ladder Logic Program
82
Siemens SIMATIC TI505 User Manual (91 pages)
MODNIM
Brand:
Siemens
| Category:
Control Unit
| Size: 0.5 MB
Table of Contents
Table of Contents
5
Preface
11
Chapter 1 Installation and Set-Up
13
Modbus Communications Overview
13
Modbus Network Characteristics
13
Modbus Protocol
13
Transmission Modes
13
Figure 1-1 Multidrop and Point-To-Point Configurations
14
Table 1-1 Transmission Mode Characteristics
14
Quick Reference Installation Steps
15
General Requirements
15
Procedures
15
Figure 1-2 Quick Reference Installation Procedures
15
Handling the Module
16
Inspecting the Module
16
Getting Started with Configuration and Installation
16
Setting the Dipswitches
17
Dipswitch Functions
17
Setting the Network Address
17
Figure 1-3 Address Setting Examples
17
Selecting Network Configuration Parameters
18
Data Transmission Rate
18
Stopbit Selection
18
Parity/No Parity Selection
18
Odd/Even Parity Selection
18
ASCII/RTU Mode Selection
18
RTS/CTS Handshaking
18
Y/C Coil Selection
18
Figure 1-4 Dipswitch Settings for Network Data Transmission Rates
18
Figure 1-5 Series 505 MODNIM Switches and Leds
19
Figure 1-6 Series 500 MODNIM Switches and Leds
20
Installing the MODNIM
21
Installing the Series 505 MODNIM in the I/O Base
21
Figure 1-7 Installing the Series 505 MODNIM in the I/O Base
21
Figure 1-8 Series 505 MODNIM Example Dipswitch Settings
22
Installing the Series 500 MODNIM in the I/O Base
23
Figure 1-9 Keying the I/O Base Slot for the Series 500 MODNIM
23
Figure 1-10 Installing the Series 500 MODNIM in the I/O Base
24
Switches and Indicator Lights
25
Switches and Buttons
25
Reset Button
25
Test Button
25
Local/Remote Switch
25
Status Indicator Lights
26
Figure 1-11 Series 505 and 500 MODNIM Indicator Lights
26
Table 1-2 Status of Indicator Lights
26
Diagnostic Tests
27
Built-In Diagnostic Tests
27
Power-Up Self Test
27
Figure 1-12 LED Status During Power-Up Self Test
27
Run-Time Self Tests
28
Figure 1-13 LED Status During Normal Run-Time Operation
28
User-Initiated Self Test
29
Table 1-3 Indicator Status after User-Initiated Test
29
Establishing Communications
30
Verifying that the MODNIM Is Logged into the PLC
30
Figure 1-14 Sample I/O Definition Chart
30
Connecting the Network Cables
31
Recommended Communication Cables
31
Building a Cable
31
Table 1-4 Standard Communication Cables
31
Modbus Commands
32
Chapter 2 Modbus Commands
33
Modbus Protocol Overview - ASCII Transmission Mode
33
Modbus Protocol
33
The ASCII Transmission Frame
33
The Start Field
33
The Address Field
33
The Function Field
33
Figure 2-1 ASCII Transmission Frame
33
The Data Field
34
The LRC Field
34
The EOF Field
34
The Ready Field
34
Table 2-1 Modbus Functions Supported
34
Modbus Protocol Overview - RTU Transmission Mode
35
The RTU Transmission Frame
35
The RTU Frame Fields
35
Message Delineation
35
Figure 2-2 RTU Transmission Frame
35
Table 2-2 RTU Mode Timing
35
Checksum
36
Invalid Characters and Messages
36
Comparing Modbus Functions with TIWAY I Network Commands
37
Modbus Functions Vs. TIWAY Commands
37
Figure 2-3 Bit Orientation
37
Table 2-3 Terminology Differences
37
Addressing
38
Address Limits
38
Modbus Function Descriptions
39
Introduction
39
Code 01 - Read Coil Status
39
Figure 2-4 Read Coil Status Example - Request
39
Figure 2-5 Read Coil Status Example - Response
40
Figure 2-6 Read Coil Status Example - Data Field
40
Code 02 - Read Input Status
41
Figure 2-7 Read Input Status Example - Request
41
Figure 2-8 Read Input Status Example - Response
41
Figure 2-9 Read Input Status Example - Data Field
42
Code 03 - Read Output Registers
43
Figure 2-10 Read Output Register Example - Request
43
Figure 2-11 Read Output Register Example - Response
43
Code 04 - Read Input Registers
44
Figure 2-12 Read Input Register Example - Request
44
Figure 2-13 Read Input Register Example - Response
44
Code 05 - Write a Single Coil
45
Figure 2-14 Write a Single Coil Example - Request
45
Figure 2-15 Read Input Register Example - Response
46
Code 06 - Write a Single Register
47
Figure 2-16 Write a Single Register Example - Request
47
Figure 2-17 Write a Single Register Example - Response
47
Code 07 - Read Exception Status
48
Figure 2-18 Read Exception Status Example - Request
48
Figure 2-19 Read Exception Status Example - Response
48
Figure 2-20 Exception Status Bits
49
Code 08 - Execute Diagnostics
50
Figure 2-21 Execute Diagnostics Example - Request
50
Figure 2-22 Execute Diagnostics Example - Response
50
Table 2-4 Diagnostic Codes Supported
51
Table 2-5 Diagnostic Bits
53
Code 11 - Get Comms Event Counter
61
Figure 2-23 Get Comms Event Counter Example - Request
61
Figure 2-24 Get Comms Event Counter Example - Response
61
Code 12 - Get Comms Event Log
62
Figure 2-25 Get Comms Event Log Example - Request
62
Figure 2-26 Get Comms Event Log Example - Response
62
Table 2-6 Event Byte Types
63
Code 15 - Write Multiple Coils
64
Figure 2-27 Write Multiple Coils Example - Request
64
Figure 2-28 Coil Bit Pattern
65
Code 16 - Write Multiple Registers
66
Code 17 - Report Slave ID
67
Table 2-7 Function Code 17 Response Options
68
Error Responses
69
Table 2-8 Exception Responses
70
Appendix A Network Cable Communications
71
A.1 Network Cables
72
Appendix A
72
Building Cables
72
Cable Pinouts
72
Network Cables
72
Recommended Communication Cables
72
Figure A-2 MODNIM to Host (with Handshaking)
73
Communications Parameters
74
RS-232-C Pin Assignments
74
Recommended Communications Parameters
74
B.1 Exception Codes Supported by the MODNIM
75
Table B-1 Exception Codes
76
Specifications
77
Table C-1 Environmental Specifications
78
Table C-2 MODNIM Specifications
79
Table C-3 Modbus Codes Vs. TIWAY Primitives Chart
79
C.2 MODNIM Communications Specifications
79
Table A-1 RS-232-C Connector Pin Assignments
74
Table A-2 Communications Parameters
74
Appendix D Using the Modasst Program
80
Appendix D
81
D.1 Getting Started
81
Getting Started
81
Hardware Requirements
81
Overview
81
Running the Program from the Floppy Disk
81
Running the Program from the Hard Disk
82
Starting Program Operation
83
Setting the Communication Port Options
83
Setting the Remaining Options
83
Using Program Options
84
Setup Options
84
Run Diagnostics
84
Find Module Settings
85
Talk to Module
85
Batch Send from File
85
Verifying Communications
85
Advertisement
Siemens SIMATIC TI505 Installation And Operation Manual (66 pages)
S5 UNLINK Adapter
Brand:
Siemens
| Category:
Adapter
| Size: 0.43 MB
Table of Contents
Table of Contents
5
Chapter 1 Product Overview
14
S5 Unilink Adapter Components
14
TIWAY Network
14
S5 Unilink Adapter Interface
14
Description of the S5 Unilink Adapter
14
S5 Personality Interface Module (PIM)
15
Adding the S5 Unilink Adapter to the TIWAY Network
16
S5 Unilink Adapter
15
S5 Unilink Adapter in a TIWAY I Network
16
Primitive Command Set
17
S5 Memory Types
17
S5 Unilink Adapter Memory Types
17
S5 Unilink Adapter Primitives
17
Chapter 2 Installation and Set-Up
18
Overview
18
The S5 Unilink Adapter as a TIWAY Secondary
18
Setting up the S5 Unilink Adapter
18
Programming the CP 525
18
Cabling the Components
18
S5 Interface Overview
18
Basic Cable Connections
18
S5 Interface Pin Assignments
18
Setting the Dipswitches
18
Dipswitch Location
18
Main Steps for Setting up the S5 Unilink Adapter
19
S5 Unilink Adapter Interface
21
S5 Unilink Adapter Dipswitch Location
23
S5 Unilink Dipswitch 1 Settings
24
S5 Unilink Dipswitch 2 Settings
24
Installing the S5 Personality Interface Module
25
Installing the PIM
25
Power-Up
25
Installing the S5 PIM
25
Local Line Interface Ports
27
S5 Unilink Adapter Models
27
TIWAY I Bus Structure
28
Local Line Connector Pin Assignments
28
Chapter 3 TIWAY I Network Communication
29
Local Line Interface Ports
29
Local Line Data Transmission Parameters
29
Number of Local Line Secondaries Vs. Cable Distance
29
Modem Interface Ports
30
RS-232-C Modem Interface Ports
30
Modem Port Pin Assignments
30
RS-232/RS-423 Modem Interface Ports
30
RS-232/RS-423 D Connector Pin Assignments
30
Modem Specifications
31
Runaway Transmitter Recovery
31
Redundant Media Transmission
32
Alternate Channel Port
32
Redundant Media Circuit
32
TIWAY I HDLC Network Protocol
33
HDLC Information Frame
33
S5 Interface Port Communications
34
Overview
34
S5 Interface Communications
34
RK 512 Computer Link with 3964R Procedure
34
Transmitting with the 3964R Procedure
35
Link Establishment
35
Transmission
35
Acknowledgment
35
Receiving with the 3964R Procedure
36
Link Establishment
36
Receiving
36
Initialization Conflict
36
Longitudinal Parity (BCC Comparison)
37
For Additional Information
37
Appendix A SIMATIC S5 Memory Mapping
38
Memory Type Overview
38
Overview
39
Quick Reference Memory Chart
39
A-1 TI500/TI505 Vs. S5 Memory Types
39
TI500/TI505 Vs. S5 Memory Types
39
Floating-Point Conversion
40
Description
40
S5 Floating-Point Value
40
Data Block - CP 525 'D' Type
41
Description
41
Address Mapping
41
Value Conversion
41
Floating-Point Support
41
Reading and Writing
41
Extended Data Block - CP 525 'X' Type
42
Description
42
Address Mapping
42
Value Conversion
42
Floating-Point Support
42
Reading and Writing
42
Input Bytes - CP 525 'E' Type
43
Description
43
Address Mapping
43
Value Conversion
43
Reading and Writing
43
Output Bytes - CP 525 'A' Type
44
Description
44
Address Mapping
44
Value Conversion
44
Reading and Writing
44
Flag Bytes - CP 525 'M' Type
45
Description
45
Address Mapping
45
Value Conversion
45
Reading and Writing
45
Timer - CP 525 'T' Type
46
Description
46
Address Mapping
46
Value Conversion
46
Reading and Writing
46
A.8 Timer — CP 525 'T' Type
46
Counter - CP 525 'Z' Type
47
Description
47
Address Mapping
47
Value Conversion
47
Reading and Writing
47
A.9 Counter — CP 525 'Z' Type
47
S5 Data Types Not Supported by S5 PIM
48
Analog I/O Bytes: CP 525 'P' Type
48
Absolute Address: CP 525 'S' Type
48
System Address: CP 525 'B' Type
48
Appendix B TIWAY I Primitives Supported by S5 PIM
50
Exception
50
Overview
50
Native
51
Configuration
52
Status
52
Primitive Format Configuration
53
Read Block
53
Read Random Block
54
Write Block
54
Define Block
55
Write Random Block
55
Gather Block
56
Write and Gather Block
57
Appendix C S5 Adapter/Cp 525 Error Codes
59
Primitive Exception Error Byte
59
S5 Unilink Adapter Primitive Exceptions
59
Primitive Exceptions
59
CP 525 Error Code
60
CP 525 Error Codes
60
Description of CP 525 Error Codes
60
Example CP 525 Error Code
60
Siemens SIMATIC TI505 User Manual (28 pages)
Smart Slice Discrete I/O Module
Brand:
Siemens
| Category:
I/O Systems
| Size: 0.21 MB
Table of Contents
Table of Contents
5
Preface
8
Chapter 1 Product Overview
9
Features
10
SIMATIC TI505 Smart Slice I/O Module
10
Chapter 2 Installing the
12
Overview of Installation
12
Flow of Tasks
12
Visual Inspection
12
Setting the Address Switch
12
Flowchart of Installation
12
Field Wiring Guidelines
13
Avoiding Noise
13
Terminal Block
14
Power
14
Outputs
14
Inputs
14
Output Wiring
14
Communication
15
Input Wiring
15
Terminal Block
15
Mounting the Module
16
Mounting Tabs
16
Clearance for Cooling
16
Mounting Tabs and Dimensions
16
Communications Cable Configuration
17
Installing Terminating Resistors
17
Connecting the Trunk
17
Chapter 3 Programming
19
Programming the Controller
19
Logging the Module into the Controller
20
Selecting the I/O Definition Chart
20
Viewing the I/O Configuration Chart
20
Sample I/O Definition Chart
20
I/O Configuration Chart
20
I/O Status Indicators
21
Chapter 4 Troubleshooting
22
Status Indicators
22
Module Status Indicators
22
I/O Status Indicators
22
Replacing the Fuse
23
Appendix A Specifications
24
Derating for both Models
25
Siemens
SIMATIC TI505
User Manual
Siemens SIMATIC TI505 User Manual (24 pages)
Redundant I/O System
Brand:
Siemens
| Category:
I/O Systems
| Size: 0.26 MB
Table of Contents
Table of Contents
6
Redundant I/O System
7
Overview
7
Communication between Units
8
Planning Redundant I/O Installation
8
Determining Signal Losses
9
Using Status Words to Indicate Presence of Redundant I/O
11
Sending a Role-Swap Command
12
Hardware Components
13
Software Requirements
13
Remote Base Controller
14
LED Display
15
Setting the RBC Number
15
Power Supply
16
Series 500 I/O Base and Adapter Chassis
16
Series 505 Dual Media I/O Base
18
Installing Power Supplies and Rbcs
19
User Supplied Materials
19
Installation and Removal Procedures
19
Advertisement
Related Products
Siemens SIMATIC TI500
Siemens Tiastar LV MCC
Siemens SIMATIC IOT2020
Siemens SIMATIC IOT2040
Siemens SIMATIC NET S7-CPs
Siemens SIMATIC PN/M-Bus LINK
Siemens SIMATIC PN/J1939 LINK
Siemens SIMATIC RTLS Series
Siemens SIMATIC RTLS4330G
Siemens SIMATIC RTLS4330A
Siemens Categories
Industrial Equipment
Controller
Control Unit
Oven
Washer
More Siemens Manuals
Login
Sign In
OR
Sign in with Facebook
Sign in with Google
Upload manual
Upload from disk
Upload from URL