Sign In
Upload
Manuals
Brands
Sony Manuals
Camcorder
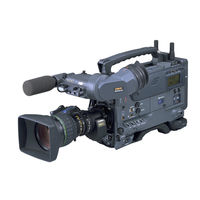
HDCAM HDW-750
Sony HDCAM HDW-750 Manuals
Manuals and User Guides for Sony HDCAM HDW-750. We have
8
Sony HDCAM HDW-750 manuals available for free PDF download: Maintenance Manual, Operation Manual, Supplemental Operation Manual, Brochure & Specs
Sony HDCAM HDW-750 Maintenance Manual (544 pages)
HD CAMCORDER
Brand:
Sony
| Category:
Camcorder
| Size: 7.69 MB
Table of Contents
Table of Contents
5
Manual Structure
15
Purpose of this Manual
15
Related Manuals
15
Contents
16
1 Service Overview
17
Circuit Configuration and Locations of the Printed
17
Locations of Main Parts and Circuit Configuration
17
Locations of Main Mechanical Parts
20
Functions and Locations of Sensors
22
Matching Connectors
24
Signal Inputs and Outputs
24
Removing and Reinstalling the Outside Panel Assembly
27
Opening and Closing the Inside Panel Assembly
28
Removing and Reinstalling the Connector Box
29
Removing and Reinstalling the Plug-In Boards
30
DCP Board Assembly
30
DVP Board Assembly
31
Removing and Reinstalling the Flexible Card Wires
33
Removing and Reinstalling the Cassette Compartment
34
On-Board Switch/Slit Land Description
37
Board
37
EQ-88 Board
38
FP-121 Board
39
Board
40
Board
41
Board
42
How to Eject a Cassette Tape Manually
43
How to Insert a Cassette Tape While the Outside Panel Assembly Is Being Removed
44
How to Clean the Heads When the Heads Are Clogged
44
List of Tools and Measuring Equipment
45
Tools
45
Measuring Equipment
48
Alignment Tapes
49
How to Extend the Circuit Board
50
Extending the AT-143 Board
50
Extending the HKDW-702 (DC-110/110A Board)
51
Extending the DCP Board Assembly
52
Extending the DCP Board Assembly (When You Want to Check the B Side or a Part of a Side of the DVP Board Assembly)
53
Extending the DVP Board Assembly
54
Extending the DVP Board Assembly (When You Want to Check the B Side or a Part of a Side of the SS-92 Board)
55
Extending the EQ-88 Board
56
Extending the HKDW-703 (MY-99 Board)
57
Extending the SS-92 Board
58
Extending the RP-123 Board (RP-127 Board) (When You Want to Check the B Side or a Part of a Side of the PA-253 Board)
59
Extending the CCD Unit
60
Extending the Mechanical Deck Assembly
62
Description on Cassette Mechanism
64
Adjustments/Setting Items When Boards Are Replaced
66
Board, DR-477 Board
66
Cn-2037 Board, Cn-2200 Board
66
Board, TG-219A Board
66
Board, PA-282/282A Board
66
Board
67
Board, DCP-28B Board
67
CCD Unit
67
FP-121 Board
68
DC-110 Board (Hkdw)
68
Board (HKDW-702)
68
Board
69
GPS Unit (HKDW-704)
69
Board (HKDW-705)
69
Pm-22 Board (Hkdw)
69
Contents of the EEPROM and NV-RAM Data
70
Description on the CCD Block Number
71
Filter Knob Position Adjustment
72
Memory Backup Battery
73
Fuse and IC Link Replacement
73
Circuit Protection Element
74
Upgrading the ROM Version
75
Confirming the ROM Version
75
(AT-143 Board)
77
(SS-92 Board)
78
How to Replace the Photo Sensors on the MDC-13 Board
79
Circuit Description
80
CCD Block (TG-219 Board, DR-433 Board, BI-147 Board, and PA-253 Board)
80
Camera System (DCP-28 Board)
81
Video Signal System (DVP-18 Board)
82
Audio System (FP-121 Board, IFA-11 Board, APR-59 Board, AL-43 Board, and AXM-24 Board)
84
System Control (FP-121 Board and SS-92 Board)
88
Servo Control System
91
Board, and SE-613 Board)
91
RF System (EQ-88 Board)
92
Power Supply Systems
93
Board, and RE-187 Board)
93
Option Board (DC-110/110A Board, MY-99 Board, PM-22 Board)
94
2 Periodic Maintenance and Inspection
97
Cleaning
97
General Information for Cleaning
97
Cleaning the Upper Drum Tape Running Surface and Video Heads
99
Cleaning the Lower Drum Tape Running Surface and Rabbet Guide
100
Cleaning the Stationary Heads
101
Cleaning the Tape Running Path and Cleaning Blade
102
Cleaning the S/T Plate Assemblies and S/T Slider Assemblies
103
Cares after Using under Special Environment
104
Periodic Inspection
105
Hours Meter
105
Periodic Inspection List
106
Applying Oil to Reel Drive Gear Assembly
107
Applying Grease to S Tension Regulator Assembly
108
Notes on Repair Parts
110
Recommended Periodic Replacement Parts
111
Recommended Replacement Parts
113
3 Error Diagnostics
115
When Does the Error Code Appear
115
Description of Error Codes
116
Details of Error Codes
118
Device Check
121
4 Setup Menu
123
Setup Menus
123
Basic Operations of Setup Menus
123
How to Display the SERVICE Menu
124
TOP Menu
125
USER Menu
126
OPERATION Menu
127
PAINT Menu
145
MAINTENANCE Menu
157
FILE Menu
170
Memory Stick
174
DIAGNOSIS Menu
180
SERVICE Menu
184
Setup Menu List
194
5 File System
211
Structure of File System
211
Data Structure
212
Operating the USER File
213
Operating the ALL File
216
Operating the SCENE File
220
Operating the REFERENCE File
223
Operating the LENS File
226
Special Saving Items
228
White Gain
228
CC/ND Filter
229
Master Gain
229
Shutter
229
6 Parts Replacement
231
CCD Unit and Its Components Parts Replacement Procedure
231
CCD Unit Replacement
231
Filter Disk Unit Replacement
235
Replacement of the Circuit Boards Inside the CCD Unit
236
Shutter, AUTO W/B BAL Switch and AUDIO Volume
238
Controls Replacement
238
MIC in Connector Replacement
240
Rotary Encoder Replacement
241
Connector Box Board Replacement
243
Removing the Connector Box Assembly
243
Removing the CNB-15 Board and AL-43 Board
243
Removing the IO-202 Board
243
Removing the AXM-24 Board
244
DC-DC Converter Replacement
246
Fan Replacement
248
SW Camera Ornamental Plate (3) Replacement
250
Fitting Bracket Assembly Replacement
251
MS Lid Assembly Replacement
252
VF Connector Replacement
255
POWER Switch Replacement
256
Board Replacement
257
CCM-45 Board Replacement
259
Ps-595 Board Replacement
260
Rm-188 Board Replacement
261
Ss-92 Board Replacement
265
Lp-114 Board Replacement
266
Sw-1030 Board Replacement
267
Mb-898 Board Replacement
268
Mdr-14 Board Replacement
269
Se-613 Board Replacement
270
7 Part Replacement of Mechanical Deck Assembly
271
General Information on Mechanical Part Replacement
271
Threading-End State and Unthreading-End State
273
About Oil and Grease
276
Screw Tightening Torque and Washer
277
Upper Drum Assembly Replacement
278
Drum Assembly Replacement
294
Replacement of Brush Assembly for Slip Ring
301
Slip Ring Assembly Replacement
304
Replacement of Ahc Roller Assembly for Video Head
308
Pinch Roller Assembly Replacement
311
S-Tension Regulator Band Assembly Replacement
314
FWD Back Tension Adjustment
316
T-Tension Regulator Band Assembly Replacement
317
REV Back Tension Adjustment
319
Timing Belt Replacement
320
Timing Belt Tension Adjustment
321
Ctl Head Replacement
324
Fe Head Replacement
327
Holder Assembly Sensor (Rec) Replacement
330
End Sensor Assembly Replacement
332
Full Top Sensor Assembly Replacement
333
S1, T1, T3 Tape Guide Replacement
334
T Soft Brake Replacement
338
Manual Eject Assembly Replacement
340
S-Tension Regulator Assembly Replacement
342
T-Tension Regulator Assembly Replacement
345
Cassette Stopper Replacement
348
Gear Block Assembly Replacement
350
S Reel Table Replacement and T Reel Table Replacement
353
T Tension Regulator Operating Position Adjustment
356
Reel Drive Gear Assembly Replacement
357
Holder Assembly Sensor (ID) Replacement
360
Top Sensor Assembly Replacement
362
Pinch Arm Assembly Replacement
364
Threading Arm Assembly Replacement
367
S3 Guide Height Adjustment
370
Cue/Tc Head Assembly Replacement
371
S Slider Assembly Replacement
376
Gear Chain Phase Adjustment
379
T Slider Assembly Replacement
381
Cam Gear Assembly Replacement
386
Mechanical Deck Assembly Removal/Installation
392
MDC-13 Board Replacement
396
Tape Run System Adjustment
423
Tape Run Adjustment
425
Video Tracking Adjustment
431
CTL Head Height Adjustment
436
CTL Head Position Adjustment
437
CUE/TC Head Height Adjustment
440
CUE/TC Head Azimuth Adjustment
442
CUE/TC Head Tape-To-Head Contact Adjustment
445
CUE/TC Head Position Adjustment
446
CUE/TC Output Level Check
450
9 Electrical Alignment of Camera System
451
General Information on Electrical Alignment
451
Notes on Electrical Alignment
451
Required Equipment, Fixtures and Tools
451
Gray-Scale Chart and Its Maintenance
452
VCO Frequency Adjustment
454
TEST out Level Adjustment
454
VF DC Level Adjustment
455
VA Gain Adjustment
456
Black Offset Adjustment
457
VSUB Adjustment
459
PA Gain Adjustment
460
Pre Knee Adjustment
461
DCC Pre Knee Adjustment
462
Black Shading Adjustment
463
White Shading Adjustment
464
Flare Adjustment
466
Gamma Correction Adjustment
467
Knee and White Clip Adjustment
468
DCC Knee Adjustment
469
Crispening Adjustment
470
Level Depend Adjustment
470
Detail Signal Level Adjustment
472
H/V Ratio Adjustment
472
Knee Aperture Adjustment
473
H. Detail Black Clip Adjustment
473
V. Detail Black Clip Adjustment
474
Skin Tone Adjustment
475
Zebra Adjustment
476
Auto Iris Adjustment
477
Sd y Level Adjustment
478
Sc Vco Adjustment
478
Sd Vf Clamp Level Adjustment
479
Sd Vf Y/R-Y/B-Y Level Adjustment
479
Rpn Concealment
481
Manual Rpn Concealment
481
Rpn Concealment Flowchart
482
Advertisement
Sony HDCAM HDW-750 Operation Manual (420 pages)
Brand:
Sony
| Category:
Camcorder
| Size: 4.29 MB
Table of Contents
Table of Contents
9
Chapter 1 Overview
15
Features
15
Vtr Features
18
Precautions
21
Phenomena Specific to CCD Image Sensors
22
Chapter 5 Setting up the Camcorder
27
Power Supply
27
Chapter 2 Locations and Functions of Parts and
29
Accessory Attachments
29
Audio Functions
31
Playback Functions
40
Menu Operating Section
55
Time Code System
59
Warnings and Indications
65
Warnings and Indications on the Display Panel
67
Time Code Displays
70
Indicators on the Viewfinder
72
Chapter 3 Recording and Playback
75
About Cassettes
75
Loading and Unloading a Cassette
75
Preventing Accidental Erasure
79
Basic Procedures
80
Continuous Recording
86
Recording Good Shot Markers
89
Items
92
Recording a Recording Start Marker
94
Continuous Recording on the Previous Cut
126
Searching for the Last Recorded Portion and Turning in the Recording Pause Mode (End Search Function)
127
Checking the Recording
129
Checking the Recording on the Color Video Monitor Playback in Color
130
Freezing a Picture During Playback
137
Black Balance Adjustment
143
White Balance Adjustment
143
Chapter 4 Adjustments and Settings for
144
Adjusting the Black Balance
144
Adjusting the White Balance
148
Shutter Modes
154
Selecting the Shutter Mode and Speed
156
Changing the Reference Value for Automatic Iris Adjustment
163
Adjusting the Audio Level
170
Setting the Time Data
178
Setting the Time Code
178
Saving the Real Time in the Time Code
180
Setting the User Bits
181
Synchronizing the Time Code
183
Viewfinder Screen
188
Menu Configuration
188
Basic Use of the Menu
191
Editing the User Menu
197
Status Display on the Viewfinder Screen
206
Layout of the Status Display on the Viewfinder Screen
207
Selecting the Display Items
212
Adjustment Progress Messages
215
Setting the Marker Display
217
Aspect
218
Center
218
Marker
218
Setting the Viewfinder
220
Color Bars
223
Setting the Shot ID
226
Displaying the Status Confirmation Windows
232
Confirming the Image of the Return Video Signal on the Viewfinder
236
Setting the Gain Selector Values
240
Selecting the Output Signals
243
Setting the Color Temperature Manually
246
Specifying an Offset for the Auto White Balance Setting
248
Assigning Functions to ASSIGN 1/2 Switches
251
Setting the Date/Time of the Internal Clock
256
Selecting the Lens File
258
Handling the Memory Stick
260
Inserting the Memory Stick
260
Removing the Memory Stick
262
Memory Stick
264
Loading Saved Data from a Memory Stick
268
Settings
275
Using the Scene Files
277
Storing Data in the Scene File
277
Loading Scene Files
287
Reference File
292
Inserting a Memory Stick
293
Using a Battery Pack
295
Avoiding Breaks in Operation Due to Dead Batteries
298
Using an Ac Adaptor
299
Using the Anton Bauer Ultralight System
300
Adjusting the Viewfinder
301
Adjusting the Viewfinder Position
301
Adjusting the Viewfinder Focus and Screen
303
Detaching the Viewfinder
304
Detaching the Eyepiece
306
Mounting the Lens
308
Focal Length
309
Audio Input System
311
Using the Supplied Microphone
311
Microphone Holder
311
Using an External Microphone
313
Attaching a UHF Portable Tuner (for a UHF Wireless Microphone System)
318
Connecting Line Input Audio Equipment
322
Tripod Mounting
323
Attaching the Shoulder Strap
325
Adjusting the Shoulder Pad Position
327
Putting on the Rain Cover
328
Control Unit
330
Chapter 6 Maintenance
335
Testing the Camcorder
335
Before Shooting
335
Preparations for Testing
335
Testing the Camera
336
Testing the Vtr
339
Cleaning the Video Heads
345
Cleaning the Viewfinder
345
Cleaning the Tape Transport System
347
Note about the Battery Terminal
348
Periodic Inspection
349
Hours Meter
349
List of Parts for the Periodic Inspection
351
Operation Warnings
352
Appendix Specifications
357
Video Camera Section
358
Vtr Section
359
Supplied Accessories
362
Recommended Additional Equipment
362
Extension Boards
364
Sony HDCAM HDW-750 Operation Manual (405 pages)
Sony Camcorder User Manual
Brand:
Sony
| Category:
Camcorder
| Size: 4.01 MB
Table of Contents
Table of Contents
6
Chapter 1 Overview
11
Features
11
Camera Features
11
VTR Features
14
Precautions
17
Example of System Configuration
18
Power Supply
19
Chapter 2 Locations and Functions of Parts
21
Accessory Attachments
21
Audio Functions
23
Shooting and Recording/Playback Functions
32
Menu Operating Section
47
Time Code System
51
Warnings and Indications
57
Warnings and Indications on the Display Panel
59
Time Code Displays
62
Indicators on the Viewfinder
64
Chapter 3 Recording and Playback
66
About Cassettes
66
Loading and Unloading a Cassette
66
Unloading a Cassette
68
Preventing Accidental Erasure
70
Recording
71
Basic Procedures
71
Continuous Recording
77
If You Turn off the Power During a Recording Pause
78
Recording Good Shot Markers
80
Recording a Recording Start Marker
85
Picture Data (Loop Rec Function) (When Using an HKDW-703 Extension Board)
85
Continuous Recording on the Previous Cut
117
Searching for the Last Recorded Portion and Turning in the Recording Pause Mode (End Search Function)
118
Checking the Recording — Playback
120
Checking the Last Two Seconds of the Recording Recording Review
120
Checking the Recording on the Color Video Monitor Playback in Color
121
Freezing a Picture During Playback
128
Chapter 4 Adjustments and Settings for
133
Adjusting the Black Balance and the White Balance
133
Adjusting the Black Balance
134
Adjusting the White Balance
138
If the Automatic White Balance Adjustment Cannot be Made
142
Shutter Modes
144
Selecting the Shutter Mode and Speed
146
Changing the Reference Value for Automatic Iris Adjustment
153
Adjusting the Audio Level
160
Manually Adjusting the Audio Level of the Front Microphone
163
Setting the Time Data
168
Setting the Time Code
168
Saving the Real Time in the Time Code
170
Setting the User Bits
171
Synchronizing the Time Code
173
Procedure for Time Code Synchronization
175
Menu Configuration
178
Basic Use of the Menu
181
Editing the USER Menu
187
Adding/Deleting/Replacing Pages
192
Status Display on the Viewfinder Screen
196
Layout of the Status Display on the Viewfinder Screen
197
Selecting the Display Items
202
Display Mode and Setting Change and Adjustment Progress Messages
205
Setting the Marker Display
207
Setting the Viewfinder
210
Recording Superimposed Shot Data in Color Bars
213
Setting the Shot ID
216
Displaying the Status Confirmation Windows
222
Confirming the Image of the Return Video Signal on the Viewfinder
226
Setting the GAIN Selector Values
230
Selecting the Output Signals
233
Setting the Color Temperature Manually
236
Specifying an Offset for the Auto White Balance Setting
238
Assigning Functions to ASSIGN 1/2 Switches
241
Setting the Date/Time of the Internal Clock
246
Selecting the Lens File
248
Handling the Memory Stick
250
Removing the Memory Stick
252
Saving/Loading User Menu Data To/From Memory Stick
254
Loading Saved Data from a Memory Stick
258
Settings
265
Storing Data in the Scene File
267
Using the Scene Files
267
Loading Scene Files
277
Resetting the Settings of the Camcorder to the Standard Settings Saved in the Reference File
282
A Memory Stick
283
Using a Battery Pack
285
Chapter 5 Setting up the Camcorder
285
Power Supply
285
Avoiding Breaks in Operation Due to Dead Batteries
288
Using an AC Adaptor
289
Using the Anton Bauer Ultralight System
290
Adjusting the Viewfinder
291
Adjusting the Viewfinder Position
291
Adjusting the Viewfinder Focus and Screen
293
Detaching the Viewfinder
294
Detaching the Eyepiece
296
Mounting the Lens
298
Adjusting the Flange Focal Length
299
Audio Input System
301
Using the Supplied Microphone
301
Using an External Microphone
303
Using an External Microphone Attached to the Camcorder
304
Attaching a UHF Portable Tuner (for a UHF Wireless Microphone System)
308
Connecting Line Input Audio Equipment
312
Tripod Mounting
313
Attaching the Shoulder Strap
315
Adjusting the Shoulder Pad Position
317
Putting on the Rain Cover
318
Control Unit
320
Chapter 6 Maintenance
325
Testing the Camcorder before Shooting
325
Preparations for Testing
325
Testing the Camera
326
Testing the Iris and Zoom Functions
328
Testing the VTR
329
Testing the Automatic Audio Level Adjusting
330
Testing the Manual Audio Level Adjusting Functions
331
Testing the Earphone and Speaker
331
Testing External Microphones
332
Maintenance
335
Cleaning the Video Heads
335
Cleaning the Viewfinder
335
Operation Warnings
338
Operation/Error Messages
339
Phenomena Specific to CCD Image Sensors
340
Appendix Specifications
342
Video Camera Section
343
VTR Section
344
Supplied Accessories
347
Recommended Additional Equipment
347
Advertisement
Sony HDCAM HDW-750 Maintenance Manual (442 pages)
HD-SD DOWN CONVERTER BOARD HKDW-702 PICTURE CACHE BOARD HKDW-703
Brand:
Sony
| Category:
Camcorder
| Size: 34.95 MB
Table of Contents
Table of Contents
3
Manual Structure
9
Purpose of this Manual
9
Related Manuals
9
Contents
10
Spare Parts
11
Notes on Repair Parts
11
Exploded Views
12
Ss-92
24
Pa-253
27
Re-186
41
Hardware List
44
Electrical Parts List
45
Cn-2037
55
Frame List
140
Packing Materials & Supplied Accessories
142
Optional Fixtures List
143
Hkdw-702
143
Hkdw-703
152
Block Diagrams
177
CAMERA BLOCK Overall
178
Pa-253
180
Cn-2037
181
Dcp-28
182
Rm-188
183
DC-110
188
At-143
190
VTR BLOCK Overall
191
Dvp-18
194
CCM-45
199
Ss-92
200
MDC-13
202
Eq-88
203
Fp-121
206
Apr-59
207
Al-43
208
Enc-61
209
Cnb-15
210
Schematic Diagrams
211
Tg-219
222
Dcp-28
225
Io-202
247
DC-110
248
At-143
258
Dvp-18
262
My-99
285
If-794
289
Hn-277
290
CI-27
291
CCM-45
293
Ss-92
294
MDC-13
300
Mdr-14
308
Se-613
309
Eq-88
310
Fp-121
332
Ifa-11
344
Ma-103
346
Sw-1031
347
Apr-59
348
Hp-103
350
Al-43
351
Axm-24
352
Bp-33
353
Enc-61
354
Ky-475
355
Re-186
356
Re-187
358
Sony HDCAM HDW-750 Operation Manual (396 pages)
Brand:
Sony
| Category:
Camcorder
| Size: 3.83 MB
Table of Contents
Table of Contents
7
Chapter 1 Overview
13
Features
13
VTR Features
16
Precautions
19
Power Supply
23
Chapter 2 Locations and Functions of Parts and
25
Accessory Attachments
25
Audio Functions
27
Shooting and Recording/Playback Functions
36
Menu Operating Section
51
Time Code System
55
Warnings and Indications
61
Time Code Displays
66
Indicators on the Viewfinder
68
Chapter 3 Recording and Playback
71
About Cassettes
71
Unloading a Cassette
73
Preventing Accidental Erasure
75
Recording
76
Continuous Recording
82
If You Turn off the Power During a Recording Pause
83
Recording Good Shot Markers
85
Recording a Recording Start Marker
90
Continuous Recording on the Previous Cut
122
Checking the Recording — Playback
125
Checking the Recording on the Color Video Monitor — Playback in Color
126
Freezing a Picture During Playback
133
Chapter 4 Adjustments and Settings for
137
Adjusting the Black Balance and the White Balance
137
Adjusting the Black Balance
138
Adjusting the White Balance
142
If the Automatic White Balance Adjustment Cannot be Made
146
Shutter Modes
148
Selecting the Shutter Mode and Speed
150
Changing the Reference Value for Automatic Iris Adjustment
157
Adjusting the Audio Level
164
Manually Adjusting the Audio Level of the Front Microphone
167
Setting the Time Data
171
Saving the Real Time in the Time Code
173
Setting the User Bits
174
Synchronizing the Time Code
176
Procedure for Time Code Synchronization
178
Setting the Cassette Numbers and Shot Numbers
181
Menu Display on the Viewfinder Screen
183
Basic Use of the Menu
186
Editing the USER Menu
192
Adding/Deleting/Replacing Pages
197
Status Display on the Viewfinder Screen
201
Layout of the Status Display on the Viewfinder Screen
202
Selecting the Display Items
206
Display Mode and Setting Change and Adjustment Progress Messages
209
Setting the Marker Display
211
Center
212
Marker
212
Setting the Viewfinder
214
Recording Superimposed Shot Data in Color Bars
217
Setting the Shot ID
220
Displaying the Status Confirmation Windows
226
Confirming the Image of the Return Video Signal on the Viewfinder
230
Setting the GAIN Selector Values
234
Selecting the Output Signals
237
Setting the Color Temperature Manually
240
Specifying an Offset for the Auto White Balance Setting
242
Assigning Functions to ASSIGN 1/2 Switches
245
Setting the Date/Time of the Internal Clock
250
Selecting the Lens File
253
Saving/Loading User Menu Data To/From Memory Stick
255
Removing the Memory Stick
257
Saving/Loading User Menu Data To/From Memory Stick
259
Loading Saved Data from a Memory Stick
263
Settings
270
Using the Scene Files
272
Loading Scene Files
282
Resetting the Settings of the Camcorder to the Standard Settings Saved in the Reference File
287
Chapter 5 Setting up the Camcorder
289
Power Supply
289
Avoiding Breaks in Operation Due to Dead Batteries
292
Using an AC Adaptor
293
Using the Anton Bauer Ultralight System
294
Adjusting the Viewfinder
295
Adjusting the Viewfinder Focus and Screen
297
Detaching the Viewfinder
298
Detaching the Eyepiece
300
Mounting the Lens
302
Adjusting the Flange Focal Length
303
Audio Input System
305
Using an External Microphone
307
Using an External Microphone Attached to the Camcorder
308
Attaching a UHF Portable Tuner (for a UHF Wireless Microphone System)
312
Connecting Line Input Audio Equipment
316
Tripod Mounting
317
Attaching the Shoulder Strap
319
Adjusting the Shoulder Pad Position
321
Putting on the Rain Cover
322
Connecting the Remote Control Unit
324
Chapter 6 Maintenance
329
Testing the Camcorder before Shooting
329
Testing the Camera
330
Testing the Iris and Zoom Functions
332
Testing the VTR
333
Testing the Automatic Audio Level Adjusting
334
Testing the Manual Audio Level Adjusting Functions
335
Testing the Earphone and Speaker
335
Testing External Microphones
336
Maintenance
339
Operation Warnings
342
Sony HDCAM HDW-750 Operation Manual (374 pages)
Sony CAMCORDER HDW-750, HDW-750CE OPERATION MANUAL
Brand:
Sony
| Category:
Camcorder
| Size: 3.03 MB
Table of Contents
Table of Contents
7
Chapter 1 Overview
13
Features
13
Camera Features
13
VTR Features
16
Precautions
20
Chapter 5 Setting up the Camcorder
21
Power Supply
21
Chapter 2 Locations and Functions of Parts and
23
Accessory Attachments
23
Audio Functions
25
Shooting and Recording/Playback Functions
34
Menu Operating Section
48
Time Code System
52
Warnings and Indications
58
Warnings and Indications on the Display Panel
61
Time Code Displays
63
Indicators on the Viewfinder
65
Chapter 3 Recording and Playback
67
About Cassettes
67
Loading and Unloading a Cassette
67
Unloading a Cassette
69
Preventing Accidental Erasure
71
Recording
72
Basic Procedure
72
Continuous Recording
78
Recording Good Shot Markers
81
Items
83
Recording a Recording Start Marker
85
Starting a Shoot with a few Seconds of Pre-Stored Picture Data (Loop Rec Function) (When Using an
85
Continuous Recording on the Previous Cut
110
Searching for the Last Recorded Portion and Turning in the Recording Pause Mode (End Search Function)
111
Checking the Last Two Seconds of the Recording Recording Review
112
Checking the Recording on the Color Video Monitor — Playback in Color
113
Recording the Recording Start Time Code Onto the Memory Label - Tele-File
115
Chapter 4 Adjustments and Settings for
121
Adjusting the Black Balance and the White Balance
121
Adjusting the Black Balance
122
Adjusting the White Balance
126
Shutter Modes
132
Selecting the Shutter Mode and Speed
133
Adjusting the Audio Level
147
Setting the Time Data
154
Setting the Time Code
154
Saving the Real Time in the Time Code
156
Setting the User Bits
157
Synchronizing the Time Code
159
Procedure for Time Code Synchronization
161
Setting the Cassette Numbers and Shot Numbers
164
Menu Configuration
166
Basic Use of the Menu
169
Editing the USER Menu
175
Adding/Deleting/Replacing Pages
180
Status Display on the Viewfinder Screen
184
Layout of the Status Display on the Viewfinder Screen
185
Selecting the Display Items
189
Display Mode and Setting Change and Adjustment Progress Messages
192
Setting the Marker Display
194
Center
195
Marker
195
Setting the Viewfinder
197
Recording Superimposed Shot Data in Color Bars
200
Setting the Shot ID
203
Displaying the Status Confirmation Windows
209
Confirming the Image of the Return Video Signal on the Viewfinder
213
Adjustments and Settings from Menus
217
Setting the GAIN Selector Values
217
Selecting the Output Signals
220
Setting the Color Temperature Manually
223
Specifying an Offset for the Auto White Balance Setting
225
Assigning Functions to ASSIGN 1/2 Switches
228
Setting the Date/Time of the Internal Clock
233
Selecting the Lens File
236
Handling the Memory Stick
238
Removing the Memory Stick
240
Saving/Loading User Menu Data To/From Memory Stick
242
Loading Saved Data from a Memory Stick
246
Settings
253
Storing Data in the Scene File
255
Using the Scene Files
255
Loading Scene Files
265
Resetting the Settings of the Camcorder to the Standard Settings Saved in the Reference File
270
Using a BP-L60A Battery Pack
271
Power Supply
271
Attaching the Battery Pack
272
Avoiding Breaks in Operation Due to Dead Batteries
274
Using an AC Adaptor
275
Using the Anton Bauer Ultralight System
276
Adjusting the Viewfinder
277
Adjusting the Viewfinder Position
277
Detaching the Viewfinder
279
Mounting the Lens
281
Adjusting the Flange Focal Length
282
Audio Input System
284
Using the Supplied Microphone
284
Using an External Microphone
286
Attaching a UHF Portable Tuner (for a UHF Wireless Microphone System)
291
Connecting Line Input Audio Equipment
295
Tripod Mounting
296
Removing the Camcorder from the Tripod Adaptor
297
Attaching the Shoulder Strap
298
Adjusting the Shoulder Pad Position
300
Putting on the Rain Cover
301
Control Unit
303
Chapter 6 Maintenance
307
Testing the Camcorder before Shooting
307
Preparations for Testing
307
Testing the Camera
308
Testing the Iris and Zoom Functions
311
Testing the VTR
312
Testing the Automatic Audio Level Adjusting
313
Testing the Manual Audio Level Adjusting Functions
314
Testing the Earphone and Speaker
314
Maintenance
318
Cleaning the Video Heads
318
Cleaning the Viewfinder
318
Detaching the Eyepiece
320
Operation Warnings
322
Appendix Specifications
325
Video Camera Section
326
VTR Section
327
Supplied Accessories
330
Recommended Additional Equipment
330
Sony HDCAM HDW-750 Supplemental Operation Manual (156 pages)
Brand:
Sony
| Category:
Camcorder
| Size: 1.19 MB
Table of Contents
日本語
3
Table of Contents
3
このマニュアルについて
5
第 1 章 Umid データを使う
6
Umidとは
7
概要
7
出力ライン番号を確認/設定する
10
準備
10
Umid メニュー設定
14
第 2 章 Gps データを使う( Hkdw-704
23
概要
23
特長
23
Gps について
25
Gpsとは
25
誤差について
27
撮影位置を記録する
28
記録する
28
測位位置を確認する
30
テープに記録した撮影位置を再生する
34
撮影位置を再生する
34
メモリースティックに記録した撮影位置を表示させる
36
撮影位置を表示するためのパソコン設定
37
メニュー設定
39
記録関係の設定をする
39
タイムゾーンを設定する
45
Gps時計に合わせる
46
表示設定に関する設定を行う
47
その他
49
主な仕様
49
記録フォーマット/記録項目/記録タイミングについて
50
困った時には
54
第 3 章 メモリーラベルにテレファイルマークを記録する
56
アサイナブルスイッチ 1 へテレファイル機能を割り当てる
56
Ok/Ng/Kp
57
を記録する
58
第 4 章 Sls シャッターモードを追加する
61
Sls モードを設定する
62
時差と世界の時差地図
67
時差
67
世界の時差地図
70
測地系と対応国名( Navin'you 用
72
Rom バージョンを確認する
75
用語説明
76
五十音順
76
アルファベット順
77
English
81
About this Manual
83
Chapter 1 Using UMID Data
83
Overview
85
What Is a UMID
85
Preparation
88
Confirming/Setting the Line Number
88
UMID Menu Setup
92
Chapter 2 Using GPS Data (When Using an HKDW-704)
99
Overview
99
Features
99
About GPS
101
What Is GPS
101
Transmitting GPS Initial Data (Almanac Data)
102
Errors
103
Recording the Position of a Shooting Location
104
Recording
104
Confirming a Location Calculated
106
Playing Back the Shooting Location
110
Playing Back the Shooting Location Recorded on
110
A Tape
110
Displaying the Shooting Locations Recorded on a "Memory Stick
112
Output Format
112
Setup of the Personal Computer Used to Display Shooting Locations
113
Menu Setup
115
Setup Related to Recording
115
Setting the Time Zone
120
Setup Related to Display of GPS Data
122
Miscellaneous
124
Specifications
124
Recording Format/Recording Items/Recording Timing
125
GPS Output Format for the REMOTE Connector
126
(8-Pin)
126
Troubleshooting
129
Chapter 3 Recording a Tele-File Mark
131
Overview
131
Assigning the TELEFILE MARK Function to the ASSIGN 1 Switch
132
Recording a Tele-File Mark (OK/NG/KP) Onto the Memory Label
133
Chapter 4 Adding the SLS Mode to Shutter
137
Overview
137
Setting the SLS Mode
138
Appendix
143
Time Difference and Time Difference World Map
143
Time Difference
143
Time Difference World Map
146
Geodetic System and Areas (for Navin'you
148
Confirming the ROM Version
151
Glossary
152
Sony HDCAM HDW-750 Brochure & Specs (20 pages)
High Definition Video System
Brand:
Sony
| Category:
Camcorder
| Size: 1.05 MB
Table of Contents
Color Balance
9
Tele-File™ System
14
System Configuration
17
Optional Accessories
19
Advertisement
Related Products
Sony HDCAM HDW-730
Sony HDCAM HDW-750P
Sony Digital HDVS HDCAM HDW-730S
Sony HDW-750PC
Sony HDW-750CE
Sony HDCAM HDW-700A
Sony HDW-790P
Sony HDW-790
Sony HDW-700
Sony HDW-F900H
Sony Categories
Laptop
TV
CD Player
Camcorder
Digital Camera
More Sony Manuals
Login
Sign In
OR
Sign in with Facebook
Sign in with Google
Upload manual
Upload from disk
Upload from URL