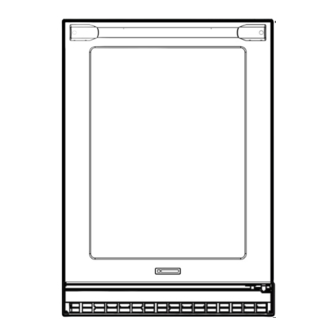
Electrolux ICON Use & Care Manual
Hide thumbs
Also See for ICON:
- Use and care manual (60 pages) ,
- Use & care manual (34 pages) ,
- Manual (4 pages)
Table of Contents
Advertisement
Quick Links
Download this manual
See also:
Use and Care Manual
Advertisement
Table of Contents

Summary of Contents for Electrolux ICON
- Page 1 EN WINE COOLER USE AND CARE GUIDE FR REFROIDISSEUR DE VIN GUIDE D’UTILISATION ET D’ENTRETIEN ES REFRIGERADOR DE VINO GUIA DE USO Y CUIDADO 242333200 June 2014...
-
Page 2: Finding Information
This Use & Care Guide is part of our information. Warranty coverage begins at commitment to customer satisfaction and the time your Electrolux wine cooler was product quality throughout the service life purchased. of your new wine cooler. -
Page 3: Table Of Contents
Finding Information Table of Contents Finding Information ..............2 Please Read and Save This Guide ............2 Make a Record for Quick Reference ............2 Product Registration Card ...............2 Questions? ....................2 Safety ....................4 Important Safety Instructions ..............4 Safety Precautions ................4 Definitions ...................4 General Precautions ..............4 Installation ...................5 Installing the Wine cooler .................5 Site Preparation ..................6... -
Page 4: Safety
Allow unit temperature to stabilize for 24 hours before use. IMPORTANT CAUTION Indicates installation, operation, or maintenance information which is • Use only genuine Electrolux important but not hazard-related. replacement parts. Imitation parts can damage the unit and may void the warranty. -
Page 5: Installation
¼ inch over the dimensions given for your unit. NOTE All units require zero clearance when installed flush with a cabinet or wall. Electrolux stainless steel models require a minimum 2 ⁄ inch handle clearance when installed against a wall or cabinet that extends beyond the front edge of the unit. -
Page 6: Site Preparation
Installation Site Preparation Installing the Anti-Tip Device 1 Position the unit on a flat, level surface capable of supporting the entire weight of the unit. Remember WARNING the unit will be significantly heavier once it is fully loaded. Do not double stack two units as shown below. - Page 7 Installation allow marking the rear corner of the cabinet, then make temporary lines on the floor marking the front corner of the cabinet, excluding the drawer. ALL UNITS CAN TIP Slide the wine cooler out of the way. From the temporary line extend the sidewall line back 21½"...
-
Page 8: Leveling
The overall height of your Electrolux appliance may be adjusted between the minimum, 33 ¾” (85.7cm), by turning the leveling leg in and the maximum, 34 ¾” (88.3cm), by turning the leveling leg out. -
Page 9: Operation
Operation Temp Temp System Minus On/Off Plus Lock Status keypad Display Area keypad keypad keypad indicators door ajar light light lock power failure temp air filter alarm reset Electronic Control Display To wake the display press any keypad. A confirm tone will sound, and the current storage compartment temperature will be Power Failure displayed. -
Page 10: Temperature Mode
To lock the control, temperature. press and hold the "Lock" keypad until the display reads "Loc". The lock icon will - Warm content load will delay flash three times and then continuously the change to a colder set-point illuminate. -
Page 11: Alarms
Operation Alarms The control will alert you to conditions that could adversely affect the performance of the appliance. Temp alarm reset Temperature alarm - If the storage Door Ajar compartment temperature exceeds 10°F from set-point for more than a one hour alarm reset duration, the System Status indicator will turn off, the "Temp"... -
Page 12: Vacation/Sabbath Mode
12 Operation Vacation/Sabbath mode: This operating mode can be used to save energy during high cost energy periods, or when you won't be using your appliance for an extended period of time. Vacation mode also serves as a Sabbath mode, disabling functions and its controls in accordance with the weekly Sabbath and religious holidays observed within the Orthodox Jewish community. -
Page 13: Storage
Storage Loading Tips and Sug- Wine cooler Shelving: • Five (5) roll-out wine racks gestions • Two (2) five bottle roll-out wine racks Your appliance is equipped with a cantilever shelf system which provides maximum adjustability and customization of the shelving arrangement. To remove a shelf from the frame: CAUTION •... -
Page 14: 14 Maintenance
14 Maintenance Front Grille The following suggestions will minimize the cost of operating Be sure that nothing obstructs the required your refrigeration appliance. air flow openings in front of the cabinet. At least once or twice a year, brush or 1. - Page 15 Maintenance Door alignment: The door should be parallel to the sides and top of the appliance. If alignment is necessary the door may be adjusted by removing the grille, then loosening the two screws which secure the door adjustment bracket on the bottom of the door and adjusting the door side to side.
-
Page 16: 16 Troubleshooting
Temperature” in the “Start-Up and Temperature Control” section). No interior light. • Failed LED assembly. • Contact a qualified Electrolux Service Technician. Light will not go • Manual light control • Turn off manual light control. out when door is is ON. -
Page 17: Warranty Information
Your appliance is covered by a one year limited warranty. For one year from your original date of purchase, Electrolux will repair or replace any parts of this appliance that prove to be defective in materials or workmanship when such appliance is installed, used, and maintained in accordance with the provided instructions.


