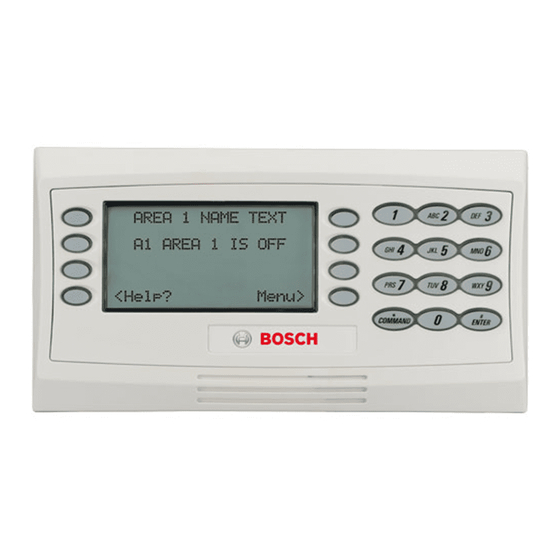
Bosch D1260 Installation Manual
Hide thumbs
Also See for D1260:
- Owner's manual (154 pages) ,
- User manual (76 pages) ,
- Brochure & specs (4 pages)
Table of Contents
Advertisement
Advertisement
Table of Contents

Summary of Contents for Bosch D1260
- Page 1 D1260/D1260B Installation Guide Keypads...
- Page 2 D1260/D1260B | Installation Guide | Trademarks Trademarks ® ® ® Microsoft , Windows , Windows NT are either registered trademarks or trademarks of Microsoft Corporation in the United States and/or other countries. ® CYCOLOY is a registered trademark of General Electric Company.
-
Page 3: Table Of Contents
Panels ..............13 Table 6: Audible Tones..........7 4.3.2 D7412G, D7412, D7212G and D7212 Table 7: D1260/D1260B DIP Switch Settings ..10 Control Panels...........14 Table 8: Area/Point Numbers and Area Text..13 99 + Enter “Setup?” Function ......14 Table 9: D1260/D1260B Specifications ....16 Programming Custom Functions ....14... -
Page 4: 1.0 Introduction
D1260/D1260B | Installation Guide | 1.0 Introduction Documentation Conventions 1.0 Introduction 1.3.1 Type Styles Used in this Manual This manual refers to the following control panels: Bold text Usually indicates selections that D9412G, D7412G, D7212G, D9412, D7412, D9112, you can use while programming and D7212. -
Page 5: 2.0 D1260/D1260B Overview
2.0 D1260/D1260B Overview requirements for the D1260/D1260B through a four- wire connection. Refer to the Current Rating Chart for The D1260/D1260B Keypad is a SDI Bus compatible Standby Battery Calculations provided in the approved device used with the Bosch Control Panels with applications compliance guide for the specific control versions 6.40 or higher. -
Page 6: Parts List
D1260/D1260B | Installation Guide | 2.0 D1260/D1260B Overview Parts List Figure 3: D1260/D1260B Keypad Table 4 lists the items included with a D1260, D1260BLK, D1260R and D1260B Keypads. Table 4: Parts List Qty. Description Part Number CD with: 4998122742B •... -
Page 7: Audible Tones
2.2.4 Audible Tones The D1260/D1260B Keypad has a built-in speaker that produces several distinct warning tones. The user can change the speaker volume and display brightness to meet their needs. You cannot connect external annunciation devices to the D1260/D1260B. Anytime the D1260/D1260B emits an audible tone, the keypad illuminates. -
Page 8: Internal Features
To access the inside of the D1260/D1260B, the back plate must be removed. Using a small flat-blade screwdriver, gently push in the two holes in the bottom of the D1260/D1260B. As the tabs are pushed in, lift the back plate away from the rest of the unit. -
Page 9: 3.0 Installation
The D1260/D1260B Keypad is a low profile, surface- damage internal components. mounted unit. Install the keypad using the following • Do not mount the D1260/D1260B in wet or moist optional packages: locations. • D56 Keypad Conduit Box - Protected surface mount or flush mount •... -
Page 10: Mounting The Back Plate
D1260/D1260B | Installation Guide | 3.0 Installation 3.1.2 Mounting the Back Plate Table 7: D1260/D1260B DIP Switch Settings The back plate for the D1260/D1260B keypad has a variety of mounting holes to accommodate different Address Switch mounting standards. To mount correctly the back plate: 1. -
Page 11: Wiring
Hold the top edges of the To connect the D1260/D1260B to the control panel: enclosure and back plate in position. Push the tabs 1. Power down the control panel. -
Page 12: Programming The Control Panel
7. The Display Revision (Command 59) function Control Panels with versions 6.40 or higher. To (under USER INTERFACE (9000MAIN) program the D1260/D1260B, version 1.15 or higher of Command Center Functions) must be enabled (E) the 9000MAIN handler or version 3.60 or higher of in the control panel’s programming for the... -
Page 13: Programming Area Names
Area Name Text. 5. Under Passcodes & Authority Levels, select Users For example, if a D1260/D1260B is assigned to Area 1, 201 - 249. and the name of Area 1 is “WAREHOUSE,” then you would program the word “WAREHOUSE”... -
Page 14: D7412G, D7412, D7212G And D7212 Control Panels
Programming Custom Functions brightness and contrast (Figure 13 to Figure 15) When programming Custom Functions for use on a D1260/D1260B Keypad, program the keystrokes as if Figure 13: High Brightness Settings you were using a D1255 Keypad. Refer to the control panel’s program entry guide and program record sheet... - Page 15 D1260/D1260B | Installation Guide | 4.0 Programming the Control Panel 5. Scroll down the list of commands in the lower 11. Double-click on the 0 cell to open a dialog box to pane to “(33) Service Walk - (Use 99 + Enter change the Function number.
-
Page 16: 5.0 Specifications
D1260/D1260B | Installation Guide | 5.0 Specifications 5.0 Specifications Table 9: D1260/D1260B Specifications Power Voltage Nominal 12 VDC Requirements Standby Current Idle 135 mA Maximum* 208 mA * with speaker and display backlight at maximum Enclosure Dimensions (H x W x D) D1260 10.9 cm x 20 cm x 2.6 cm... - Page 17 D1260/D1260B | Installation Guide | 5.0 Specifications Notes: Bosch Security Systems | 9/04 | 48101E...
- Page 18 D1260/D1260B | Installation Guide | 5.0 Specifications Notes: Bosch Security Systems | 9/04 | 48101E...
- Page 19 D1260/D1260B | Installation Guide | 5.0 Specifications Notes: Bosch Security Systems | 9/04 | 48101E...
- Page 20 Bosch Security Systems 130 Perinton Parkway Fairport, NY 14450-9199 Customer Service: (800) 289-0096 Technical Support: (888) 886-6189 © 2004 Bosch Security Systems 48101E...


