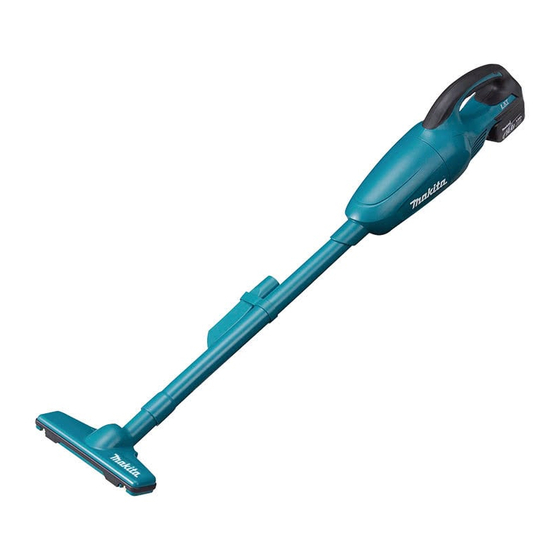
Makita DCL180 Instruction Manual
Cordless cleaner
Hide thumbs
Also See for DCL180:
- Instruction manual (77 pages) ,
- Technical information (9 pages) ,
- Instruction manual (44 pages)
Table of Contents
Advertisement
Quick Links
Advertisement
Table of Contents

Summary of Contents for Makita DCL180
- Page 1 INSTRUCTION MANUAL Cordless Cleaner DCL140 DCL180 DCL180F Read before use.
-
Page 2: Specifications
Children shall not play with the appliance. Cleaning and user maintenance shall not be made by children without supervision. SPECIFICATIONS Model DCL140 DCL180 DCL180F Capacity 650 mL Continuous use Approx. 20 min Overall length... - Page 3 Do not bring close to stoves or other heat causing ires, personal injury and damage. It will sources. also void the Makita warranty for the Makita tool and Do not block the intake hole or vent holes. charger. SAVE THESE INSTRUCTIONS.
-
Page 4: Functional Description
FUNCTIONAL CAUTION: • Always install the battery cartridge fully until the red indi- DESCRIPTION cator cannot be seen. If not, it may accidentally fall out of the tool, causing injury to you or someone around you. • Do not install the battery cartridge forcibly. If the CAUTION: cartridge does not slide in easily, it is not being •... - Page 5 Indicator lamps Remaining CAUTION: capacity • Before inserting the battery cartridge into the tool, always check to see that the switch trigger Lighted Blinking actuates properly and returns to the "OFF" 75% to 100% position when released. To start the tool, simply pull the switch trigger. Release 50% to 75% the switch trigger to stop.
- Page 6 High performance ilter ► 1. Preilter 2. Capsule Twist preilter in direction of arrow to unfasten securing ► 1. Capsule 2. High performance ilter lip from cleaner unit and then pull off preilter. Disposing of dust CAUTION: • Empty the cleaner before it becomes too full, or the suction force weakens.
- Page 7 Clean out the ine dust and lightly tap to dislodge dust Disposing of dust for high from high performance ilter. performance ilter Reassembly In order to drop dust sticking on the ilter in the capsule, tap the capsule 4 or 5 times with your hand. Reassembly for normal ilter Now point suction inlet downwards, turn capsule in direction of arrow in diagram, and disconnect capsule...
- Page 8 Problem Examples Example 1: Only preilter has been loaded (no ilter) Connect capsule. Align O symbol on capsule with O symbol on handle and then irmly twist capsule in direc- tion of arrow until it is secured. ► 1. Preilter Example 2: Only ilter has been loaded (no preilter) ►...
- Page 9 ► 1. Groove of cleaner housing 2. Preilter 3. Securing ► 1. O Mark Reassembly for high performance ilter Connect high performance ilter. At this time, make sure to twist high performance ilter so that securing lip is irmly locked into cleaner unit. ►...
-
Page 10: Operation
Nozzle + Extension wand (Straight pipe) OPERATION The extension wand its in between the nozzle and the cleaner itself. This arrangement is convenient for clean- CAUTION: ing a loor while standing erect. • To connect attachments, such as nozzle, twist-insert attachment in direction of arrow to ensure secure connection during use. -
Page 11: Maintenance
Cleaner body Cleaning without nozzle From time to time wipe off the outside (cleaner body) of You can pick up powder and dust without nozzle. the cleaner using a cloth dampened in soapy water. Clean out also the suction opening and ilter mounting area. - Page 12 R e c h a r g e b a t t e r y . NOTE: • Do not attempt to repair cleaner by yourself. To maintain product SAFETY and RELIABILITY, repairs, any other maintenance or adjustment should be performed by Makita Authorized Service Centers, always using Makita replacement parts. 12 ENGLISH...
-
Page 13: Optional Accessories
CAUTION: • These accessories or attachments are recom- mended for use with your Makita tool speciied in this manual. The use of any other accessories or attachments might present a risk of injury to persons. Only use accessory or attachment for its stated purpose. - Page 16 Jan-Baptist Vinkstraat 2, Makita Europe N.V. 3070 Kortenberg, Belgium 3-11-8, Sumiyoshi-cho, Makita Corporation Anjo, Aichi 446-8502 Japan 885261F227 www.makita.com 20170920...


