Advertisement
Quick Links
Owner's Manual and Installation Instructions
GES-NJGB25IN-1
GES-NJGW25IN-1
GES-NJGB35IN-1
GES-NJGW35IN-1
GES-NJGB50IN
GES-NJGW50IN
GES-NM25IN M
SAFETY INFORMATION
OPERATION
MAINTENANCE
Write the model and serial
numbers here:
Model # _________________________
Serial #
____________________________
GES-NMG25IN
GES-NMG35IN
GES-NMG50IN
GES-NMG70IN
GES-NIG25IN
GES-NIG35IN
GES-NM35IN M
This appliance is filled with R32.
1
3
4
11
14
15
16
Advertisement

Summary of Contents for GE GES-NJGB25IN-1
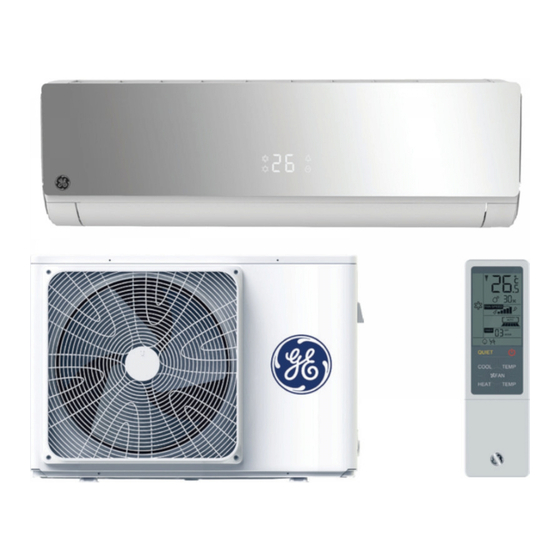
- Page 1 Owner’s Manual and Installation Instructions GES-NJGB25IN-1 GES-NMG25IN GES-NJGW25IN-1 GES-NMG35IN GES-NJGB35IN-1 GES-NMG50IN GES-NJGW35IN-1 GES-NMG70IN GES-NJGB50IN GES-NIG25IN GES-NJGW50IN GES-NIG35IN GES-NM25IN M GES-NM35IN M SAFETY INFORMATION PARTS AND FUNCTIONS OPERATION INDOOR UNIT INSTALLATION MAINTENANCE TROUBLE SHOOTING SPECIFICATIONS Write the model and serial numbers here:...
-
Page 2: Important Safety Information
IMPORTANT SAFETY INFORMATION. READ ALL INSTRUCTIONS BEFORE USING. SAFETY INFORMATION This is the safety alert symbol. This symbol alerts you to potential hazards that can kill or hurt you and others. All safety messages will follow the safety alert symbol and the word “DANGER”, “WARNING”, or “CAUTION”. These words are defined as: DANGER Indicates a hazardous situation which, if not avoided, will result in death or serious injury. -
Page 3: How To Connect Electricity
IMPORTANT SAFETY INFORMATION. READ ALL INSTRUCTIONS BEFORE USING. WARNING Do not use a refrigerant other than the one indicated on the outdoor unit(R32) when installing, moving or repairing. Using other refrigerants may cause trouble or damage to the unit, and personal injury. HOW TO CONNECT ELECTRICITY WARNING WARNING... -
Page 4: Parts And Functions
HEAT display When receiving the remote pressed, temp. setting HEALTH display control signal, display the set temperature. increases 1 ºC. DRY display COOL display button GES-NJGB25IN-1 GES-NJGB35IN-1 GES-NJGB50IN pressed, temp. setting GES-NJGW25IN-1 GES-NJGW35IN-1 GES-NJGW50IN decreases 1 ºC. HEAT button Display board Used to set HEAT operation. - Page 5 GES-NMG50IN GES-NM25IN M GES-NJGB35IN-1 GES-NJGB50IN GES-NMG25IN GES-NJGB25IN-1 -1 GES-NJGW35IN-1 GES-NJGW50IN GES-NMG35IN GES-NMG70IN GES-NM35IN M GES-NJGW25IN...
-
Page 6: Quiet Operation
Operation Operation COOL,HEAT and DRY Operation QUIET Operation Unit start. FAN SPEED FAN SPEED AUTO AUTO Select operation mode. AUTO AUTO COOL TEMP COOL TEMP Press the COOL button on QUIET Operation HEAT TEMP the remote control. HEAT TEMP SMART SWING HEALTH MODE... - Page 7 Operation button. pressed, temp. setting FAN SPEED FAN SPEED increases 1 ºC. AUTO AUTO AUTO AUTO button. QUIET pressed, temp. setting QUIET COOL TEMP decreases 1 ºC. COOL TEMP HEAT TEMP HEAT TEMP TEMP SMART SWING TEMP HEALTH MODE AIRFLOW SLEEP POWER CODE...
-
Page 8: Fan Mode Operation
Operation FAN MODE Operation HEALTH AIRFLOW Operation The setting of MODE function FAN SPEED Fan mode: default low fan speed, FAN SPEED fan mode1, the setting temperature AUTO AUTO appears on the display. Avoid will not display, the temperature of indoor display is 24 ℃... -
Page 9: Timer Operation
Operation TIMER Operation SWING Operation You can let unit start or stop automatically a following times: Before you wake up in the morning, or get back from outside after you fall asleep at night. Press the button of the TIMER at the remote controller off mode. - Page 10 Operation Comfortable SLEEP 3 hours then stops. Temp. is lower than temp. setting so that room temperature won’t be too high for your Before going to bed, you can simply press the SLEEP sleep. button and unit will operate in SLEEP mode and bring you a sound sleep.
-
Page 11: Test Operation
Operation SMART Operation ON/OFF operation and test operation (This function is unavailable on some models) RISK OF ELECTRIC SHOCK. Do not operate the ON/OFF switch with a wet hand. One key can give you a comfortable room! ON/OF F Operation: AUTO FAN SPEED The air conditioning unit can... -
Page 12: Indoor Unit Installation
Indoor Unit Installation Necessary Tools for Installation Power Source Torque wrench Driver (17mm, 22mm, 26mm) Nipper Risk of electric shock. Can cause injury or death. P ipe cutter Hacksaw T he electrical power outlet should be located sufficiently close F laring tool Hole core drill to the indoor unit, such that the cord-set and plug are not placed K nife... - Page 13 In case of right rear piping, please find the wall hole location C. Cut the connecting wirings 1.5m longer than the pipe length. 60mm 60mm 60mm 60mm GES-NMG25IN GES-NMG35IN GES-NM25IN M GES-NJGB25IN-1 GES-NJGB35IN-1 GES-NIG25IN GES-NIG35IN GES-NM35IN M GES-NJGW25IN -1 GES-NJGW35IN-1 Remove the burrs...
- Page 14 them through the wall hole to the outdoor . 2. Make 3. Hang surely the unit body onto the upper notches of the mounting plate. Move the body from side to side to verify its se cure fixing. 4. In order to fix the body onto the mounting plate,hold up the body aslant from the underside and then put it down perpen dicularly.
- Page 15 Maintenance For Smart Use of The Air Conditioner R emote C ontroller Indoor Body S etting of proper room Do not block the air inlet temperature or outlet P roper wipe the air conditioner by using a temperature soft and dry cloth. F or serious stains, use a neutral detergent diluted with Do not use wate r,wipe the controller water.
-
Page 16: Trouble Shooting
Trouble shooting Before asking for service, check the following first. Cause or check points Phenomenon The system When unit is stopped, it won't restart immediately until 3 minutes have does not restart elapsed to protect the system. immediately. When the electric plug is pulled out and reinserted, the protection circuit will work for 3 minutes to protect the air conditioner. -
Page 17: Specifications
Specifications Important information regarding the European regulations conformity refrigerant used for the models Contains fluorinated greenhouse gases Voltage:230V Climate:T1 covered by the Kyoto Protocol All the products are in conformity with the following European provision: 1+2= - 2014/53/EU(RED) - 2014/517/EU(F-GAS) This product contains fluorinated greenhouse gases covered by - 2009/125/EC(ENERGY) the Kyoto Protocol.


