Advertisement
Quick Links
Advertisement

Summary of Contents for MadMapper MiniMad VIDEO
- Page 1 The hardware companion of MadMapper User guide...
- Page 2 MiniMad will either be configured with miniMAD Video to play a video-mapping, or with miniMAD Light to play recorded DMX sequences. WARNING : MiniMad Video and MiniMad Light cannot be installed at the same time on the same MiniMad. www.madmapper.com...
- Page 3 MiniMad VIDEO FEATURES Surfaces Media Projector Export Network synchronization CONTROLS Buttons Keyboard Network synchronization MiniMad LIGHT FEATURES Record Export Audio CONTROLS Buttons Keyboard Micromodul8 INFORMATION SPECIFICATIONS Technical Specifications In the box Activate and update...
- Page 4 - Mask Other surface types (line, 3D surface) and FX are not supported yet. MEDIA MiniMad Video supports a single media at a time on every surfaces. Every image files supported by MadMapper will be exported to MiniMad. During the export process, movie files will be...
- Page 5 EXPORT In MadMapper, click File > Export Video Mapping to MiniMad. FFmpeg Tools is required to export MadMapper project to MiniMad, so please download FFmpeg Tools Installer using the provided link. Eject the SD-card from the MiniMad and insert it in your computer.
- Page 6 TV-screen, a video-wall, a straight video-projection or perspective-corrected by the projector itself - MadMapper will propose you to switch the Fullscreen maximum quality mode on, so your media will be exported using the best possible resolution (up to 1080p30).
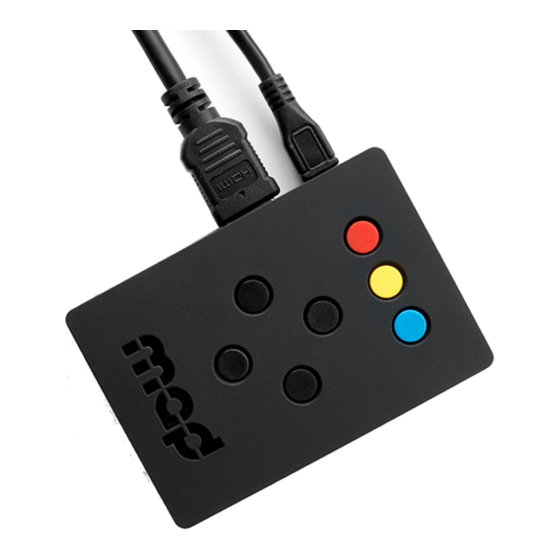
- Page 7 MiniMad VIDEO CONTROLS BUTTONS change playback mode Right next media Left previous media Down pause media Long press: restart movie Blue Red(toggle ON/OFF) activate mapping control next control point Yellow control point position previous control point/ Right control point position...
- Page 8 MiniMad VIDEO CONTROLS KEYBOARD As an alternative to the MiniMad’s buttons, you can use any USB keyboard as a remote. Using a wireless USB keyboard may be particularly interesting when the device is not easily accessible. Attach the keyboard to one of the four USB ports prior to powering it on and follow the following...
- Page 9 - First master knob: master luminosity - Second master knob: master audio-level The miniMAD declares itself as “miniMAD Video( - Nickname)( - ProjectorName)”, using the Bonjour protocol, where Nickname can be specified in the Advanced tab of the Export Video Mapping to miniMAD dialog, and ProjectorName is the name of the corresponding projector in MadMapper if there are several projectors in the project, for example: “miniMAD Video - LOBBY - Projector-1”.
- Page 10 MiniMad VIDEO FEATURES MiniMad Controller (OSC) In MadMapper, create a new MiniMad Control- ler module and get the full-control of the selected MiniMad (Video or Light) at a glance, control its parameters using control mapping (Keyboard, Midi, OSC, BPM, Oscillators, etc)
- Page 11 MiniMad VIDEO FEATURES In addition to controlling the media playback, you can adjust manually adjust the mapping and the image settings:...
- Page 12 MiniMad VIDEO FEATURES TOUCH OSC The following TouchOSC layouts are available on the MadMapper Yourspace page:...
-
Page 13: Network Synchronization
Therefore MiniMad is not the best solution for setups using edge-to-edge screens, side-by-side or soft- edge projections, using content that wouldhighlight this delay. For such a setup, we advice you to use MadMapper software on a computer with several video-outputs. For better synchronization, we also advice you prefer 720p over 1080p projector resolution.. - Page 14 In the MadLight Recorder dialog, check the sequences you want to export then click Export to MiniMad to open the export dialog. By default, MiniMad will use the same DMX interface as MadMapper, but you can select a different one using MiniMad DMX Output.
- Page 15 MiniMad LIGHT FEATURES In Advanced tab, you can also specify a nickname for the the Bonjour OSC Discovery, or disable it completely to prevent the miniMAD from appearing in applications supporting Bonjour. (cf CONTROLS / OSC section for more details) Insert the MiniMad SD-card in the SD-card reader.
- Page 16 MiniMad LIGHT CONTROLS BUTTONS Yellow + Up/Down control Luminosity change playback mode Yellow +Red toggle Blackout Right next sequence Left previous sequence Down pause media long press: restart sequence KEYBOARD Backspace restart sequence Numbers direct access to the toggle blackout 10 first sequences increase luminosity...
- Page 17 - /next_sequence: next sequence - /playback_mode/{playback mode index}: set the playback mode (cf media playback mode list in MadMapper’s export window), example: /playback_mode/1 to set the Repeat sequence list playback mode - /media_name/{sequence name}: set the current sequence by name, example: /sequence_by_name/...
- Page 18 MiniMad LIGHT FEATURES MiniMad Controller (OSC) In MadMapper, create a new MiniMad Controller module and get the full-control of the selected MiniMad at a glance, control its parameters using control mapping (Keyboard, Midi, OSC, BPM, Oscillators, etc) and Cues.
- Page 19 MiniMad LIGHT FEATURES TOUCH OSC The following TouchOSC layouts are available on the MadMapper Yourspace page:...
-
Page 20: Technical Specifications
INFORMATION TECHNICAL SPECIFICATIONS • Raspberry Pi 2 Model B • 7 buttons control panel • HDMI output up to 1080p60 (1920×1080 at 60Hz) • 16 GB MicroSD-card + adapter • 2 Amps power supply • Size 9x10x3 cm IN THE BOX •... - Page 21 Etcher flashing tool. Note that you don’t need to decompress the downloaded zipped images. All those files are available to download on the MadMapper Yourspace page. On both platforms: 1. Insert your MiniMad SD-card in your computer’s card-reader.


