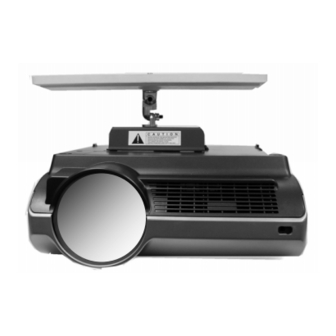
Sharp XG-PH50X Quick Start Reference Sheet
Hide thumbs
Also See for XG-PH50X:
- Operation manual (109 pages) ,
- Installation instructions manual (13 pages) ,
- Brochure & specs (4 pages)
Advertisement
NOTE: This document is intended only as a quick reference for installation – please read the following
SP Controls Application Note for a complete description of this projector driver prior to installation.
I. Driver Features
1. Input Selection Mapping
Selection 1:
RGB 1 (HD15)
Selection 2:
RGB 2 (BNC)
Selection 3:
VIDEO 1 (RCA)
Selection 4:
VIDEO 2 (S-VID)
2. Hidden Function Mapping
Selection 1:
AUTO SYNC
Selection 2:
ENTER
Selection 3:
ADJUST LEFT
Selection 4:
ADJUST RIGHT
Off:
MENU
Volume Up:
ADJUST UP
Volume Down:
ADJUST DOWN
3. Other Driver Features
Power Status Feedback Method
Control Wiring Option
Note: when the Panel is wired to the projector Wired Remote port, the projector remote control will no
longer function.
II. Wiring Specifications
NOTE: For a wiring diagram, please see the SP Controls Application Note for the Sharp XG-PH50X
1. RS-232:
Wire the Panel RS-232 port to a female DB9 as follows:
RX to
2
TX to
3
GND to
5
Connect this female DB9 to the projector port labeled RS-232C.
2. Wired Remote:
Wire the Panel IR/Serial port to a female 1/8" Mini as follows:
IR/SER to
Tip
GND to
ring
Attach to the projector port labeled Wired Remote using a male 1/8" mini to male 1/8" mini.
III. Additional Projector Information
1. The XG-PH50X requires the correct menu settings for use with the SmartPanel:
•
Configure to BAUD 9600 (default) in the second OPTIONS menu
•
Configure to LAN/RS-232C ENABLED in the second OPTIONS menu
2. SmartPanel customers have reported intermittent control failures using the SmartPanel with the Sharp
XG-PH50X, though as of the writing of this Application Note SP Controls believes this issue has been
resolved. Please read Section V. Special Control Note in the Application Note for more information, or
contact SP Controls Technical Support
8/10/05
RS-232 Power Polling
RS-232 and Wired Remote or IR Emitter
SP Controls reserves the right to modify specifications without notice at any time.
Quick Start Reference Sheet
Sharp XG-PH50X
Revision B
Advertisement
Table of Contents

Summary of Contents for Sharp XG-PH50X
- Page 1 2. SmartPanel customers have reported intermittent control failures using the SmartPanel with the Sharp XG-PH50X, though as of the writing of this Application Note SP Controls believes this issue has been resolved. Please read Section V. Special Control Note in the Application Note for more information, or...
-
Page 2: Projector Control
Hidden functions names are based on the Sharp remote and controls on top of the projector. Hidden functions names are based on the Sharp remote, manual, and controls on top of the projector. ADJUST controls, ENTER and UNDO navigate through onscreen menus. UNDO is a “return to previous menu”... - Page 3 Control Wiring Option Wired Remote or IR Emitter (see note 2) Control for the Sharp with this Driver is via RS-232 and Wired Remote. An IR Emitter can alternately be used. NOTE: When Wired Remote is connected to the Sharp projector, the Sharp will not respond to its remote control.
-
Page 4: Control Wiring
II. CONTROL WIRING This section specifies how RS-232 and Wired Remote should be wired to the Sharp projector. PROJECTOR CONTROL A. RS-232 should be connected to the Sharp control port RS232 IR/SERIAL labeled RS-232C. Connection should be as follows: 1. Wire the Panel to a female DB9 as follows:... -
Page 5: Troubleshooting
Verify that both RS-232 and the wired remote are correctly wired. The most common error is reversal of RX and TX for RS232, and polarity reversal of the wired remote. Note that the Sharp is controlled using both Wired Remote and RS-232. If a subset of functionality appears to be working, verify that both types of control wiring are correctly wired. -
Page 6: Revision History
V. SPECIAL CONTROL NOTE – IR-Only Driver Available SP Controls has received reports of an intermittent control failure from customers using the Sharp XG- PH50X projector with the SmartPanel. As of the writing of this Application Note, all reported failures occurred using the Sharp XG-P25XU SmartPanel driver to control the XG-PH50X.


