Table of Contents
Advertisement
Quick Links
Advertisement
Table of Contents

Summary of Contents for AEG IKB63302FB
- Page 1 IKB63302FB User Manual USER MANUAL...
-
Page 2: Table Of Contents
FOR PERFECT RESULTS Thank you for choosing this AEG product. We have created it to give you impeccable performance for many years, with innovative technologies that help make life simpler – features you might not find on ordinary appliances. Please spend a few minutes reading to get the very best from it. - Page 3 installation or usage. Always keep the instructions in a safe and accessible location for future reference. 1.1 Children and vulnerable people safety This appliance can be used by children aged from 8 years • and above and persons with reduced physical, sensory or mental capabilities or lack of experience and knowledge if they have been given supervision or instruction concerning the use of the appliance in a safe way and understand the...
-
Page 4: Safety Instructions
CAUTION: The cooking process has to be supervised. A • short term cooking process has to be supervised continuously. WARNING: Danger of fire: Do not store items on the • cooking surfaces. Metallic objects such as knives, forks, spoons and lids •... - Page 5 • Seal the cut surfaces with a sealant to • Make sure not to cause damage to the prevent moisture from causing swelling. mains plug (if applicable) or to the mains • Protect the bottom of the appliance from cable. Contact our Authorised Service steam and moisture.
- Page 6 2.4 Care and cleaning from the power supply. This to prevent an electrical shock. • Clean the appliance regularly to prevent • Users with a pacemaker must keep a the deterioration of the surface material. distance of minimum 30 cm from the •...
-
Page 7: Installation
Contact an Authorised Service Centre. The connection cable may only be Find the video tutorial "How to install your replaced by a qualified electrician. AEG Induction Hob - Worktop installation" by typing out the full name indicated in the 3.4 Assembly graphic below. -
Page 8: Product Description
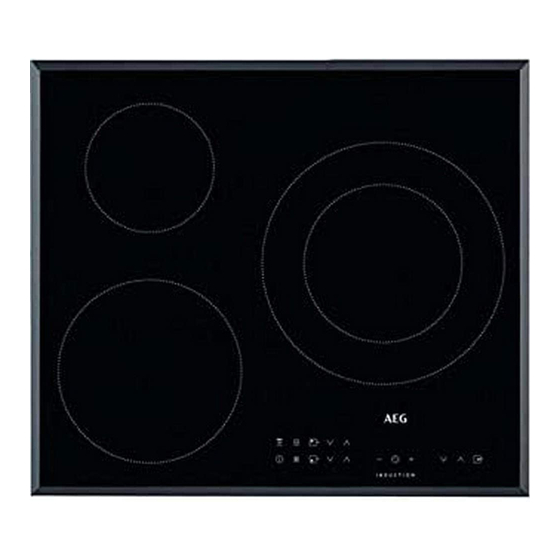
4. PRODUCT DESCRIPTION 4.1 Cooking surface layout Induction cooking zone Control panel 145 mm 180/280 210 mm 4.2 Control panel layout Use the sensor fields to operate the appliance. The displays, indicators and sounds tell which functions operate. Sensor Function Comment field ON / OFF... - Page 9 Sensor Function Comment field Outer ring indicator To show that the outer ring is active. To select the cooking zone. To increase or decrease the time. To set a heat setting. PowerBoost To activate the function. 4.3 Heat setting displays Display Description The cooking zone is deactivated.
-
Page 10: Daily Use
• when the hob is deactivated but the The indicator disappears when the cooking cooking zone is still hot. zone has cooled down. 5. DAILY USE 5.3 The heat setting WARNING! Refer to Safety chapters. Touch to increase the heat setting. Touch to decrease the heat setting. - Page 11 5.6 PowerBoost with a double ring To stop the sound: touch cooking zone To deactivate the function: touch The function is activated for the inner ring then touch . The remaining time counts when the hob detects a pot with a diameter down to 00.
- Page 12 selected heat setting and the reduced for 4 seconds. comes on. Deactivate heat setting. the hob with • Wait until the display stops flashing or reduce the heat setting of the cooking To override the function for only one zone selected last. The cooking zones will cooking time: activate the hob with continue operating with the reduced heat comes on.
-
Page 13: Hints And Tips
Operating the fan speed manually You can also operate the function manually. Automat‐ Boiling 1) Frying 2) ic light To do that touch when the hob is active. This deactivates automatic operation of the Mode H6 Fan speed Fan speed function and allows you to change the fan speed manually. - Page 14 6.2 The noises during operation • correct: cast iron, steel, enamelled steel, stainless steel, multi-layer bottom (with a If you can hear: correct marking from a manufacturer). • not correct: aluminium, copper, brass, • crack noise: cookware is made of different glass, ceramic, porcelain.
-
Page 15: Care And Cleaning
• Do not interrupt the signal between the work with this function refer to our consumer hob and the hood (e.g. with the hand, a website. The AEG cooker hoods that work cookware handle or a tall pot). See the with this function must have the symbol picture. -
Page 16: Troubleshooting
7.2 Cleaning the hob stains, shiny metallic discoloration. Clean the hob with a moist cloth and a non- • Remove immediately: melted plastic, abrasive detergent. After cleaning, wipe plastic foil, sugar and food with sugar, the hob dry with a soft cloth. otherwise, the dirt can cause damage to •... -
Page 17: Technical Data
Centres are in the guarantee booklet. corner of the glass surface) and an error 9. TECHNICAL DATA 9.1 Rating plate Model IKB63302FB PNC 949 597 414 00 Typ 61 B3A 02 AA 220 - 240 V 50 - 60 Hz... -
Page 18: Energy Efficiency
It changes with the material and dimensions of the cookware. 10. ENERGY EFFICIENCY 10.1 Product information* Model identification IKB63302FB Type of hob Built-In Hob Number of cooking zones Heating technology Induction Diameter of circular cooking zones (Ø) -
Page 19: Environmental Concerns
• Put the smaller cookware on the smaller • Use the residual heat to keep the food cooking zones. warm or to melt it. • Put the cookware directly in the centre of the cooking zone. 11. ENVIRONMENTAL CONCERNS appliances marked with the symbol with Recycle materials with the symbol . - Page 20 www.aeg.com/shop...


