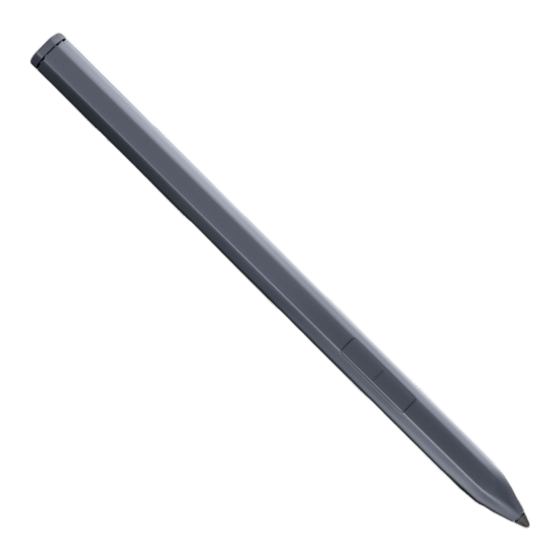
Summary of Contents for Dell XPS Stylus
- Page 1 XPS Stylus User’s Guide Regulatory Model: PN9315A Regulatory Type: PN9315A001 July 2022 Rev. A00...
- Page 2 A WARNING indicates a potential for property damage, personal injury, or death. © 2022 Dell Inc. or its subsidiaries. All rights reserved. Dell Technologies, Dell, and other trademarks are trademarks of Dell Inc. or its subsidiaries. Other trademarks may be trademarks of their respective owners.
-
Page 3: Table Of Contents
Contents Chapter 1: What’s in the box......................4 Chapter 2: Views and features of your XPS Stylus.................6 Chapter 3: Setting up your XPS Stylus..................8 Connecting your XPS Stylus for the first time......................8 Charging your XPS Stylus..............................9 Pairing your XPS Stylus manually...........................10 Chapter 4: Using your XPS Stylus.................... -
Page 4: Chapter 1: What's In The Box
3. Pen nib 4. Documentation (Quick Start Guide, Safety, Environmental, and Regulatory Information) NOTE: The XPS Stylus is specifically designed for use with selected XPS computers. For a list of supported devices, search for XPS Stylus at www.dell.com. NOTE: For your warranty records, either retain the box or note the PPID number located on the rear of the box. - Page 5 What’s in the box...
-
Page 6: Chapter 2: Views And Features Of Your Xps Stylus
XPS Stylus with Tile. Top button Press and hold this button for three seconds to pair your XPS Stylus with your computer. After pairing is complete: ● Press this button once to launch the Pen settings menu on your computer. - Page 7 Table 1. Features and functionality of your XPS Stylus (continued) Feature Functionality Table 2. LED colour and status of your XPS Stylus LED color Status Blinking blue Pairing in progress. Solid blue Pairing with the computer is successful. Blinking white Firmware upgrade is in progress.
-
Page 8: Chapter 3: Setting Up Your Xps Stylus
Setting up your XPS Stylus Connecting your XPS Stylus for the first time 1. Place the flat side of the XPS Stylus on the top of the computer, where the charging area is located—the pen nib can face either the left or the right. -
Page 9: Charging Your Xps Stylus
Charging your XPS Stylus 1. Place the flat side of the XPS Stylus on the top of the computer, where the charging area is located—the pen nib can face either the left or the right. 2. During charging, the LED indicator on the XPS Stylus remains solid white. An onscreen message appears showing the percentage charged. -
Page 10: Pairing Your Xps Stylus Manually
If your XPS Stylus is not listed, ensure that the pairing mode is enabled on the pen as instructed in Step 1. The LED indicator on the XPS Stylus turns solid blue for few seconds to indicate that the pairing is complete and then turns off. -
Page 11: Chapter 4: Using Your Xps Stylus
For more information on using DPeM, search in the Knowledge Base Resource at www.dell.com/support. Replacing the pen nib When the pen nib on your XPS Stylus is worn out or damaged, replace the pen nib using the nib remover as shown in the following image. -
Page 12: Finding Your Xps Stylus With Tile
Finding your XPS Stylus with Tile The XPS Stylus is compatible with the Tile app which helps you to find your pen if you misplace it. Install the Tile app on your device and connect the app connect to your XPS Stylus using Bluetooth technology. For installation and usage instructions about the Tile app, see https://www.thetileapp.com/. -
Page 13: Chapter 5: Specifications
Specifications Table 3. Specifications of your XPS Stylus Model XPS Stylus PN9315A Dimensions and weight Length 157 mm (6.10 in.) Diameter 9.80 mm (0.38 in.) Weight 15 g (0.033 lb) Wireless Bluetooth Smart Low Energy 5.0 Wireless operating range 10 m (32.80 ft) Wireless protocol AES 1.0/ 2.0... -
Page 14: Chapter 6: Troubleshooting
Troubleshooting NOTE: You can only use your XPS Stylus with selected XPS computers. For a list of supported devices, search for XPS Stylus at www.dell.com. Table 4. List of keyboard shortcuts Problems Possible causes Possible solutions The pen does not work, or the LED The computer is unsupported. - Page 15 Ensure to your computer supports the computer from standby when you standby feature. connected standby feature. For a list press and hold the top button or of supported devices, search for XPS when you press the top button Stylus at www.dell.com. twice. Troubleshooting...
-
Page 16: Chapter 7: Statutory Information
Dell may also provide an additional hardware warranty—full details of the Dell end user contract and warranty terms can be found by going to www.dell.com, selecting your country from the list at the bottom of the “home” page and then clicking the “terms and conditions”... -
Page 17: Chapter 8: Regulatory Information
FCC notices (U.S. only) and other regulatory information For FCC notices and other regulatory information, see the regulatory compliance website located at www.dell.com/ regulatory_compliance. This device complies with Part 15 of the FCC Rules. Operation is subject to the following two conditions: 1. -
Page 18: Chapter 9: Getting Help And Contacting Dell
Getting help and contacting Dell Self-help resources You can get information and help on Dell products and services using these self-help resources: Table 5. Self-help resources Self-help resources Resource location Information about Dell products and services www.dell.com My Dell app...


