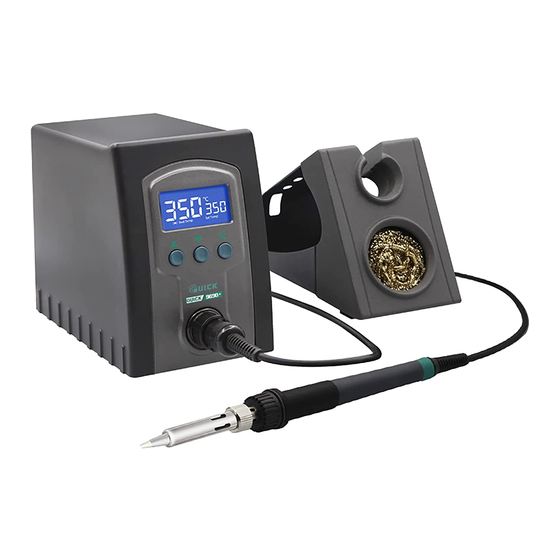
Summary of Contents for Quick 969D+
- Page 1 QUICK 969D+ Lead Free Soldering Station Instruction Manual Thank you for purchasing our products. Please keep the instructions properly for future reference.
-
Page 2: Table Of Contents
Contents 1. Safety Instruction......................1 2. Product Overview......................1 3. Product Features......................2 4. Product Specifications....................2 5. Display and Function Descriptions................3 5.1 Part descriptions....................3 5.2 Button function descriptions................3 5.3 LCD display descriptions................4 6. Installation and Connection..................4 6.1 Connection......................4 6.2Dimensions......................5 7. - Page 3 12. Tip Maintenance......................9 13. Soldering Station Heater Replacement.............. 10 13.1 Steps of removing the heater..............10 13.2 Steps of replacing the heater..............10 14. Fault Descriptions....................11 15. Tip Type........................12...
-
Page 4: Safety Instruction
1. Safety Instruction CAUTION During the installation and use of the product, you need to observe the electrical safety regulation of location. Please power off the product during disassembly. If the product is not working properly, please contact the supplier or manufacture, do not disassemble or modify without notice. -
Page 5: Product Features
3. Product Features Temperature rises and recovers rapidly, suitable for lead free soldering. LCD display, use the button to adjust the temperature and temperature Calibration flexible and convenient. Various types of the tips available, easy operation and long service life. ... -
Page 6: Display And Function Descriptions
5. Display and Function Descriptions 5.1 Part descriptions Part Name Soldering station Iron stand Handle holder power switch 5.2 Button function descriptions Button Descriptions In the Main menu,Press button once to increase 1℃,press and ▲ hold it to continuously increase. In the Main menu,Press▲... -
Page 7: Lcd Display Descriptions
5.3 LCD display descriptions Icon Descriptions heating state turn on:Shows the buzzer is open turn off:Shows the buzzer is close Real Temp Set Temp 6. Installation and Connection 6.1 Connection 1) Connect the 5-pin plug into station, and make sure the pin in the plug must match the groove in the connection socket.Place the soldering iron handle in the iron holder. -
Page 8: Dimensions
6.2Dimensions Unit: mm 7. soldering station setting 7.1 Raise temperature and reduce temperature 1)Press “▲”or“▲” button, the temperature will rise or drop. 2)Press “▲” or “ ▲” button once to rise or drop 1℃, press and hold it to continuously rise or drop. -
Page 9: Password Setting
2) After selecting the temperature point, press"▲" or "▼" to set the temperature of the temperature point. To save the setting temperature of the temperature point, hold down the “*” key until " " is displayed in the window. 3) Temperature cannot be set in password locking state, but the three temperatures can be selected freely. -
Page 10: Parameter Setting
3)If the inputting password is wrong for the first time, it comes into the password-inputting interface again and the window displays“---” . Input the password again as the step 2. 4)If the inputting passwords both are wrong, the window displays “Err”. It cannot come into the parameter setting and return to the work state directly. -
Page 11: Temperature Calibration
second password. The method of setting the password for the second time is the same as the method of setting the password for the first time. After entering the password for the second time, click *. 3)If the inputting passwords are not same with each other, it will return to the working state directly, which means the password setting is not successfully. -
Page 12: Tip Maintenance
Repeat the above steps if there’s any difference between the thermometer and soldering station. Note: It is recommended to use QUICK 191/192 series temperature tester to measure tip temperature. 12. Tip Maintenance 1) When a new tip is used for the first time, set 250 to 280°C to protect the tip with solder. -
Page 13: Soldering Station Heater Replacement
soldering. 13. Soldering Station Heater Replacement 13.1 Steps of removing the heater 1) Pull out the ①Soldering tip and screw down the ⑤Nipple. 2) Pull out the ⑥Heater from the ⑪Handle body. 3) Pull out the ⑩Wire clamp from the ⑨Plastic part upward. 4) Unplug the three leads plugged into the heater pin. -
Page 14: Fault Descriptions
4) Screw on ⑤Nipple and Install ①Soldering tip. 5) Put ② Tip enclosure and ③ Nut on ⑤Nipple and screw them tightly. 6) After replacing the heater, the following measurements are recommended: 7)After the replacement of the heater, it is recommended to calibrate temperature, refer to 11temperature calibration 14. -
Page 15: Tip Type
15. Tip Type...


