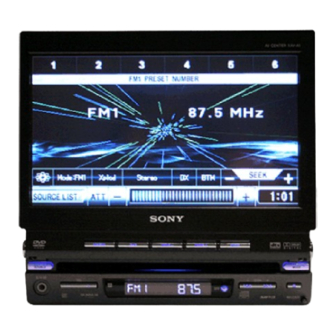
Summary of Contents for Sony XAV-A1
- Page 1 2-597-872-44(1) AV Center 多媒體影音中心 Installation/connections Notice to dealers and installers Please return this manual to the customer after the installation is completed. XAV-A1 XAV-C1 © 2005 Sony Corporation...
-
Page 2: Precautions
If you are in any doubt about the safe installation of this unit, please consult your nearest Sony dealer. Do not install in locations which interfere with airbag operation Otherwise there is a risk of accidents and injury. -
Page 3: Table Of Contents
Table of Contents Precautions ...................... 2 Parts List ......................4 Connection Example ..................5 Connecting Information ................. 6 Connecting the cords ......................6 Using the tap ........................6 1 Car Systems Connections ................. 7 Connecting without optional TV tuner unit ..............9 Connecting with optional TV tuner unit .............. -
Page 4: Parts List
Parts List The numbers in the list are keyed to those in the instructions. ×4 ×4 ×4 ×2 ×2 CAUTION Handle the bracket 8 carefully to avoid injuring your fingers. -
Page 5: Connection Example
Connection Example For details, see the section “1 Car Systems Connections” (pages 7 - 10). Be sure to refer also to the documentation for all other components in the system. System configuration AV Center XAV-A1 XAV-C1 Game (optional) Walkman or... -
Page 6: Connecting Information
Connecting the parking cord The mounting position of the parking brake switch cord depends on your car. Refer to the system connection illustrations below and consult your car dealer or your nearest Sony dealer for further details. Foot brake type... -
Page 7: Car Systems Connections
1 Car Systems Connections Refer also to the documentation for all other components in the system. Also see “Connecting Information” on page 6. • Components listed here except for supplied accessories are available separately. When connecting such components, be sure to also refer to their documentation. For specifications and other information on separately available components, contact your dealer. - Page 8 Notes on speaker connection • Before connecting the speakers, turn the unit off. • Use speakers with an impedance of 4 to 8 ohms, and with adequate power handling capacities to avoid its damage. • Do not connect the speaker terminals to the car chassis, or connect the terminals of the right speakers with those of the left speaker.
-
Page 9: Connecting Without Optional Tv Tuner Unit
Connecting without optional TV tuner unit RCA interconnects (optional) Active subwoofer (optional) SUB OUT (MONO) RCA interconnects (optional) Rear speakers This terminal is not (optional) used in this case. REAR L/R Amplifiers RCA interconnects (optional) (optional) To the optional back camera or Front speakers a video AUX 3... -
Page 10: Connecting With Optional Tv Tuner Unit
Connecting with optional TV tuner unit Film antenna Antenna cord Tuner To the +12 V power amplifier terminal which is unit energized in the accessory position of the ignition key switch. Be sure to connect the black ground lead first. TV tuner unit XT-V70 (optional) -
Page 11: Installing The Main Unit
2 Installing the Main Unit Installation angle After all connections are made, install the main unit to the The unit should be installed within an dashboard. angle of 30 degrees from horizontal. If this angle is exceeded, the monitor may Before installation not open up or retract properly. -
Page 12: Installation Procedure
Installation procedure Mounting example When installing this unit, be sure to close the monitor of the unit. If the monitor is opened while installing and given too much force, it may cause a malfunction. 1 8 2 5 3 m Claws Dashboard Fire wall... - Page 13 Align the brackets of the factory-installed car stereo with the mounting holes marked “T” on the side of the main unit, and use the supplied screws to fasten the brackets. For Toyota cars, the supplied screws 5 should be used. XAV-A1 XAV-C1 Bracket of factory-installed...
-
Page 14: After Installation And Connections
3 After Installation and Connections Start the car’s engine. Verify that the brake lights, other lights, horn, turn indicators, and all other electrical parts operate normally. Note Use a mechanical-pencil or similar to push the Reset To avoid the possibility of damage, you button on the unit. - Page 16 • • • • • • •...
- Page 18 ×4 ×4 ×4 ×2 ×2...
- Page 19 多媒體影音中心XAV-A1 XAV-C1 • •...
- Page 20 • •...
- Page 21 • • • • • • • • • • • • •...
- Page 22 • • • • • • • •...
- Page 23 SUB OUT (MONO) REAR L/R AUX 3 FRONT L/R AUX 2 REAR MONITOR OUT...
- Page 24 AUX 3...
- Page 25 • • • • N T/N T/N T/N • • •...
- Page 26 1 8 2 5 3 m...
- Page 27 • • • 5 mm 6 mm...
- Page 32 2RR6P12A22803B Sony Corporation Printed in Japan...


