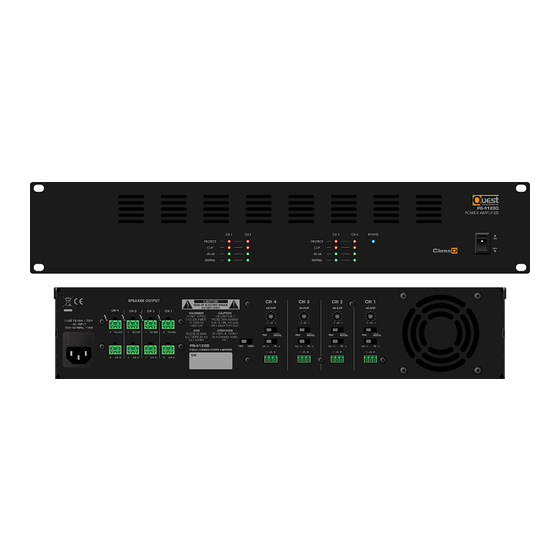
Summary of Contents for Quest Engineering PB-4120D
- Page 1 POWER AMPLIFIER MODEL: PB-4120D / PB-4300D Specifications are subject to change without notice...
- Page 2 IMPORTANT SAFETY INSTRUCTIONS The apparatus has been damaged in any way, such as power supply Read these instructions - All the safety and operating instructions should be cord or plug is damaged, liquid has been spilled or objects have fallen read before this product is operated.
-
Page 3: Table Of Contents
Table of Contents Introduction Features Controls Setup Connections 10-12 Specifications 21000 Transcanadienne Baie d’Urfé, Québec, H9X 4B7 Phone: 1-877-374-5266 Fax: 888-918-2244 www.eriksoncommercial.com Copyright © 2024 Exertis | Jam. All rights reserved – 3 –... -
Page 4: Introduction
Both models are identical physically and in features. They differ only in the power output: 4 x 120W for the PB-4120D and 4 x 300W for the PB-4300D. The amplifiers can drive either low-impedance loudspeakers directly (4-8 ohms) or 70/100V line loudspeaker distribution system, each channel can be configured independently for 4-8 ohms or 70/100V operation, allowing for mixed use. -
Page 5: Features
Features The PB-4120D and PB-4300D power amplifiers are complete have been developed using the latest technology in Class D power amplifier design. Here are some of their main features: • The amplifiers deliver either 120W or 300W of clean power per channel at 70/100V and 4 Ohms •... -
Page 6: Controls
Controls FRONT PANEL [Figure 1.1 Front panel layout] 1. Protection LED - This goes on for approximately one second, whenever the amplifier is powered on and then turns off. The Protection LED will also light when overheating or other severe problems occur. It is normal for the Protection LED to fade slowly when the amp is powered off. - Page 7 REAR PANEL [Figure 1.2 Rear panel diagram] 1. AC input - Connect the supplied heavy-gauge 3-pin “IEC” power cable here. 2. Input connectors - Connect incoming signals to these electronically balanced connectors. We recommend the use of balanced three-conductor cabling wherever possible (unbalanced two- conductor signals can also be inserted into these inputs, but you’ll get better signal quality and less outside noise and hum if you use balanced lines).
-
Page 8: Setup
Setup Installation CAUTION: Before you begin, make sure your mixer amplifier is unplugged from the power source, and the power switch is in the "OFF" position. Location: Take the unit out of its packaging (keep it for any return to the workshop). The PB-Series amplifiers can be installed in a standard 19”... - Page 9 A simple way to represent a constant voltage is to divide the power in Watts of the amplifier by the number of loudspeakers used. For example, to connect ten loudspeakers to one of the output channels of a PB-4120D amplifier, use a loudspeaker whose transformer provides a tap point of 10 watts maximum.
-
Page 10: Connections
(either constant voltage 70/100V, or low impedance 4/8 ohms) of both options at a time. Output voltage, impedance and maximum power load for each model. Model Output voltage Impedance Power per channel 40.8 Ohm PB-4120D 120W 100V 83.3 Ohm 16.3 Ohm PB-4300D 300W 100V 33.3 Ohm... - Page 11 For 70/100V operation, connect the speaker's positive input to the 70/100V terminal, and the negative input to the 0 (ground) terminal. Then connect the other speakers one after the other in parallel. [Figure 2.4 Constant voltage speaker connection] The following diagrams illustrate various wiring setups for 4/8 ohm and 70 Volt operation. 8 Ohm Operation 4 Ohm Operation (One 8 Ohm speaker per channel)
- Page 12 70 Volt Operation (Four speakers per channel with their line transformer tap set to 25 watt – For PB-4120D) (Four speakers per channel with their line transformer tap set to 65 watt – For PB-4300D) [Figure 2.6 Connection example, 70/100V operation]...
-
Page 13: Specifications
Specifications: Performance Model Number PB-4120D PB-4300D 120W x4 (70/100V) 300W x4 (70/100V Rated Power (1kHz, 1%THD+N ) 60W x4 (8Ω) 150W x4 (8Ω) 120W x4 (4Ω) 300W x4 (4Ω) 4Ω, 100V (83.3 Ω) 4Ω, 100V (33.3 Ω) Output Impedance or 70V (40.8 Ω) or 70V (16.3 Ω) - Page 14 Notes: – 14 –...
- Page 15 Notes: – 15 –...
- Page 16 21000 Transcanadienne Baie d’Urfé, Québec, H9X 4B7 Phone: 1-877-374-5266 Fax: 888-918-2244 www.eriksoncommercial.com Copyright © 2022 Exertis | Jam. All rights reserved...


