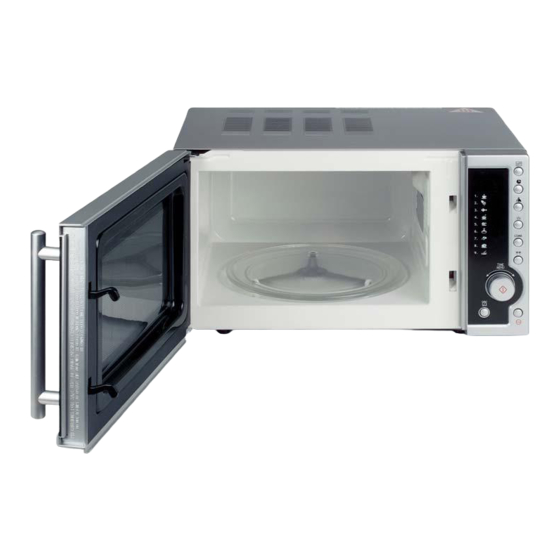
Summary of Contents for Silvercrest KH 1168
- Page 1 Microwave KH 1168 Microwave Operating instructions KOMPERNASS GMBH · BURGSTRASSE 21 · D-44867 BOCHUM www.kompernass.com ID-Nr.: KH1168-06/09-V3...
- Page 2 KH 1168...
-
Page 3: Table Of Contents
INDEX PAGE Intended Usage Safety instructions Items supplied Technical Data Before you begin Basic principles of microwave cookery ......... .6 Use suitable cookware . -
Page 4: Intended Usage
MICROWAVE KH1168 • Do not jam anything between the front of the appliance and the door, and make sure that there is no residual food or cleaning agent Intended Usage on the seals. Risk of injury! This appliance is intended for the heating up and preparation of foodstuffs according to the described •... - Page 5 • Never touch the microwave oven door, housing, • Before consumption, check the temperature, so ventilation openings, accessories or the dinnerware as to avoid a potentially life threatening scalding directly after the grill, combi or automatic menu for babies. process. The parts will be very hot. Allow them Cooking utensils may become hot from the heat to cool down before cleaning them.
- Page 6 Danger • Clean the microwave oven thoroughly after warming up greasy foods, especially if they were not covered. • Never submerse the appliance, the power cable Allow the appliance to cool down completely or the plug in water or other fluids. before cleaning it.
-
Page 7: Items Supplied
• Plug the microwave into another wall socket. • Eggs in their shells and hard boiled eggs should The microwave and the receiver should be not be heated in the microwave oven as they could explode, even on completion of the heating connected to different circuits. -
Page 8: Before You Begin
Before you begin • We recommend the use of round/oval cookware instead of square or oblong containers, as food in corner areas tends to overcook. Basic principles of microwave cookery The following list provides general hints to assist • Arrange the food with consideration. you in selecting the correct cookware. -
Page 9: Description Of The Appliance
Description of the appliance • Ensure that the electrical plug is accessible without problem, so that in case of danger it 1 Display can be easily reached and removed. 2 Programme overview • Do not remove the pads underneath the micro 3 Glass plate wave oven. -
Page 10: Inserting Accessories
Operation Without foodstuffs or accessories (Glass plate 3 and grill stand z), switch the appliance on in the mode Grill: Setting the Clock • Press the button Grill once 0 When you take the microwave oven into use for the With this you select the Grill operation. -
Page 11: Child Protection System
Heating and cooking The cooking timer progresses further in the background. If you wish to check the progress of the kitchen timer, Microwave operation press the kitchentimer button r It appears for a brief period in the kitchen timer. Notice As soon as the programmed time has expired, an extended acoustic signal sounds. -
Page 12: Grill Operation
The increments for setting the time with the control Should you wish to cook for longer than 30 seconds, dial e are as follows: repeatedly press the button Start/Quick start e • from 10 sec. to 5 min: in 10 second increments until the desired time is reached. -
Page 13: Auto Menu
Starting the Auto-menu Combination 1 In Combination 1 the microwave element amounts Turn the Control dial e slowly to the right. In the display 1 appears a number (e.g. "3" to 30% and the grill element amounts to 70% of the cooking time. -
Page 14: Programmes In Detail
Notice • Turn the foodstuff. Proceed cautiously with the To avoid sudden simmering: possibly already hot food. • If possible, place a glass rod in the fluid for as • Press the button Start/Quick start e long as it is being heated. continue the cooking process. -
Page 15: Defrosting
• Cover the container. After this, you can start the Programmme 8: Roasting auto menu for rice. This programme runs over several cooking stages, using microwave power and the grill function. Programmme 5: Chicken Subject to the weight programmed in, this programme This programme runs over several cooking stages, runs for between 16 and 60 minutes. -
Page 16: Presetting The Start Time
Using the control dial e enter in the weight of Press the clock button 8 . In the display the foodstuff to be defrosted. You can enter in 1 the current time display blinks and the hour a weight of between 100 g and 1800 g. glass symbol appears. -
Page 17: Troubleshooting
• Regularly remove splashes or contaminants. The Glass plate 3 generates loud noise when Clean the door 4, both sides of the viewing revolving. The Glass plate 3 is not positioned correctly window, the door seals and adjacent components • on the star roller. -
Page 18: Warranty And Service
Warranty and Service You receive a 3-year warranty for this device as of the purchase date. This appliance has been manu- factured with care and meticulously examined before delivery. Please retain your receipt as proof of purchase. In the case of a warranty claim, please make contact by telephone with our service department.


