Table of Contents
Advertisement
Quick Links
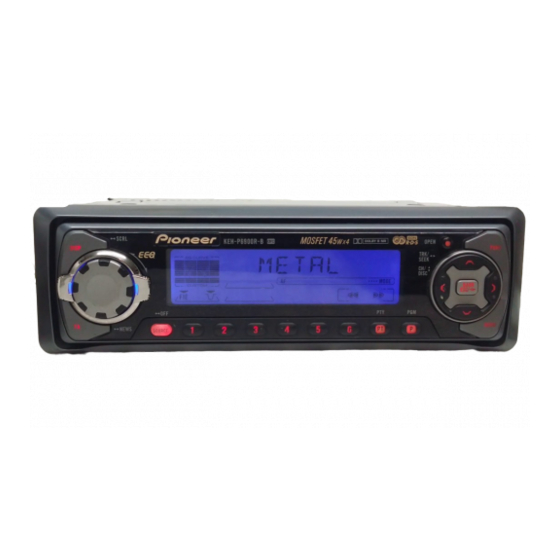
KEH-P6900R
KEH-P6900R-B
This product conforms to new cord colors.
Los colores de los cables de este producto se confor-
man con un nuevo código de colores.
Dieses Produkt entspricht den neuen kabelfarben.
Le code de couleur des câbles utilisé pour ce produit est
nouveau.
Questo prodotto è conforme ai nuovi codici colori.
De kleuren van de snoeren van dit toestel zijn gewijzigd.
Printed in Thailand
Imprimé en Thaïlande
<CRD3109-A/N> EW
<99I00F0P01>
5
30°
Fig. 1
Fig. 3
Abb. 1
Abb. 3
Afb. 1
Afb. 3
2
1
6
182
53
3
4
Fig. 2
Fig. 4
Abb. 2
Abb. 4
Afb. 2
Afb. 4
Installation
<ENGLISH>
Note:
Removing the Unit (Fig. 3) (Fig. 4)
•
Before finally installing the unit, connect the
5. Frame
wiring temporarily, making sure it is all connect-
ed up properly, and the unit and the system work
Pull out to remove the frame. (When reattaching
properly.
the frame, point the side with a groove down-
wards and attach it.)
•
Use only the parts included with the unit to
ensure proper installation. The use of unautho-
6. Insert the supplied extraction keys into the unit,
rized parts can cause malfunctions.
as shown in the figure, until they click into place.
Keeping the keys pressed against the sides of the
•
Consult with your nearest dealer if installation
unit, pull the unit out.
requires the drilling of holes or other modifica-
tions of the vehicle.
•
Install the unit where it does not get in the dri-
ver's way and cannot injure the passenger if there
is a sudden stop, like an emergency stop.
•
If installation angle exceeds 30° from horizontal,
the unit might not give its optimum performance.
(Fig. 1)
Installation with the rubber bush
(Fig. 2)
1. Dashboard
2. Holder
After inserting the holder into the dashboard,
then select the appropriate tabs according to the
thickness of the dashboard material and bend
them.
(Install as firmly as possible using the top and
bottom tabs. To secure, bend the tabs 90
degrees.)
3. Rubber bush
4. Screw
Instalación
<ESPAÑOL>
Nota:
Quitado de la unidad (Fig. 3) (Fig. 4)
•
Antes de finalmente instalar la unidad, conecte el
5. Marco
cableado temporalmente y asegúrese de que todo
esté conectado correctamente y que la unidad y
Tire hacia afuera para extraer el marco. (Para la
el sistema funcionan debidamente.
fijación del marco, apunte el lado con ranura
hacia abajo.)
•
Utilice sólo las piezas que se incluyen con esta
unidad para asegurar la instalación adecuada. El
6. Inserte las herramientas de extracción suminis-
uso de piezas no autorizadas podría causar fallos
tradas en la unidad, como se indica en la figura,
de funcionamiento.
hasta que se enganchen en su positión.
•
Consulte con su distribuidor si la instalación
Tire de la unidad mientras mantiene las her-
requiere del taladro de orificios u otras modifica-
ramientas presionadas contra los lados de la
ciones del vehículo.
unidad.
•
Instale la unidad donde no alcance el espacio del
conductor, y donde no pueda dañar a los
pasajeros si sucediera un paro repentino, como
una detención de emergencia.
•
Si el ángulo de la instalación excede los 30° del
lado horizontal, la unidad podría no brindar su
óptimo funcionamiento. (Fig. 1)
Instalación con tope de goma
(Fig. 2)
1. Tablero de instrumentos
2. Soporte
Después de insertar el soporte en la tabla de
mandos, luego seleccione las orejetas apropiadas
según el grosor del material de la tabla de man-
dos y dóblelos.
(Instale lo más firme posible usando las lengüetas
superior e inferior. Para fijar, doble las lengüetas
90 grados.)
3. Tope de goma
4. Tornillo
Advertisement
Table of Contents

Summary of Contents for Pioneer KEH-P6900R
- Page 1 30° ciones del vehículo. unidad. KEH-P6900R • Install the unit where it does not get in the dri- ver’s way and cannot injure the passenger if there •...
-
Page 2: Einbau
Einbau <DEUTSCH> Installation <FRANÇAIS> Installazione <ITALIANO> Installeren <NEDERLANDS> Hinweis: Entnahme des Gerätes Remarque: Dépose de l’únite (Fig. 3) (Fig. 4) Nota: Estrazione dell’unità (Fig. 3) (Fig. 4) Opmerking: Verwijderen van het apparaat • Schließen Sie vor dem Einbau die Leitungen •... - Page 3 13. Yellow/black If you use a cellular telephone, connect it via the Audio Mute lead on the cellular telephone. If 1. Refer to “Connection in a car not featuring an ISO Connector.” not, keep the Audio Mute lead free of any connections.
-
Page 4: Connecting The Units
Connecting the Units <ENGLISH> Note: Connection in a car featuring an Connection in a car not featuring • This unit is for vehicles with a 12-volt battery • When this product’s source is switched ON, a an ISO Connector (Fig. 7) ISO Connector (Fig. - Page 5 13. Yellow/black If you use a cellular telephone, connect it via the Audio Mute lead on the cellular telephone. If 1. Refer to “Connection in a car not featuring an ISO Connector.” not, keep the Audio Mute lead free of any connections.
-
Page 6: Conexión De Las Unidades
Conexión de las unidades Anschließen der Geräte <ESPAÑOL> <DEUTSCH> Nota: • Cuando se conecta la fuente de este producto, una Conexión en un automóvil con Conexión en un automóvil sin Hinweis: Anschluß bei einem Wagen mit Anschluß bei einem Wagen ohne •... -
Page 7: Connexion Des Appareils
Connexion des appareils <FRANÇAIS> Collegamento degli apparecchio <ITALIANO> Remarque: Raccordement dans un véhicule Raccordement dans un véhicule ne Nota: Collegamento in un’automobile Collegamento in un’automobile • Cet appareil est destiné aux véhicules avec une bat- • Questo apparecchio è per veicoli con una batteria da •... -
Page 8: Aansluiten Van De Apparatuur
Aansluiten van de apparatuur <NEDERLANDS> Opmerking: Verbinden in een auto die een ISO Verbinden in een auto zonder ISO • Dit apparaat is bestemd voor inbouw in voertuigen • Als u met dit apparaat een externe eindversterker aansluiting heeft (Afb. 5) aansluiting (Afb.


