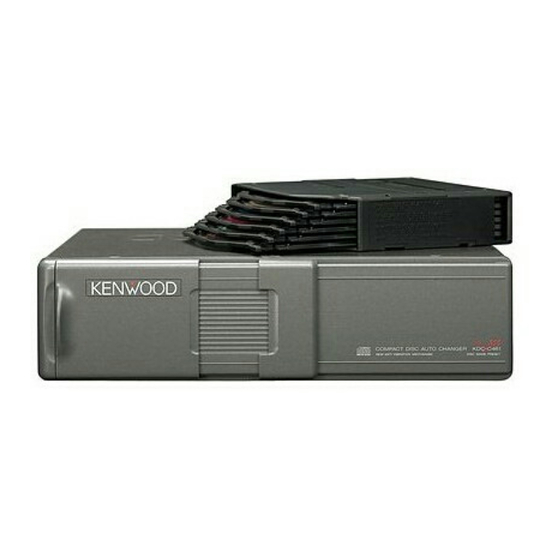
Kenwood KDC-C461 Instruction Manual
Kenwood compact disc auto changer instruction manual
Hide thumbs
Also See for KDC-C461:
- Instruction manual (16 pages) ,
- Instruction manual (16 pages) ,
- Instruction manual (18 pages)
Table of Contents

Summary of Contents for Kenwood KDC-C461
- Page 1 KDC-C461 COMPACT DISC AUTO CHANGER INSTRUCTION MANUAL CHANGEUR AUTOMATIQUE DE DISQUES COMPACTS MODE D’EMPLOI CAMBIADOR AUTOMATICO DE DISCOS COMPACTOS MANUAL DE INSTRUCCIONES ©PRINTED IN JAPAN B64-1118-00 (E2) (MC) ‘99/2 1 ‘98/12 11 10 9 8 7 6 5 4 3 2 1...
-
Page 2: Laser Product
Warning The marking of products using lasers (Except for some areas) CLASS 1 LASER PRODUCT The label is attached to the chassis/case and says that the component uses laser beams that have been classified as Class 1. It means that the unit is using laser beams that are of a weaker class. There is no danger of hazardous radiation outside the unit. - Page 3 NOTE • If you have difficulty in installing this unit in your vehicle, contact your Kenwood dealer. • If it doesn't seem to be working properly, first press the Reset button. If the malfunction persists, consult your Kenwood dealer.
- Page 4 • Lors d’un dégagement d’odeur ou de fumée, éteindre immédiatement l’appareil et consulter son agent Kenwood. ATTENTION Pour maintenir l’appareil en parfait état de marche, observer les précautions suivantes. • Ne pas ouvrir le couvercle du dessus ni le couvercle du fond.
- Page 5 • Si huele u observa humo, desactive inmediatamente la unidad y consulte con su concesionario autorizado Kenwood. PRECAUCIÓN Cumpla con las precauciones siguientes para que la unidad funcione adecuadamente. • No abra la cubierta inferior o superior.
-
Page 6: Handling Compact Discs
Handling compact discs / Manipulación de discos compactos Stains, scratches, or warping can cause skipping, malfunction, or low sound quality. Take the following precautions to avoid damage to the compact discs. • Avoid touching the recorded side (the side without the titles on) when you hold a compact disc. -
Page 8: Installation
Installation / Installation Accessories / Accessories Removing the transportation screws / Comment enlever les vis de transport / Cómo remover los tornillos de transporte Transportation screws / Vis de transport / Tornillos de transporte Instalación Accesorios Remove all 3 transportation screws for protecting the internal mechanism before you start to install the unit. - Page 9 Angle adjustment switches / Conmutadores de ajuste de ángulo • The angle adjustment switches on the both side of the unit are to be set according to the angle of installation of the CD auto changer. Set both of the two switches to the same position.
- Page 10 Installation / Installation Cover the holes indicated by 3 with the dustproof seals E. (Bottom and sides) Use the holes marked to install the unit. CAUTION Do not tighten the screw B too securely at the time of installation, but tighten it securely after having fixed the bracket A.
- Page 11 Vertical installation / Installation verticale Bottom view / Vue de dessous / Vista del panel inferior Side view / Side view / Side view In case of hanging in the trunk / Lorsqu’on suspend le changeur à l’intérieur du coffre / En el caso de instalarla en el portaequipajes Bottom view / Vue de dessous /...
-
Page 12: Loading Compact Discs
Loading compact discs / Projection / Saillie / Saliente Make sure the disc magazine is the right way up with the "disc" logo on the top.Pull the tray out by the projection. Place the disc on the tray with the label facing upwards. - Page 13 de discos compactos Asegúrese de que el cartucho de discos esté debidamente orientado hacia arriba, con el logotipo "disc" hacia arriba. Extraiga la bandeja por medio del saliente. Coloque el disco en la bandeja con la etiqueta dirigida hacia arriba. Inserte la bandeja en el cartucho de discos hasta que encaje.
- Page 14 Sortie de commande du changeur automatique de CD / Salida de control de cambiador automático de discos compactos Conexiones CD auto changer control unit (optional) / Contröleur de changeur automatique de CD Kenwood (en option) / Unidad de control de cambiador automático de discos compactos Kenwood (opcional)
-
Page 15: Troubleshooting Guide
Troubleshooting guide / Guía de solución de problemas Symptom Sound skips due to vibration. When removing the CD changer be sure to remove the magazine before disconnecting the changer cable. Also note that the transport screw must be secured prior to transporting the changer. Leaving the magazine or CDs inside the changer or failing to secure the transport screw may cause breakdown of the unit. -
Page 16: Specifications
Specifications / Specifications subject to change without notice. Laser diode ...GaAlAs ( =780 nm) Digital Filter ...8 Time Over Sampling D/A Converter...1 bit Spindle speed...500 ~ 200 rpm (CLV) Wow & Flutter...Below Measurable Limit Frequency Response ( 1 dB) ...5 Hz ~ 20 kHz Total harmonic distortion (1 kHz) ...0.005 % Signal to Noise Ratio...94 dB Dynamic range ...94 dB...


