Sign In
Upload
Manuals
Brands
Fujitsu Manuals
Touch terminals
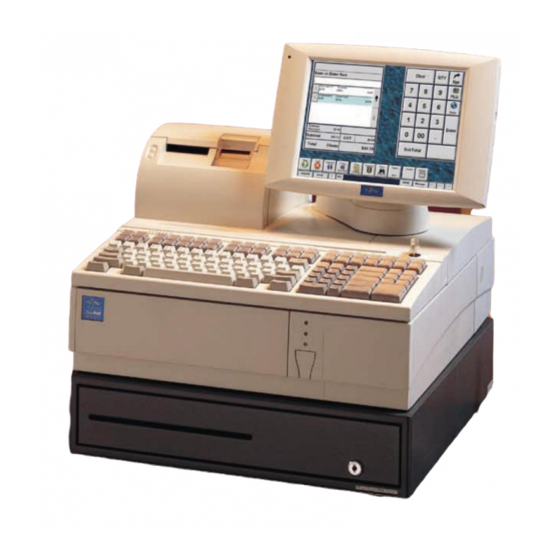
TeamPoS 2000
Fujitsu TeamPoS 2000 Refurbished Terminal Manuals
Manuals and User Guides for Fujitsu TeamPoS 2000 Refurbished Terminal. We have
1
Fujitsu TeamPoS 2000 Refurbished Terminal manual available for free PDF download: Installation And Maintenance Manual
Fujitsu TeamPoS 2000 Installation And Maintenance Manual (234 pages)
Brand:
Fujitsu
| Category:
Touch terminals
| Size: 13.21 MB
Table of Contents
Table of Contents
8
Chapter 1 Overview
17
Teampos 2000 Control Unit Flow Diagram
18
Front Panel Leds and Switches
19
Teampos 2000 Front Panel Switch and LCD Matrix
20
Intelligent Pins (Product Identification Numbers)
21
Chapter 2 - EXTERNAL VIEW and ENVIRONMENTAL
23
Specifications
23
Environmental Specifications
24
Chapter 3 DIMENSIONS
27
Standard Teampos 2000 15" LCD Stacked Configuration
27
Compact Teampos 2000 12.1" LCD Stacked Configuration Dimensions
28
Standard Teampos 2000 12.1" LCD Stacked Configuration Dimensions
28
Control Units
29
Keyboards
30
Model 133UQ Keyboard Dimensions
30
Model 104P Keyboard Dimensions
30
Model 133PQ Keyboard Dimensions
31
Basic Model 92M and 92U Keyboard Dimensions
31
Model 92M & 92U Keyboard with MSR and Display Dimensions
32
Model 92M Keyboard with Vertical Key-Lock Dimensions
32
Cash Drawers
33
Model TP10 Cash Drawer
33
MP5 Cash Drawer, Compact
33
NF5 Cash Drawer
34
Model NAF Cash Drawer
34
Displays
35
Model D15 LCD Displays (New Release)
35
LCD Bracket Mounting
36
Single Stacked D15 LCD
36
Single Stacked D15 LCD W/Customer Display
37
Single Dispersed D15 LCD
37
Single Dispersed LCD with MSR
38
Single Dispersed D15 with Keypad and MSR
38
Models D12 and A12 LCD Displays
39
LCD Bracket Mounting
40
Single Stacked LCD
41
Single Dispersed LCD with Dispersed Stand
41
Single Dispersed LCD - Alternate Mount
42
Teamkey
42
LCD with MSR (Dispersed)
43
Dual Stacked LCD
43
Other Options
44
Crts, 9
44
Crt, 14
45
VF50 & VF50U Customer Displays (Dispersed Configuration)
46
Printers
47
Model DT50/DT50II Printer
47
Model DT50II Transcan Printer
47
Model TM-T88III Printer
48
Model TM-T90 Printer
48
Model A758 & A760 Printers
49
Model A794 Printer
49
Chapter 4 SITE PREPARATION
51
Unpacking
51
Inspecting the Shipment
51
Reporting Shipment Damage
52
Returning Equipment
52
Using Anti-Static Protection
52
Preparing for Installation
52
Determining Power Requirements
53
General Requirements
53
Installation with Other Equipment
54
Mains Power Cable
55
Chapter 5 INSTALLATION
57
Cover Removal/Installation Process
57
Front Cover
57
Side Cover (Left)
58
Rear Cover
59
Top Cover
60
Installing D12 and A12 LCD Brackets
63
PCI Add-In Card(S)
66
Adding Main Memory
67
Memory Configuration
67
Accessing and Configuring
68
Retail I/O Board Pin Layout
68
Retail I/O Board Settings
69
Printer Jumpers
70
PTR (Printer) Connector Signals
71
Retail I/O Board. Ports 1 and 2 Connector Signals
72
Retail I/O Board.port 5 Connector Signals
72
DRW Connector Signals
73
Retail I/O Boardports 3, 4 & 6 Connector Signals
73
Installing the Teamcombo Board
74
Teamcombo Board Pin Layout
74
Team COMBO Board Settings
75
Teamcombo Board. Ports 1 and 2 Connector Signals
76
DRW Connector Signals
77
Teamcombo Board. Ports 3 and 4 Connector Signals
77
Teamcombo Board. USB Connectors - 4 Ports
78
Teamusb Settings
79
Teamusb Board. USB Connectors - 7 Ports
80
Teamusb Board DRW Connector Signals
81
Teamusb Board, Powered USB Connectors - 7 Ports
81
Riser Card Connectors
82
CD-ROM/CD-RW/DVD (Media Player) Installation
83
Pos Peripheral Installation
85
Model 133UQ Keyboard Unit (Programmable)
85
Model 92U Keyboard Unit (Programmable)
86
Model 133PQ Keyboard Unit (Not Programmable)
87
Model 104P Keyboard Unit (Compact Keyboard)
89
Model D15 LCD Stands
93
D15 LCD Audio Cable Connections
93
D15 LCD Cable Requirements
93
D15 LCD Video Data Cable Connections
95
D15 LCD Dual Monitor Video Cable Connections
96
D15 LCD Power and Data (Touch, MSR and Keypad) Cable Connections
97
D15 Cable Summary
101
Model D15 LCD Installation
102
Model D12 and A12 LCD Stand Option Summary
110
Models D12 and A12 LCD Installation
110
LCD Cable Requirements
111
A12/D12 Cable Summary
116
D12/A12 LCD Stand and Rotating Arm Assembly
117
Model VF50 & VF50U Integrated Customer Display with D12/A12 LCD
119
D12/A12 LCD with Teamkey Assembly
122
Models D12 and A12 LCD, 12.1" Adjustments
126
Model VF50 and VF50U Customer Display Settings
127
Cash Drawers
130
Connecting Retail I/O, Teamcombo & Teamusb Board Cables
131
Teampos 2000 with Retail I/O Board Connector Layout-A Motherboard
132
Teampos 2000 with Teamcombo Board Connector Layout-A Motherboard
133
Teampos 2000 with Teamusb Board Connector Layout
135
With a Motherboard
135
Teampos 2000 M with Teamusb Board Connector Layout
136
With M Motherboard
136
Chapter 6 GENERAL OPERATIONS
137
System Operations
137
General Care and Maintenance
137
Power on and off Sequence
138
Powering on
138
Powering off
139
Chapter 7 MAINTENANCE
141
Power on and off Sequence
141
Powering on
142
Powering off
143
PC Board Replacement
143
M Motherboard Layout
145
M Motherboard Settings
146
Picture of M Motherboard
148
A Motherboard Layout
149
A Motherboard Settings
150
Lead Acid Battery Replacement
151
Power Supply Unit Replacement
152
HDD Kit Replacement
154
FDD Unit Replacement
156
CD-ROM/CD-Read/Write/DVD (Media Player) Kit Replacement
157
Operator Panel
158
Operator Panel Layout
159
Operator Panel Settings
159
Memory (DIMM or SDRAM)
160
Chassis Fan
162
Retail I/O, Teamcombo and Teamusb Board Replacement
163
Riser Card
165
Chapter 8 BIOS Setup Procedures - M Motherboard
169
Opening CMOS Setup Screen
169
CMOS Settings
169
Main Menu - M Motherboard
170
Advanced Settings - M Motherboard
171
Configure Advanced CPU Settings - M Motherboard
172
IDE Configuration - M Motherboard
173
Primary IDE Master - M Motherboard
174
Primary IDE Slave - M Motherboard
175
Secondary IDE Master - M Motherboard
176
Floppy Configuration - M Motherboard
177
Configure Win627 Super IO Chipset - M Motherboard
178
Hardware Health Configuration - M Motherboard
179
ACPI Settings - M Motherboard
180
General ACPI Configuration - M Motherboard
181
Advanced ACPI Configuration - M Motherboard
182
Event Logging Details - M Motherboard
183
Configure Remote Access Type and Parameters - M Motherboard
184
USB Configuration - M Motherboard
185
Advanced Pci/Pnp Settings - M Motherboard
186
Boot Settings - M Motherboard
187
Boot Settings Configuration - M Motherboard
188
Boot Group Priority - M Motherboard
189
Boot Device Priority - M Motherboard
190
Hard Disk Drives - M Motherboard
191
Removable Drive - M Motherboard
192
CD ROM Drives - M Motherboard
193
Security Settings - M Motherboard
194
Advanced Chipset Settings - M Motherboard
195
Configure Advanced Settings for Northbridge - M Motherboard
196
Configure Advanced Settings for Southbridge - M Motherboard
197
Advanced SMI Enable/Resume Event Controls - M Motherboard
199
Clock Margin - M Motherboard
200
Exit Options - M Motherboard
201
BIOS Error Messages - M Motherboard
202
BIOS Reflash Instructions - M Motherboard
203
Chapter 9 BIOS SETUP PROCEDURES - a Motherboard
205
Opening CMOS Setup Screen - a Motherboard
205
CMOS Settings - a Motherboard
205
Main Menu - a Motherboard
205
Standard CMOS Setup - a Motherboard
206
BIOS Features Setup - a Motherboard
207
Chipset Features Setup- a Motherboard
208
Power Management Setup - a Motherboard
209
PNP/PCI Configuration
210
Clock and Sensor
211
Load BIOS Defaults
211
Load SETUP Defaults
211
Integrated Peripherals
213
BIOS Error Messages
214
Exit Without Saving
214
IDE HDD Auto Detection
214
Save & Exit SETUP
214
Supervisor Password
214
User Password
214
BIOS Beep Code
217
Chapter 10 SPARE and UPGRADE PARTS LIST
219
Advertisement
Advertisement
Related Products
Fujitsu TeamPoS 7000 Series
Fujitsu TeamPoS TP7000-F200
Fujitsu TeamPoS TP7000-F300
Fujitsu TeamPoS TP7000-F500
Fujitsu TP2000
Fujitsu TeamPad500 System
Fujitsu TeamPad 500
Fujitsu TE988G
Fujitsu teamserver Series
Fujitsu PRIMERGY TX200 S7
Fujitsu Categories
Air Conditioner
Laptop
Server
Scanner
Storage
More Fujitsu Manuals
Login
Sign In
OR
Sign in with Facebook
Sign in with Google
Upload manual
Upload from disk
Upload from URL