Sign In
Upload
Manuals
Brands
Hitachi Manuals
Excavators
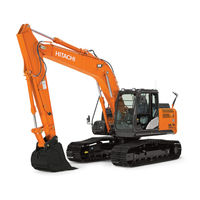
ZX160LC-6N
Hitachi ZX160LC-6N Manuals
Manuals and User Guides for Hitachi ZX160LC-6N. We have
1
Hitachi ZX160LC-6N manual available for free PDF download: Operator's Manual
Hitachi ZX160LC-6N Operator's Manual (497 pages)
Hydraulic Excavator
Brand:
Hitachi
| Category:
Excavators
| Size: 5.06 MB
Table of Contents
Table of Contents
5
Machine Numbers
12
Safety
17
Recognize Safety Information
17
Understand Signal Words
17
Follow Safety Instructions
18
Prepare for Emergencies
19
Wear Protective Clothing
19
Protect against Noise
20
Inspect Machine
20
General Precautions for the Cab
21
Use Handholds and Steps
22
Adjust the Operator's Seat
22
Ensure Safety before Rising from or Leaving Operator's Seat
23
Fasten Your Seat Belt
23
Move and Operate Machine Safely
24
Operate Only from Operator's Seat
24
Jump Starting
25
Keep Riders off Machine
25
Precautions for Operations
26
Investigate Job Site Beforehand
27
Install OPG Guard
28
Restriction of Attachment Installation
28
Provide Signals for Jobs Involving Multiple Machines
29
Confirm Direction of Machine to be Driven
29
Drive Machine Safely
30
Avoid Injury from Rollaway Accidents
32
Avoid Injury from Back-Over and Swing Accidents
33
Keep People Clear from Working Area
34
Never Position the Bucket over Anyone
34
Avoid Undercutting
35
Avoid Tipping
35
Never Undercut a High Bank
36
Dig with Caution
36
Operate with Caution
36
Avoid Power Lines
37
Precautions for Lightning
37
Object Handling
38
Protect against Flying Debris and Falling Object
39
Park Machine Safely
40
Handle Fluids Safely−Avoid Fires
40
Transport Safely
41
Practice Safe Maintenance
42
Warn Others of Service Work
43
Support Machine Properly
43
Stay Clear of Moving Parts
44
Prevent Parts from Flying
44
Avoid Injury from Attachment Falling Accident
45
Prevent Burns
45
Replace Rubber Hoses Periodically
46
Avoid High-Pressure Fluids
46
Prevent Fires
47
Evacuating in Case of Fire
49
Beware of Exhaust Fumes
49
Precautions for Welding and Grinding
50
Avoid Heating Near Pressurized Fluid Lines
51
Avoid Applying Heat to Lines Containing Flammable Fluids
51
Precautions for Handling Accumulator and Gas Damper
51
Remove Paint before Welding or Heating
52
Beware of Asbestos and Silica Dust and Other Contamination
52
Prevent Battery Explosions
53
Service Air Conditioning System Safely
53
Handle Chemical Products Safely
54
Dispose of Waste Properly
54
Never Ride Attachment
55
Notes on Aftertreatment Device
55
Precautions for Communication Terminal
55
Notes on Protection of Operator's Station When the Machine Rolls over
56
Safety Signs
57
Name of Components
65
Getting on and off the Machine
66
Operator's Station
67
About Aftertreatment Device
67
Cab Features
70
Multi Function Monitor
71
Default Setting
72
Basic Screen
73
How to Use Screens
74
Displaying Basic Screen
74
Hour Meter
77
Clock
77
Fuel Gauge
77
Def/Adblue® Gauge
78
Def/Adblue® Level Alarm
78
Coolant Temperature Gauge
79
Operating Status Icon Display
79
Security Functions (Optional)
80
Input Password
80
Extending Password Duration Time
81
Alarm Occurrence Screen
82
Remedy
84
Urea SCR System Remedy
87
Aftertreatment Device
89
Aftertreatment Device Condition Display
89
Aftertreatment Device Manual Regeneration Request
90
Manual Regeneration Procedure
91
Main Menu
92
Engine Output Restriction Suspend
93
Urea SCR System Troubleshooting
95
Air Conditioner
97
Circulation Air Mode
97
Air Conditioner ON/OFF
97
Radio
98
Work Mode
99
Attachment Selection
99
Mail (Optional)
100
Setting Menu
102
Date and Time
103
Time Adjustment
103
Date Adjustment
105
Display Mode Setting
107
Attachment Adjustment
109
Flow Rate Adjustment
109
Priority (Arm Roll-Out)
111
Priority (Arm Roll-In) (Except ZX350LC-6N, 380LC-6N)
113
Attachment Name Input
115
Auto Shut-Down
117
Auto Shut-Down: ON/OFF
117
Auto Shut-Down: Setting Time
118
Aftertreatment Device Regeneration Inhibited
119
Setting Procedure
119
Password Change (Optional)
121
Sub Meter
125
Push Selector Knob (2) While Displaying Basic Screen
125
To Display Main Menu Screen (3)
125
MDCD-01-026
125
Rear View Camera Monitor
127
Rear View Camera ON/OFF
127
Brightness Adjustment
129
Rotate Selector Knob (2) to Highlight Setting Menu
129
Language Settings
131
Lists of Display Language
133
Unit Selection
134
Display Item Selection (Rear View Camera OFF)
136
Main Menu Sequence Change
138
Information Menu
140
Operation
141
Fuel Consumption
141
Breaker Operation
143
Attachment Operation
145
Travel Operation
147
Actual Operation
149
Maintenance
151
Remaining Time and Maintenance Interval
153
Troubleshooting
155
Monitoring
157
Switch Panel
159
Return to Previous Screen Switch (Monitor)
160
Return to Basic Screen Switch (Monitor)
160
Selector Knob (Monitor)
160
Temperature Control Switch/Mode Switch (Air Conditioner)
160
AUTO/OFF Switch/Fan Switch (Air Conditioner)
160
AM/FM Selector/Tuning Switch (Radio)
161
Power Switch/Volume Control Knob (Radio)
161
Engine Control Dial
161
Auto-Idle Switch
162
Travel Mode Switch
162
Power Mode Switch
163
Work Light Switch
163
Wiper/Washer Switch
164
Numeric Keypad
165
Switch Panel (for Optional Equipments)
166
Travel Alarm Deactivation Switch (Optional)
167
Rear Light Switch (Optional)
167
Electrical Control Main Switch (Optional)
167
ON/OFF Operation Switch (Optional)
167
Key Switch
168
Power Boost Switch
168
Horn Switch
168
Electrical Control Main Switch (Optional)
169
ON/OFF Operation Switch (Optional)
170
AUX Function Lever 3
170
Cigar Lighter
171
Using Cigar Lighter
171
Cab Light Switch
172
Installing Fire Extinguisher (Optional)
172
Pilot Control Shut-Off Lever
173
Engine Stop Switch
173
Fuse Box
174
Auto Air Conditioner
175
Features
175
Name of Components
176
Controller Part Name and Function
177
Cab Heater Operation
179
Cooling Operation
180
Defroster Operation
181
Cool Head/Warm Feet Operation
181
Tips for Optimal Air Conditioner Usage
182
For Rapid Cooling
182
When Windows Become Misty
182
Off-Season Air Conditioner Maintenance
182
AM/FM Radio Operation
183
Controls on the Radio
183
Tuning Procedure
183
Station Presetting Procedure
184
Station Auto-Presetting Procedure
185
TONE Control
186
Audio Input (Optional)
187
Cab Door Release Lever
188
Opening/Closing and Removing Cab Inside Window
189
Opening Upper Front Window
190
Removing and Storing Lower Front Window
191
Opening Side Window
192
Opening/Closing Overhead Window
193
Opening/Closing Overhead Window (Clear Hatch: if Equipped)
194
Emergency Exit
195
Adjusting Operator's Seat
196
Seat Height and Angle Adjustment
196
Console and Seat Fore-Aft Adjustment
196
Seat Fore-Aft Adjustment
196
Backrest Adjustment
196
Armrest Adjustment
197
Adjusting Operator's Seat
198
Seat Height and Angle Adjustment
198
Console and Seat Fore-Aft Adjustment
198
Seat Fore-Aft Adjustment
198
Suspension Adjustment
198
Backrest Adjustment
199
Armrest Adjustment
199
Adjusting Operator's Seat (Optional)
200
Seat Height and Angle Adjustment
200
Console and Seat Fore-Aft Adjustment
200
Seat Fore-Aft Adjustment
200
Suspension Adjustment
200
Backrest Adjustment
201
Armrest Adjustment
201
Adjusting Operator's Seat (Optional)
202
Adjusting Seat Height
202
Console and Seat Fore-Aft Adjustment
202
Seat Fore-Aft Adjustment
202
Suspension Adjustment
203
Fore-Aft Position Adjustment of Seat Surface
203
Angle Adjustment of Seat Surface
203
Backrest Adjustment
203
Armrest Adjustment
203
Console Height Adjustment
204
Adjusting Procedures
204
Installation and Adjustment of Mirrors
205
Seat Belt
206
Battery Disconnect Switch
207
Switch Operation
207
Break-In
209
Observe Engine Operation Closely
209
Every 8 Hours or Daily
209
After the First 50 Hours
209
After the First 100 Hours
209
Operating the Engine
211
Inspect Machine Daily before Starting
211
Before Starting Engine
212
Starting the Engine
213
Check Instruments after Starting
219
Using Booster Batteries
220
Stopping the Engine
222
Engine Auto-Stop in Extremely Low Temperature
223
Driving the Machine
225
Travel Levers and Pedals
225
Travel Mode Switch
227
Travel Alarm (Optional)
227
Operating on Soft Ground
228
Raise One Track Using Boom and Arm
228
Towing Machine a Short Distance
229
Operating in Water or Mud
230
Parking the Machine on Slopes
231
Parking the Machine
231
Operating the Machine
233
Control Lever (ISO Pattern)
233
Pilot Control Shut-Off Lever
234
Warming-Up Operation
235
Engine Speed Control
236
Auto-Idle
237
Auto-Idle ON/OFF
238
Auto Shut-Down
239
Aftertreatment Device Manual Regeneration
242
Work Mode
244
Power Boost Switch
247
Power Mode
248
Operating Backhoe
249
Shovel
250
Grading Operation
251
Do Not Strike the Ground with Bucket Teeth
252
Avoid Hammer Work
252
Avoid Abusive Operation
253
Never Move an Object Sideways with the Bucket
253
Do Not Use Wide Track Shoes on Rough Ground
254
Shackle Hole Usage
255
Pilot Accumulator Functions
256
How to Lower Boom in Case of Emergency and When Engine Stops
257
Precautions for after Operations
258
Transporting
259
Transporting by Road
259
Loading/Unloading on a Trailer
260
Fastening Machine for Transporting
263
Unloading
263
Lifting Machine
265
Maintenance
267
Correct Maintenance and Inspection Procedures
267
Layout
269
Check the Hour Meter Regularly
270
Maintenance Guide Table
271
Preparations for Inspection and Maintenance
273
Hood and Access Covers
274
Maintenance Guide
277
Periodic Replacement of Parts
282
Kind of Oils
283
Recommended Engine Oil
283
List of Consumable Parts
286
Greasing
294
Front Joint Pins
294
Swing Bearing
296
Swing Internal Gear
297
Engine
298
Check Engine Oil Level
298
Change Engine Oil
300
Replace Engine Oil Filter
300
Check and Clean Around the Engine
303
Replace Oil Separator Element
303
Transmission
304
Pump Transmission (Except ZX130-6N)
304
Swing Reduction Gear
305
Travel Reduction Gear
306
Hydraulic System
308
Inspection and Maintenance of Hydraulic Equipment
308
Check Hydraulic Oil Level
312
Change Hydraulic Oil
313
Bleed Air from the Hydraulic System
315
Suction Filter Cleaning
316
Replace Full-Flow Filter
317
Replace Pilot Oil Filter
318
Replace Air Breather Element
319
Check Hoses and Lines
320
Fuel System
324
Recommended Fuel
324
Drain Fuel Tank Sump
326
Drain Fuel Pre-Filter
327
Replace Fuel Main Filter Element
330
Replace Fuel Pre-Filter Element
332
Replace Fuel Solenoid Pump Filter Element
334
Procedures
334
Check Fuel Hoses
336
Air Cleaner
337
Clean and Replace Air Cleaner Element (Outer)
337
Replace Air Cleaner Element (Inner)
339
Cooling System
340
Check Coolant Level
341
Check and Adjust Fan Belt Tension
343
Change Coolant
345
Clean Radiator/Oil Cooler/Inter Cooler Core
347
Clean Oil Cooler, Radiator and Inter Cooler Front Screen
349
Clean Air Conditioner Condenser
349
Clean Fuel Oil Cooler
349
Drain Intercooler (Only ZX130-6N)
350
Electrical System
351
Battery
352
Replace Battery
355
Check Electrolyte Specific Gravity
356
Replacing Fuses
357
Fuse Box
358
Miscellaneous
360
Check and Replace Bucket Teeth
360
Change Bucket
366
Convert Bucket Connection into Face Shovel
367
Adjust Bucket Linkage
368
Remove Travel Levers
369
Check and Replace Seat Belt
369
Check Windshield Washer Fluid Level
370
Check Track Sag
371
Clean and Replace Air Conditioner Filter
374
Check Air Conditioner
376
Clean Cab Floor
378
Retighten Cylinder Head Bolt
379
Inspect and Adjust Valve Clearance
379
Measure Engine Compression Pressure
379
Check Starter and Alternator
379
Check and Replace EGR Device
379
EGR Cooler Cleaning
379
Check Turbo Charger
379
Check and Clean Injector
380
Check Gas Damper
380
Tightening and Retightening Torque of Nuts and Bolts
380
Aftertreatment Device
402
Check and Clean Aftertreatment Device
402
Urea SCR System
403
Check Def/Adblue
405
Refill Def/Adblue
405
Extendable Filler Neck
407
Clean Filler Port Strainer
408
Change Def/Adblue
409
Replace Def/Adblue® Supply Module Main Filter
410
Replace Def/Adblue® Tank Water Supply Inlet Filter
412
Replace the Def/Adblue® Back Flow Line Filter
413
Maintenance under Special Environmental Conditions
415
Storage
417
Specifications
428
Zx130-6N
428
Zx130-6N
429
Specifications
429
Zx160Lc-6N
431
Zx160Lc-6N
432
Zx160Lc-6N
433
Zx160Lc-6N
434
Specifications
434
Zx180Lc-6N
435
Zx180Lc-6N
436
Zx180Lc-6N
437
Zx180Lc-6N
438
Specifications
438
Zx210Lc-6N
439
Specifications
439
Zx250Lc-6N
443
Specifications
443
Zx300Lc-6N
447
Specifications
447
Zx350Lc-6N
451
Zx350Lc-6N
452
Zx350Lc-6N
453
Zx350Lc-6N
454
Specifications
454
Optional Attachments and Devices
459
Using Pad Crawler Shoe
459
Traveling and Other Cautions
460
Transporting
461
Precautions for Transporting Machines with Pad Crawler Shoes
461
Long Arm Operation
464
Blade Lever
465
Avoid Hitting Blade with Front-End Attachment
466
Blade Maintenance
467
Specifications
468
ZX130-6N with Blade
468
Working Ranges
469
ZX130-6N with Blade
469
Shoe Types and Applications
470
ZX130-6N with Blade
470
Bucket Teeth (Transverse-Type-Pin-Used Type)
471
Attachment Pedal (Hydraulic Breaker) (Optional)
472
Attachment Pedal (Hydraulic Crusher) (Optional)
473
Hydraulic Breaker, Hydraulic Crusher and Quick Coupler
474
Piping for Breaker and Crusher
475
Operational Procedures for Stop Valves and Selector Valve
475
Secondary Relief Pressure Adjustment
476
Precautions for Breaker Operation
477
Change Hydraulic Oil and Replace Full-Flow Filter Element
481
Precautions for Crusher Operation
482
Attachment
485
Allowable Weight Limits of Installed Attachment
485
Attachment Connection Parts
487
Precautions for Arm Roll-In/Bucket Roll-In Combined Operation
488
Index
490
Advertisement
Advertisement
Related Products
Hitachi ZX 160LC
Hitachi ZX 180LCN
Hitachi ZX170W-5A
Hitachi ZX 110-3
Hitachi ZX 120-3
Hitachi ZX180-3 class
Hitachi ZX 130-5G
Hitachi ZX 170W-3
Hitachi ZX 190W-3
Hitachi ZX 180LC
Hitachi Categories
Projector
Air Conditioner
Drill
Power Tool
TV
More Hitachi Manuals
Login
Sign In
OR
Sign in with Facebook
Sign in with Google
Upload manual
Upload from disk
Upload from URL