Sign In
Upload
Manuals
Brands
Honeywell Manuals
IP Camera
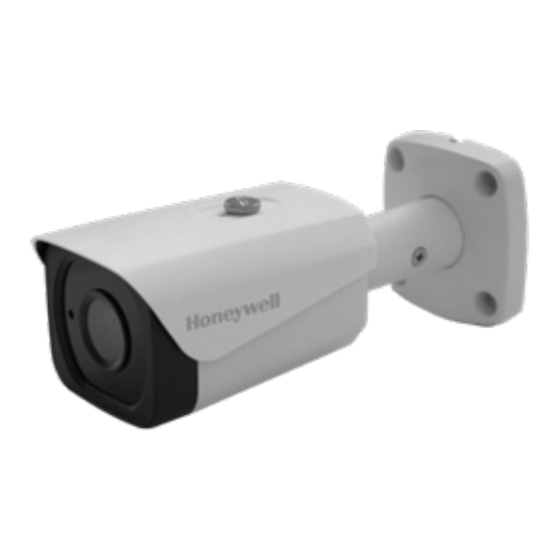
HBW2PR1
Honeywell HBW2PR1 Manuals
Manuals and User Guides for Honeywell HBW2PR1. We have
2
Honeywell HBW2PR1 manuals available for free PDF download: Software Configuration Manual, Quick Installation Manual
Honeywell HBW2PR1 Software Configuration Manual (94 pages)
Performance Series
Brand:
Honeywell
| Category:
IP Camera
| Size: 6.95 MB
Table of Contents
Cautions and Warnings
4
Fcc Compliance Statement
4
Safety Instructions
5
Warranty and Service
6
Table of Contents
7
About this Document
12
Overview of Contents
12
1 Introduction
13
Overview
13
Key Features
13
Camera Dimensions
14
HEW2PR1/HEW4PR3/HEW2PRW1/HEW4PRW3 Ball Cameras
14
Figure 1-1 HEW2PR1/HEW4PR3/HEW2PRW1/HEW4PRW3 Dimensions
14
H2W2PRV3/H2W4PRV3 Micro Dome Cameras
15
Figure 1-2 HEW2PR1/HEW4PR3/HEW2PRW1/HEW4PRW3 Components
15
Figure 1-3 H2W2PRV3/H2W4PRV3 Dimensions
15
Figure 1-4 H2W2PRV3/H2W4PRV3 Components
15
HBW2PR1/HBW4PR1 Bullet Camera
16
H4W4PRV3 Mini Dome Camera
16
Figure 1-5 HBW2PR1/HBW4PR1 Dimensions
16
Figure 1-6 HBW2PR1/HBW4PR1 Components
16
Figure 1-7 H4W4PRV3 Dimensions
16
Figure 1-8 H4W4PRV3 Components
16
H4W2PRV2/H4W4PRV2 Mini Dome Camera
17
HEW2PR2/HEW4PR2 Ball Camera
17
Figure 1-9 H4W2PRV2/H4W4PRV2 Dimensions
17
Figure 1-10 H4W2PRV2/H4W4PRV2 Components
17
Figure 1-11 HEW2PR2/HEW4PR2 Dimensions
17
Figure 1-12 HEW2PR2/HEW4PR2 Components
17
HBW2PR2/HBW4PR2 Bullet Camera
18
Figure 1-13 HBW2PR2/HBW4PR2 Dimensions
18
Figure 1-14 HBW2PR2/HBW4PR2 Components
18
2 Getting Started
19
Installing the Configtool IP Utility
19
Discovering Your Device on the Network
19
Assigning a New IP Address to Your Device
19
Figure 2-1 Log in to a Device
20
Figure 2-2 Network Settings
20
Upgrading Your Device's Firmware
21
To Upgrade a Single Device
21
To Upgrade Multiple Devices Simultaneously
21
Figure 2-3 Upgrade Screen
21
Figure 2-4 Select Batch Mode
21
Opening a Web Client
22
Figure 2-5 Batch Mode Screen
22
Figure 2-6 Batch Upgrade Dialog Box
22
3 Logging in and Viewing Live Video
23
Logging in to the Camera Via the Web Client
23
Before You Begin
23
Logging in to the Camera
23
Figure 3-1 Login Window
23
Installing the Browser Plug-In
24
Figure 3-2 First-Time Login Message
24
Figure 3-3 File Download Security Warning Message for the Plug-In
24
Figure 3-4 Internet Explorer - Security Warning
24
Using the Live View Interface
25
Video Encoder Settings
25
Figure 3-5 Live View Interface
25
Figure 3-6 Video Encoder Settings
25
Table 3-1 Video Encoder Settings
25
System Menus
26
Live View Controls
26
Figure 3-7 System Menu
26
Figure 3-8 Live View Window Controls
26
Table 3-2 Live View Window Controls
26
Live View Window Configuration
27
Figure 3-9 Live View Window Configuration Toolbar
27
Table 3-3 Live View Window Configuration Tools
27
4 Playing Back Video
28
Introduction
28
Overview of the Playback Interface
29
Playing Back Recorded Video
29
Playback Controls
29
Figure 4-1 Playback Interface
29
Figure 4-2 Playback Controls
29
Table 4-1 Playback Controls
29
Playing a Recorded File from the Calendar
30
Figure 4-3 Playback Calendar
30
Searching for a File by Recording Type
31
Timeline Configuration
31
Figure 4-4 Recording Timeline
31
Figure 4-5 Playback File Details
31
Figure 4-6 Recording Type Filter in Playback
31
Figure 4-7 Playback Timeline Configuration
31
Using the Playback Assistant
32
Zooming in and out
32
Taking a Snapshot
32
Creating a Video Clip
32
Figure 4-8 Clip Function Controls
32
Viewing Snapshots
33
Figure 4-9 Snapshot Playback Control Interface
33
Figure 4-10 List of Snapshots
33
5 Configuring Camera Settings
34
Conditions
34
Figure 5-1 Camera Setup Window
34
Table 5-1 Camera Configurations
35
Profile Management
37
Figure 5-2 Profile Management Tab
37
Zoom and Focus
38
Figure 5-3 Motorized Zoom and Focus
38
Table 5-2 Zoom and Focus
38
Video Configuration
39
Figure 5-4 Video Bit Stream Configuration Window
39
Table 5-3 Video Bit Stream Configurations
39
Snapshot
40
Figure 5-5 Snapshot Configuration Interface
40
Video Overlay
41
Figure 5-6 Video Overlay Configuration Interface
41
Table 5-4 Snapshot Configurations
41
Table 5-5 Video Overlay Configurations
41
Roi
42
Path
42
Figure 5-7 ROI Interface
42
Figure 5-8 Storage Path Interface
42
Table 5-6 ROI Configurations
42
Configuring Network Settings
43
Tcp/Ip
43
Figure 5-9 TCP/IP Interface
43
Table 5-7 TCP/IP Configuration
43
P2P
44
Figure 5-10 P2P Configuration Interface
44
Table 5-8 P2P Configurations
44
Connection
45
Figure 5-11 Connection Configuration Interface
45
Table 5-9 Connection Configurations
45
Onvif
46
Pppoe
46
Figure 5-12 Pppoe Configuration Interface
46
Ddns
47
Figure 5-13 DDNS Configuration Interface
47
Figure 5-14 Using Honeywell DDNS to Configure DDNS
47
Table 5-10 DDNS Configurations
47
IP Filter
48
Figure 5-15 IP Filter Configuration Interface
48
Table 5-11 Honeywell DDNS Configurations
48
SMTP (Email)
49
Figure 5-16 SMTP Configuration Interface
49
Table 5-12 SMTP (Email) Configurations
49
Upnp
50
Figure 5-17 Upnp Configuration Interface
50
Snmp
51
Figure 5-18 SNMP Configuration Interface
51
Table 5-13 SNMP Configurations
51
Bonjour
52
Multicast
52
Figure 5-19 Bonjour Configuration Interface
52
Figure 5-20 Multicast Configuration Interface
52
Ieee802.1X
53
Figure 5-21 802.1X Configuration Interface
53
Table 5-14 Multicast Configurations
53
Table 5-15 802.1X Configurations
53
Qos
54
Certificate
54
Figure 5-22 Qos Configuration Interface
54
Figure 5-23 Certificate Configuration Interface
54
Table 5-16 Qos Configurations
54
Configuring Storage Settings
55
Recording Schedule and Snapshot Schedule
55
Figure 5-24 Recording Schedule Configuration Interface
55
Destination
56
Figure 5-25 Holiday Schedule
56
Figure 5-26 Path Configuration Interface
56
Table 5-17 Path Configurations
56
Figure 5-27 Local Storage Configuration Interface
57
Figure 5-28 FTP Configuration Interface
57
Table 5-18 FTP Configurations
57
Record Control
58
Figure 5-29 NAS Configuration Interface
58
Figure 5-30 Record Control Configuration Interface
58
Table 5-19 NAS Configurations
58
Configuring System Settings
59
General System Setup
59
Figure 5-31 General System Configuration Interface
59
Table 5-20 Record Control Configurations
59
Table 5-21 General System Configurations
59
Account Setup
60
Figure 5-32 Date and Time Configuration Interface
60
Table 5-22 Date and Time Configurations
60
Figure 5-33 Username Configuration Interface
61
Figure 5-34 Add User Configuration Interface
61
Figure 5-35 Modifying User Interface
62
Figure 5-36 Group Configuration Interface
62
Restoring Default Settings
63
Figure 5-37 Add Group Interface
63
Figure 5-38 Modify Group Interface
63
Figure 5-39 Default Interface
63
Import/Export
64
Automatic Maintenance
64
Figure 5-40 Import/Export Configuration Interface
64
Figure 5-41 Auto Maintain Configuration Interface
64
Table 5-23 Import/Export Configurations
64
Upgrade
65
Viewing System Information
65
Version
65
Figure 5-42 Upgrade Interface
65
Figure 5-43 Version Interface
65
Log
66
Online User
66
Figure 5-44 Log Interface
66
Figure 5-45 Online User Interface
66
Table 5-24 Log Interface Configurations
66
6 Configuring Events and Alarms
67
Configuring Events
67
Configuring Motion Detection Settings
67
Figure 6-1 Video Detection Configuration Interface
67
Table 6-1 Video Detection Configurations
67
Figure 6-2 Configuring the Working Period
68
Figure 6-3 Configuring the Motion Detection Area
68
Configuring Camera Tampering Settings
69
Figure 6-4 Tampering Configuration Interface
69
Table 6-2 Motion Detection Area Configurations
69
Table 6-3 Tampering Configurations
69
Configuring System Events Settings
70
Figure 6-5 Tampering Working Period Configuration Interface
70
Figure 6-6 no SD Card Warning Configuration Interface
71
Figure 6-7 SD Card Error Warning Configuration Interface
71
Figure 6-8 Capacity Warning Configuration Interface
71
Figure 6-9 Disconnection Configuration Interface
72
Figure 6-10 IP Conflict Configuration Interface
72
Configuring Alarms
73
Figure 6-11 Illegal Access Configuration Interface
73
Figure 6-12 Alarm Configuration Interface
73
Table 6-4 Alarm Configurations
74
7 Troubleshooting
75
Embedded NVR Integration Capacity Matrix
77
Table 7-1 Embedded NVR Integration Matrix - Maximum Frame Rate and Resolution
77
8 Camera Specifications
78
HEW2PR1/HEW2PRW1/HEW4PR3/HEW4PRW3 Ball Cameras
78
Table 8-1 HEW2PR1/HEW2PRW1/HEW4PR3/HEW4PRW3 Specifications
78
HBW2PR1/HBW4PR1 Bullet Cameras
80
Table 8-2 HBW2PR1/HBW4PR1 Specifications
80
H2W2PRV3/H2W4PRV3 Micro Dome Cameras
82
Table 8-3 H2W2PRV3/H2W4PRV3 Specifications
82
H4W4PRV3 Mini Dome Camera
84
Table 8-4 H4W4PRV3 Specifications
84
H4W2PRV2/H4W4PRV2 Mini Dome Cameras
86
Table 8-5 H4W2PRV2/H4W4PRV2 Specifications
86
HEW2PR2/HEW4PR2 Ball Cameras
88
Table 8-6 HEW2PR2/HEW4PR2 Specifications
88
HBW2PR2/HBW4PR2 Bullet Cameras
90
Table 8-7 HBW2PR2/HBW4PR2 Specifications
90
List of Symbols
92
Advertisement
Honeywell HBW2PR1 Quick Installation Manual (2 pages)
WDR IR Bullet IP Camera
Brand:
Honeywell
| Category:
Security Camera
| Size: 0.12 MB
Advertisement
Related Products
Honeywell HBW2PR2
Honeywell HBW4PR1
Honeywell HBW4PR2
Honeywell HBW8PER1V
Honeywell HBW4PER1V
Honeywell HBD2FR1X
Honeywell HBD2FR1
Honeywell HBD2PR1
Honeywell HBD2PR1(X)
Honeywell EQUIP HD4MWIHX
Honeywell Categories
Thermostat
Controller
Control Unit
Security Camera
Accessories
More Honeywell Manuals
Login
Sign In
OR
Sign in with Facebook
Sign in with Google
Upload manual
Upload from disk
Upload from URL