Sign In
Upload
Manuals
Brands
Honeywell Manuals
Security Camera
HDZ30AX
Honeywell HDZ30AX Analog PTZ Dome Manuals
Manuals and User Guides for Honeywell HDZ30AX Analog PTZ Dome. We have
2
Honeywell HDZ30AX Analog PTZ Dome manuals available for free PDF download: User Manual, Quick Installation Manual
Honeywell HDZ30AX User Manual (114 pages)
Analogue PTZ Dome HDZ Series
Brand:
Honeywell
| Category:
Security Camera
| Size: 2.9 MB
Table of Contents
User Manual
1
Cautions and Warnings
3
Fcc Compliance Statement
3
Safety Instructions
4
Warranty and Service
5
Table of Contents
7
About this Document
15
Overview of Contents
15
Related Documents
16
Typographical Conventions
16
1 Introduction
17
Overview
17
Dimensions
18
Figure 1-1 Indoor PTZ Dome Camera Dimensions
18
Upgrading Analogue PTZ Dome Firmware
19
Figure 1-2 Outdoor PTZ Dome Camera Dimensions
19
2 Installing the Camera
21
Before You Begin
21
Accessories You Can Order Separately
22
Installation Overview
22
Table 2-1 Orderable Accessories
22
Assembling the Camera
23
System Configuration
24
Figure 2-1 HDZ Series System Configuration
24
Dip Switches and Cable Connections
25
Figure 2-2 Camera Back Plate Layout
25
Table 2-2 Camera Back Plate Connectors, Switches, and Buttons
25
Figure 2-3 Dip Switch ON/OFF Positions
26
Figure 2-4 ID Setting Dip Switches
26
ID Setting
26
Setting Dip Switches
26
Table 2-3 ID Switch Settings
26
Camera Control Protocol Setting
27
Figure 2-5 Camera Control Protocol Dip Switch Settings
27
Table 2-4 Camera Control Protocol Switch Settings
27
Connecting RS485
28
Connecting Video
28
Figure 2-6 RS485 Connector
28
Table 2-5 RS485 Pin Definitions
28
Connecting Alarm Inputs/Outputs
29
Connecting Power
29
Figure 2-7 Main Power Adapter Input (Detail)
29
Figure 2-8 Main Alarm Adapter Input (Detail)
29
Table 2-6 Power Input Pin Definitions
29
Mounting the Camera
30
Table 2-7 Alarm Input Pin Definitions
30
Table 2-8 Honeywell Mounts and Adapters
30
Figure 2-9 Eyelet on Camera to Secure by Lanyard During Setup
31
Using Safety Cable During Installation
31
Figure 2-10 HDCM1 Ceiling Mount Installation
32
Installing a Ceiling Mount (Indoor Only)
32
Figure 2-11 HDXWM2 Wall Mount Installation
33
Installing a Wall Mount
33
Figure 2-12 HDPRM2 Parapet/Flat Roof Mount Installation
34
Installing a Parapet/Flat Roof Mount
34
3 Understanding the OSD
35
Pre-Configuration Checklist
35
Preparing to Configure the Dome
35
Accessing the Main Menu
36
Using the OSD Password to Login
36
Figure 3-1 Main Menu Screen
36
Figure 3-2 Enter Password Screen
36
Navigating OSD Menus
37
On-Screen Display Overview
37
Figure 3-3 OSD Display Elements
38
Table 3-1 OSD Item Descriptions
38
OSD Menu Tree
39
Figure 3-4 Main Page 1 OSD Menus
39
Figure 4-5 Setup Menu
39
Figure 4-8 Setup Menu
39
Figure 3-5 Main Page 2 OSD Menus
40
Figure 3-6 Main Page 3 OSD Menus
41
OSD Menu Structure
42
Table 3-2 OSD Menu Structure
42
Basic Keyboard Controls
48
Sending the Dome to a Preset
48
Special Presets
48
Table 3-3 Special Presets
48
Upgrading Analogue PTZ Firmware
49
4 Operation and Configuration
51
Main Menu Page 1 Settings
51
Figure 4-1 Main Menu
51
Setting the Backlight Compensation
52
Setting the Default Camera
52
Setting the Focus Mode and Options
52
Auto Focus
52
Figure 4-2 Auto Focus Mode
52
Manual Focus
53
Setting the Language
52
Setting the Auto Exposure Mode Options
53
Setting the Auto Exposure Mode
53
Setting the Exposure Compensation
53
Exiting AE Mode Sub Menu
54
Figure 4-3 Auto Exposure Mode Menu
54
Table 4-1 Color Temperatures by Light Source
54
Figure 4-4 Manual WBC Mode
55
Setting ATW (Auto Tracing White Balance)
55
Setting Auto WBC
55
Setting Indoor WBC
55
Setting Manual WBC
55
Setting Outdoor WBC
55
Setting the WBC Mode
54
Setup Menu Page 1 Settings
56
Setting the Zoom Speed
56
Setting the Digital Zoom
56
Setting the Slow Shutter
57
Setting the Digital Noise Reduction
57
Enabling the Image Inverse
57
Figure 4-6 D.N.R. Submenu
57
Enabling the Freeze Option
58
Setting the Sharpness
58
Enabling the Image Stabilizer
58
Exiting the Setup Menu 1
58
Figure 4-7 Image Inverse Examples
58
Setup Menu Page 2 Settings
59
Enabling the Image Flip Option
59
IMAGE (Digital Flip)
59
Figure 4-9 Flip Setting Options
59
Mechanical Flip)
60
OFF (no Image Flip)
60
Setting the Angle Adjuster
60
Setting the PT Position
60
Figure 4-10 Angle Adjuster Options
60
Exiting the PT Position Menu
61
Setting Pan to Zero
61
Setting PT Display
61
Setting the Speed by Zoom
61
Setting the Auto Calibration
61
Setting the Password
61
Figure 4-11 PT Position Options
61
Figure 4-12 Password Sub Menu
62
Figure 4-13 Enter Password Screen
62
Using the OSD Password to Login
62
Setting the OSD to Close Automatically
63
Resetting the System
63
System Reset
63
Default System
63
Setting the Maximum Pan Speed
63
Exiting the Setup Menu 2
63
Main Menu Page 2 Settings
63
Setting the ID Display
64
Setting up the Zone Title Display
64
Enabling the Title Display
64
Entering a Zone Title Name
64
Figure 4-14 Main Menu
64
Setting up a Preset Position
65
Programming a Preset
65
Figure 4-15 Camera Title Editing
65
Figure 4-16 Preset Menu
65
Running a Programmed Preset
66
Naming a Preset
66
Figure 4-17 Preset Title Editing
66
Deleting a Preset Title
67
Exiting the Preset Menu
67
Setting up a Preset Tour
67
Selecting the Preset Tour Number
67
Selecting a Preset Number
67
Figure 4-18 Preset Tour Menu
67
Setting the Preset Position
68
Setting the Preset Tour Speed
68
Setting the Preset Tour Dwell Time
68
Running a Preset Tour
68
Deleting a Preset Tour
69
Exiting the Preset Tour Menu
69
Setting up an Autopan Path
69
Selecting an Autopan Line
69
Setting the Autopan Start and End Points
69
Figure 4-19 Autopan Menu
69
Setting the Autopan Direction
70
Setting the Autopan Speed
70
Running an Autopan Path
70
Deleting an Autopan Path
70
Figure 4-20 Pan Direction in Relation to Dome Movement
70
Exiting the Autopan Menu
71
Setting up a MIMIC Tour
71
Selecting a MIMIC Tour
71
Recording a MIMIC Tour
71
Figure 4-21 MIMIC Tour Menu
71
Running a MIMIC Tour
72
Deleting a MIMIC Tour
72
Exiting the MIMIC Tour Menu
72
Configuring the Home Setting
72
Figure 4-22 Home Setting Menu
72
Enabling the Home Function
73
Selecting the Home Setting Mode
73
Executing Home Function (GO)
74
Exiting the Home Menu
74
Setting the Return Time
74
Main Menu Page 3 Settings
74
Setting the IR Function (Removable IR Cut Filter)
74
Figure 4-23 Main Menu
74
Setting Auto IR Function
75
Setting Manual IR Function
75
Configuring the Alarm Setting
75
Selecting an Alarm Pin
75
Figure 4-24 Alarm Setting Menu
75
Enabling/Disabling the Alarm Switch
76
Setting the Alarm Type
76
Selecting the Alarm Action
76
Figure 4-25 Examples of Alarm Types
76
Setting the Dwell Time
77
Setting the Alarm Priority
77
Configuring the Alarm Output
78
Exiting the Alarm Setting Menu
78
Setting the Motion Detect Function
78
Setting the Detect Switch
78
Setting the Detect Mode
78
Setting the Block Mode
78
Figure 4-26 Alarm Detect Menu
78
Setting the Motion Frame
79
Figure 4-27 Frame Set Menu
79
Disabling a Frame
80
Setting the Threshold
80
Exiting the Alarm Detect Menu
80
Setting the WDR Function
80
Enabling WDR
80
Disabling WDR
81
Setting up Privacy Masks
81
Enabling Privacy Masks
81
Setting the Privacy Mask Transparency
81
Setting the Privacy Mask Color
81
Figure 4-28 Privacy Mask Menu
81
Setting up the Mask
82
Clearing a Mask
82
Figure 4-29 Set Mask Menu
82
Exiting the Privacy Mask Menu
83
Setting up the Time
83
Enabling the Time Display
83
Setting the Year / Month / Day
83
Setting the Hour / Minute
83
Exiting the Time Setting Menu
83
Setting up Schedules
83
Figure 4-30 Time Setting Menu
83
Enabling/Disabling Schedules
84
Figure 4-31 Schedule Menu
84
Setting Schedule Points
84
Setting the Hour / Minute of a Schedule Point
84
Setting the Mode of a Schedule Point
84
Exiting the Schedule Menu
85
Reseting a Schedule
85
Exiting the On-Screen Display
85
Appendix A HDZ Camera Specifications
87
Table A-1 HDZ30A(X) Series Camera Specifications
87
Table A-2 HDZ36AE(X) Series Camera Specifications
89
Appendix B Troubleshooting
93
Problem: Lens out of Optical Focus
93
Technical Support
93
Problem: Communication between Dome and Keyboard
94
Recommended WDR and DNR Settings by Scene Type
94
Table B-1 Recommended WDR and DNR Settings by Scene Type
95
Appendix C ID Settings
97
Table C-1 ID Switch Settings
97
Appendix D In-Ceiling Bracket Installation
105
Figure D-1 In-Ceiling Bracket Dimensions
105
Installing the In-Ceiling Bracket
106
Package Contents
106
Recommended
106
Index
109
Document 800-16526 – Rev a
114
Advertisement
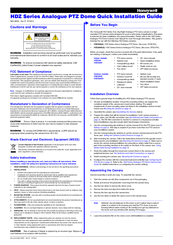
Honeywell HDZ30AX Quick Installation Manual (4 pages)
Honeywell HDZ Series Analogue PTZ Dome Quick Installation guide
Brand:
Honeywell
| Category:
Security Camera
| Size: 0.68 MB
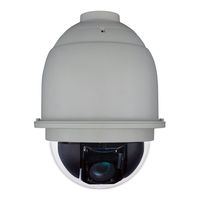
Table of Contents
Before You Begin
1
Cautions and Warnings
1
Installation Overview
1
Safety Instructions
1
Assembling the Camera
1
System Overview
2
Connecting Video
2
Connecting Power
2
Mounting the Camera
3
Using Safety Cable During Installation
3
Accessing the Main Menu
4
Advertisement
Related Products
Honeywell HDZ30A
Honeywell HDZ36AE
Honeywell HDZ36AEX
Honeywell HDZ302D
Honeywell HDZ302DE
Honeywell HDZ302DIN
Honeywell HDZ20HD
Honeywell HDZ404LIWV
Honeywell HDZ408LIWV
Honeywell HDZ404LIKV
Honeywell Categories
Thermostat
Controller
Control Unit
Security Camera
Accessories
More Honeywell Manuals
Login
Sign In
OR
Sign in with Facebook
Sign in with Google
Upload manual
Upload from disk
Upload from URL