Sign In
Upload
Manuals
Brands
HP Manuals
Network Router
J8752A
HP J8752A Manuals
Manuals and User Guides for HP J8752A. We have
2
HP J8752A manuals available for free PDF download: Basic Management And Configuration Manual, Product End-Of-Life Disassembly Instructions
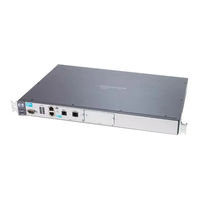
HP J8752A Basic Management And Configuration Manual (910 pages)
ProCurve 7000dl Series Secure Router
Brand:
HP
| Category:
Network Router
| Size: 8.46 MB
Table of Contents
Table of Contents
5
Procurve Secure Router
3
Commands Available in the Basic, Enable, or Global
6
Create a Named List to Track New Connections or
10
Specifying Which Snmp Server Receives the Router's
11
Configuring the Ethernet Interface as an Unnumbered
12
Checking the Status of Logical Interfaces
16
Adsl Wan Connections
17
Domain Name System (Dns) Services
25
Configuring a Dynamic Dns Client on a Procurve Secure
26
Configuring the Local Router to Authenticate Itself to
29
Assigning an Isdn Group or Bri Interface to the
30
Configuring Spanning Tree Settings for Individual
30
1 Overview
33
Contents
33
Using this Guide
37
Understanding Command Syntax Statements
37
CLI Prompt
38
IP Address Notation Convention
39
Quick Start Sections
39
Obtaining Additional Information
39
Downloading Software Updates
40
Downloading Software Updates
41
Interface Management Options
42
Cli
42
Web Browser Interface
42
Accessing the Web Browser Interface
43
Using the Procurve Web Browser Interface
44
Hardware Overview
46
Procurve Secure Router Front Panel
46
Console Port
46
Ethernet Ports
47
Slots
47
E1 and T1 Modules
48
Backup Modules
51
ISDN Module
51
Wide-Slot Option Modules
52
Interface Numbering Conventions
54
Status Leds
55
Fault LED
55
Power LED
55
Leds for Slots 1 and 2
56
Status Leds
56
Backup Leds
57
Slot 3 Leds
57
Tx and Rx Leds
57
Activity LED
58
Ethernet and Activity Leds
58
Status LED
58
Test LED
58
Activity Leds
59
Link Leds
59
Optional Ipsec VPN Module
59
Rear Panel
59
Compact Flash Card
60
Memory
61
Redundant Power Source
61
Software Overview
62
Bootup Process
62
Advantages of Booting from Compact Flash
64
Setting up a Compact Flash Card from Which to Boot
65
Boot the Router
65
Saving Configuration Changes
65
Autosynch™ Technology
66
Secure Router os Hierarchy
66
Basic Mode
68
Enable Mode
68
Global Configuration Mode
69
Basic Mode Commands
71
Clear
71
Commands Available in the Basic, Enable, or Global
71
Configuration Mode Contexts
71
Enable
71
Logout
72
Ping
72
Show
73
Telnet
74
Traceroute
74
Enable Mode Commands
75
Terminal
75
Wall
75
Clear
76
Clock
77
Configure
78
Copy
78
Debug
81
Dir
81
Disable
82
Erase
82
Events
83
Reload
83
Show
83
Undebug
89
Write
89
Show Tech
90
Updating the Boot Code
92
Autosynch Command
93
Global Configuration Mode Commands
93
Hostname Command
93
Safemode
94
CLI Help Commands
97
Editing Commands
97
Help Tools
97
Bootstrap Mode Context
99
Exit
99
Autosynch™ Error Messages
103
Compact Flash
103
Troubleshooting
103
Using the Reload in Command
105
Managing Configuration Files Using a Text Editor
107
Creating and Transferring Configuration Files
109
Configuration File Transfer Using the Console Port
110
Configuration File Transfer Using a TFTP Server
112
Configuration File Transfer Using a Compact Flash Card
115
Troubleshooting the FTP Server
117
Using the FTP Server on the Procurve Secure Router
117
Configuring the Procurve Secure Router as an SNTP Client
118
Enabling the SNTP Server on the Procurve Secure Router
118
Configuring a Source Address for the SNTP Server
119
Troubleshooting SNTP
120
Viewing SNTP Settings
120
Accessing the Secure Router os
121
Quick Start
121
Configuring SNTP on the Procurve Secure Router
122
Enabling the FTP Server
122
2 Controlling Management Access to the Procurve Secure Router
125
Contents
125
Securing Management Access to the Procurve Secure Router
128
Restricting Access to the Enable Mode Context
128
Configuring a Password for Console Access
129
Enabling Remote Access to the Procurve Secure Router
131
Configuring an Ethernet Interface
131
Configuring Telnet Access
132
Configuring Local User Lists
135
Enabling Access to the Web Browser Interface
135
Managing SSH Communications
136
Using FTP to Access the Router
137
Using the Local User List for Console or Telnet Access
137
Encrypting All the Passwords Configured on the Router
137
Enabling Secure Copy Server
138
Viewing Information about Users
138
Using the AAA Subsystem to Control Management Access
139
Advantages of Using the AAA Subsystem
139
Criteria for Failure of Authentication Methods
140
Enabling the AAA Subsystem
141
Configuring AAA for Authentication
141
Creating a Named List for the Enable Mode Authentication
142
Creating a Named List for User Authentication
143
Assign the Named List
145
Messages, and Prompts
146
Options for AAA Authentication: Configuring Banners
146
Configuring Authorization
148
Creating a Named List to Allow Authorized Users to Access the Basic Mode Context or the Enable Mode Context
148
Create a Named List that Allows Authorized Users to Immediately Enter into the Enable Mode Context
149
Assign the Named List
150
Enable Authorization Commands for Console Line
151
Configuring AAA Accounting
151
Creating a Named List to Track When Users Access the Basic or Enable Mode Context
152
Create a Named List to Track New Connections or Outbound Telnet Connections
153
Assign the Named List
154
Configure Update Settings
155
Do Not Send Records for Null Users
155
Configuring a RADIUS Server for Authentication
155
Define the RADIUS Server
155
Define a Group of RADIUS Servers
157
Configure Global Settings for RADIUS Servers
158
Configuring the TACACS+ Server
159
Define the TACACS+ Server
159
Creating a TACACS+ Group
161
Configure Global Settings for TACACS+ Servers
162
Troubleshooting AAA
163
Debug Aaa Command
163
Troubleshooting the RADIUS Server
164
Debug Radius Command
165
Troubleshooting the TACACS+ Server
165
Using SNMP to Manage the Procurve Secure Router
168
SNMP Architecture
168
SNMP Versions
169
SNMP Support in the Procurve Secure Router
171
Enabling the SNMP Agent on the Procurve Secure Router
171
Configuring SNMP Identity Information
172
Change the Default Setting for the Router's Chassis ID
172
Specify the Router's Location
172
Specify the SNMP Server Contact Information
173
Specify the SNMP Server Management URL Information
174
Change the Engine ID for a Local Machine
175
Specifying the Engine ID for a Remote Server
176
Configuring SNMP Views
176
Configuring SNMP Communities
178
Configuring SNMP Groups and Users
180
Create an SNMP Group
180
Configure SNMP Users
182
Configuring SNMP Traps and Informs
184
Enabling SNMP Traps
184
Notifications
185
Specifying Which SNMP Server Receives the Router's
185
Specify the Response Retry Attempts and Wait Time
186
Specify the Source Interface for SNMP
187
Viewing SNMP Information
188
The Procurve Secure Router as an 802.1X Supplicant
189
Enabling Supplicant Functionality
189
Troubleshooting Supplicant Functionality
190
Quick Start
191
Configure the Enable Mode Password
191
Configure a Password for the Console Access
191
Configuring Remote Access to the Procurve Secure Router
192
Configuring an Ethernet Interface
192
Configuring a Password for Telnet Access
193
Configuring Local User Lists
194
Enabling AAA
195
Configuring Authentication with AAA
195
Configuring Authorization with AAA
196
Configuring Accounting with AAA
198
Defining a RADIUS Server
200
Defining a TACACS+ Server
200
Using SNMP to Monitor Network Devices
200
Enabling 802.1X Supplicant Status
202
3 Configuring Ethernet Interfaces
203
Contents
203
Ethernet Interfaces
204
Configuring the Ethernet Interface
205
Enabling the Ethernet Interface
206
Configuring an IP Address
207
Assigning a Static IP Address
207
Configuring the Ethernet Interface as a DHCP Client
207
Configuring the Ethernet Interface as an Unnumbered
212
Interface
212
Setting the Speed and the Duplex Settings
213
Configuring the Line for Half-Duplex or Full-Duplex
214
Setting the MTU
214
Adding a Description
215
Summary of Ethernet Configuration Settings
216
Configure VLAN Support
218
Configuring VLAN Support
220
Assigning an IP Address
222
Viewing the Status of Ethernet Interfaces or Subinterfaces
222
Show Interfaces Command
222
Show Running-Config Commands
224
Viewing the Configurations that Have Been Entered
225
Viewing All the Configuration Settings Including Defaults
225
Troubleshooting an Ethernet Interface
227
Show Event-History Command
228
Debug Interface Ethernet Command
228
Configuring the Ethernet Interface
229
Quick Start
229
4 Configuring E1 and T1 Interfaces
231
Contents
231
Overview of E1 and T1 WAN Connections
233
Elements of an E1- or T1-Carrier Line
233
Connecting Your Premises to the Public Carrier: the Local Loop
234
External or Built-In CSU/DSU
236
Procurve Secure Router Modules
238
E1 Modules with a Built-In DSU
238
Supported Standards
238
T1 Modules with a Built-In CSU/DSU
239
Supported Standards
239
E1 or T1 Interfaces: Configuring the Physical Layer
240
E1 or T1 Interface Configuration Mode Context
241
Interface Range Command
242
Channels
243
Line Coding
245
Frame Format
246
Clock Source, or Timing, for the E1- or T1-Carrier Line
248
Transmit Signal Level (T1 Interfaces Only)
249
Set the FDL (T1 Interfaces Only)
250
Activate the E1 or T1 Interface
251
Threshold Commands
252
Types of Line Errors
253
Viewing Information about E1 and T1 Interfaces
257
Show Interfaces Command
258
Show Running-Config Command
259
Show Running-Config Verbose Command
260
Troubleshooting E1 and T1 WAN Connections
261
No Light
263
Red Light
263
Yellow Light
265
Green Light
266
Viewing Performance Statistics
266
Quick Start
269
Configuring an E1 or T1 Interface
269
5 Configuring Serial Interfaces for E1- and T1-Carrier Lines
273
Contents
273
Using the Serial Module for E1- or T1-Carrier Lines
275
Elements of an E1- or T1-Carrier Line
275
Connecting Your Premises to the Public Carrier's Central
276
Office: the Local Loop
276
External or Built-In CSU/DSU
278
Serial Module for the Procurve Secure Router
279
Standards Supported by the Serial Module
279
Serial Interface: Configuring the Physical Layer
280
Making the Physical Connection
280
Serial Interface Configuration Mode Context
284
Configuring the Interface for the Appropriate Cable
284
Configuring the Clock Source
285
Inverting Et-Clock
285
Inverting Txclock or Rxclock
285
Activating the Serial Interface
286
Configuring the Data Link Layer Protocol
286
Viewing Information about the Serial Interface
287
Show Interfaces Serial Command
287
Show Running-Config Interface Command
288
View All the WAN Connections Configured on the Router
289
Troubleshooting a Serial Connection
290
Checking the LED for the Serial Module
290
No Light
291
Red Light
291
Green Light
293
Yellow Light
293
Solving a Specific Problem: the Line between the Serial Module and the CSU/DSU Keeps Going down
293
Configure a Serial Interface
295
Quick Start
295
6 Configuring the Data Link Layer Protocol for E1, T1, and Serial Interfaces
297
Contents
297
Configuring the Logical Interface
299
Establishing a PPP Connection
300
PPP Overview
300
Creating a PPP Interface on the Procurve Secure Router
302
Configuring an IP Address for the WAN Connection
304
Activating the PPP Interface
306
Binding the Physical Interface to the Logical Interface
306
PPP Authentication
307
Additional Settings
312
Settings Explained in Other Chapters
314
Frame Relay Overview
315
Packet-Switching Network
316
Components of a Frame Relay Network
317
Dlci 16
318
Create the Frame Relay Interface
319
Activate the Frame Relay Interface
321
Define the Signaling Role
321
Configure Frame-Relay Counters
322
Define the Frame Relay Signaling Type
322
Assign a DLCI to the Frame Relay Subinterface
324
Create the Frame Relay Subinterface
324
Configure the IP Address for the WAN Connection
325
Set the CIR
331
Set the EIR
331
Bind the Physical Interface to the Logical Interface
332
Additional Settings
333
Settings Explained in Other Chapters
335
Configuring HDLC as the Data Link Layer Protocol
336
Create the HDLC Interface
336
Activate the HDLC Interface
338
Configure an IP Address for the WAN Connection
338
Bind the Physical Interface to the Logical Interface
340
Additional Settings
341
Settings Explained in Other Chapters
343
Example Networks
344
Checking the Status of Logical Interfaces
350
View the Status of Interfaces
350
Viewing the Status of PPP Interfaces
350
Queuing Method
351
Subinterfaces
352
Viewing Configuration Information
354
Viewing the Status of HDLC Interfaces
354
Troubleshooting Logical Interfaces
355
Troubleshooting the PPP Interface
355
Troubleshooting PPP Authentication
359
Troubleshooting the Frame Relay Interface
362
Troubleshooting HDLC
366
Quick Start
367
PPP Authentication
368
Authenticating to a Peer
369
Requiring the Peer to Authenticate Itself
369
Frame Relay
370
Hdlc
372
Contents
375
ADSL Overview
378
ADSL Technologies
379
ADSL2 and ADSL2+: Enhancing Transmission Speeds
379
READSL: Supporting Greater Distances
380
Elements of an ADSL Connection
380
ADSL Infrastructure
381
Or ISDN Voice Traffic
382
ADSL Splitters
383
ADSL Without Splitters
384
ADSL Modules for the Procurve Secure Router
385
Configuring the ADSL Interface: the Physical Layer
386
Accessing the ADSL Interface Configuration Mode Context
386
Activating the ADSL Interface
387
Defining the Training Mode
387
Setting the SNR-Margin
389
Manually Forcing Retraining
390
Monitoring the SNR-Margin
390
Configuring the Data Link Layer for the ADSL Connection
391
Activating the ATM Interface
391
Creating the ATM Interface
391
Configuring a Subinterface for each PVC
392
Creating the Subinterface
392
Activating the ATM Subinterface
393
Configuring the VPI/VCI
393
Assigning the ATM Subinterface an IP Address
394
Defining the ATM Encapsulation
394
OAM Settings
401
Bind the ADSL Interface to the ATM Interface
402
Additional Settings
402
Pppoe Overview
403
Two Phases for Establishing a Pppoe Session
404
Discovery Phase
404
PPP Session
406
Creating the PPP Interface
407
Binding the ATM Subinterface to the PPP Interface
408
Assigning an IP Address
408
Identifying the Access Concentrator
409
Identifying Pppoe Services
410
Pppoa Overview
410
Creating the PPP Interface
412
Assigning an IP Address
412
Binding the ATM Subinterface to the PPP Interface
413
Routed Bridged Encapsulation
414
Viewing the Status and Configuration of Interfaces
416
Viewing the Status of the ADSL Interface
416
Viewing the Status of the ATM Interface and Subinterface
419
Troubleshooting the ADSL Connection
421
Troubleshooting the ADSL Interface
421
Identifying the Problem
421
Debug Interface Adsl Events Command
422
Troubleshooting the ATM Interface
423
Troubleshooting the ATM Subinterface
424
Debug Atm Oam Command
424
Troubleshooting Pppoe
425
Troubleshooting the Pppoe Discovery Process
425
Show Pppoe Command
426
Clear a Pppoe Connection
427
Debug Pppoe Client Command
427
Troubleshooting the PPP Link Establishment Process
427
Configure the Physical Layer: the ADSL Interface
429
Quick Start
429
Configure the Data Link Layer: the ATM Interface and Subinterface
431
Configure ATM Only
431
Configure RBE
433
Configure Pppoe
434
Configure Pppoa
436
Contents
439
Overview of ISDN Connections
442
Elements of an ISDN Connection
443
The Local Loop
443
ISDN Interfaces: Connecting Equipment to the ISDN Network
446
Line Coding for ISDN BRI Connections
447
ISDN Data Link Layer Protocols
447
Lapd
448
Q.931
449
Call Process
449
Procurve Secure Router ISDN Modules
451
Primary ISDN Modules
453
Using Demand Routing for ISDN Connections
454
Define the Traffic that Triggers the Connection
456
Specifying a Protocol
457
Defining the Source and Destination Addresses
458
Configuring the Demand Interface
460
Creating the Demand Interface
461
Configuring an IP Address
462
Matching the Interesting Traffic
464
Specifying the Connect-Mode Option
467
Associating a Resource Pool with the Demand Interface
468
Defining the Connect Sequence
468
Specify the Order in Which Connect Sequences Are Used
470
Configure the Number of Connect Sequence Attempts
471
Configure Settings for the Recovery State
471
Commands Work
473
Configuring the Idle-Timeout Option
475
Configuring the Fast-Idle Option
476
Defining the Caller-Number Option
476
Defining the Called-Number Option
477
Configuring the Hold Queue
477
Configuring the BRI Interface
478
Accessing the BRI Interface
478
Configuring the ISDN Signaling (Switch) Type
479
Configuring a SPID and LDN for ISDN BRI U Modules
480
Configuring an LDN for BRI S/T Modules
481
Activating the Interface
481
Caller ID Options
481
Configuring the ISDN Group
482
Assigning BRI Interfaces to the ISDN Group
482
Creating an ISDN Group
482
Assigning the ISDN Group to a Resource Pool
483
Configuring the Incoming-Accept-Number
483
Configuring a Static Route for the Demand Interface
484
Example of a Successful Demand Interface Call
486
MLPPP: Increasing Bandwidth
488
Configuring MLPPP for Incoming Calls
488
Configuring MLPPP for Demand Interfaces
489
Example of MLPPP with Demand Routing
490
Configuring PPP Authentication for an ISDN Connection
491
Configuring CHAP Authentication for a Demand Interface
492
Configuring PAP Authentication for a Demand Interface
492
Enabling PPP Authentication for All Demand Interfaces
492
Configuring Peer IP Address
493
Example of Demand Routing with PAP Authentication
493
Expects to Receive
493
Configuring an ISDN Template
495
Setting the MTU for Demand Interfaces
495
Using Call Types and Patterns
497
Default ISDN Template
498
Viewing Information about Demand Routing
499
Viewing the Status of the Demand Interface
499
Viewing a Summary of Information about the Demand Interface
501
Viewing Settings Configured for the ISDN Group
502
Viewing the Status of the BRI Interface
503
Viewing Demand Sessions
505
Viewing the Resource Pool
506
Show the Running-Config for the Demand Interface
506
Troubleshooting Demand Routing
508
Checking the Demand Interface
508
Checking the BRI Interface
509
Checking the ACL that Defines the Interesting Traffic
511
Troubleshooting the ISDN Connection
511
Test Calls
513
Line Maintenance
515
Troubleshooting with Loopbacks
515
Troubleshooting PPP for the ISDN Connection
515
Quick Start
517
Contents
525
Table of Contents
526
Using an E1- or T1-Carrier Line for Data and Voice
527
Drop-And-Insert Modules
527
Standards Supported by the Drop-And-Insert Modules
527
Configuring the E1 + G.703 Module
528
Making the Physical Connection
528
Assigning Channels to the E1 Interface
529
Setting the Clock Source
531
Configuring the E1 Interface for Data Communications
529
Accessing the G.703 Interface
531
Configuring Line Coding
531
Configuring Frame Format
532
Enabling Ts
533
Activating the Interface
534
Checking the Status of the G.703 Interface
534
Viewing Configuration Information
535
Alarms or Errors that will Not Clear
536
Troubleshooting the G.703 Interface
536
Interface Is Accruing Errored Seconds and Clock Slips
537
Yellow Alarm
537
Assigning Channels
538
Configuring the T1 + DSX-1 Module
538
Configuring the T1 Interface for Data Communications
538
Making the Physical Connection
538
Setting the Clock Source
540
Accessing the T1 Interface for the DSX-1 Port
541
Configuring Line Coding
541
Configuring Frame Format
542
Configuring Signaling Mode
543
Setting the Line Length
543
Activating the DSX-1 Interface
544
Checking the Status of the DSX-1 Interface
544
Troubleshooting the DSX-1 Interface
545
Alarms or Errors that will Not Clear
545
Viewing Configuration Information
545
Interface Is Accruing Errored Seconds and Clock Slips
546
Yellow Alarm
546
Configuring the E1 + G.703 Module
547
Configuring the E1 Interface
547
Making the Physical Connection
547
Quick Start
547
Configuring the G.703 Interface
548
Assigning the Channels to the T1 Interface
549
Configuring the T1 + DSX-1 Module
549
Making the Physical Connection
549
Configuring the DSX-1 Interface
550
Bridging—Transmitting Non-Ip Traffic or Merging Two Networks
553
Troubleshooting Spanning Tree
554
Overview
555
Transmitting Non-IP Traffic
556
Merging Two Remote Networks
556
Spanning Tree Protocol
556
Configuring Bridging
557
Configuring a Bridge Group
558
Assigning an Interface to the Bridge
558
Disabling IP Routing
559
Viewing the Bridge Table
560
Troubleshooting Bridging
562
Configuring Spanning Tree
563
STP Bpdus
564
Overview
564
STP States
565
RSTP Improvements
566
RSTP and STP Compatibility
569
Configuring RSTP
569
Determining Which Links Are Chosen: Setting Link Cost
570
Priority
570
Setting Interface Roles
571
Altering Timers
574
Configuring STP
575
Using the BPDU Filter to Disable STP or RSTP
575
Testing Spanning Tree
577
Troubleshooting Spanning Tree
577
Addressing Common Spanning Tree Problems
578
Slow Convergence
580
Incorrect Path Selection
581
Quick Start
582
IP Addressing
587
Networks
588
Network Addresses and Subnet Masks
588
Classful Networks
589
Cidr
590
Routing Table
591
Destination Network Address and Subnet Mask
591
Administrative Distance and Metric
592
Next-Hop Address and Forwarding Interface
592
Other Information Stored in a Route
593
Static Routing
593
Dynamic Routing Protocols
594
Static Routing Versus Dynamic Routing
594
Load Sharing
595
Fast Caching
596
Configuring Static Routes
597
Overview
597
Configuring a Static Route
598
Configuring a Floating Static Route
600
Configuring a Default Route
601
Configuring a Route through the Null Interface
602
Configuring Load Sharing
604
Enabling Fast Caching
606
Troubleshooting Static Routing
608
Monitoring the Routing Table
608
Using the Routing Table to Troubleshoot Static Routing
610
Monitoring Routes
611
Clearing Routes
612
Connecting Simple Remote Sites
615
Quick Start
615
Static Routing
615
Routing Traffic to an ISP
616
Contents
617
Domain Name System (Dns) Services
618
Host and Domain Names
619
Host Tables
619
Overview
619
Authoritative and Caching Name Servers
620
DNS Queries
620
Procurve Secure Router DNS Support
621
Dynamic DNS
622
Custom DNS
623
Static DNS
623
Configuring DNS
624
Enabling DNS
624
Adding an Entry to the Router's Host Table
625
Specifying DNS Server Addresses
626
Enabling the Router to Act as a Name Server
626
Troubleshooting DNS
627
Process
627
Debugging DNS Server Activity
627
Debugging DNS Client Activity
630
Configuring Dynamic DNS
631
Opening an Account with Dyndns
632
Configuring the Interface's IP Address
632
Setting a Dynamic Address
632
Specifying a Static Address
633
Activating the Dynamic DNS Client
633
Special Considerations for Configuring Custom DNS
634
Configuring the Procurve Secure Router as a DNS Client
635
Quick Start
635
Configuring the Procurve Secure Router as a Name Server
636
Router Interface
636
Contents
639
Configuring a Router Interface as a Dhcp Client/Managing and Troubleshooting the Dhcp Client
640
DHCP Request Process
641
Overview
641
The Procurve Secure Router as a DHCP Server
642
The Procurve Secure Router as a DHCP Client
643
Configuring a DHCP Server
644
DHCP Relay
644
Creating a DHCP Pool
645
Specifying the Network Address and Subnet Mask
646
Specifying the Default Gateway
647
Changing a Pool's Lease Time
648
Specifying DNS, WINS, and Other Servers
649
Specifying a Bootfile
650
Specifying a Domain Name for the Subnet
650
Excluding Static Addresses
645
Configuring Parent and Child Pools
651
Example DHCP Pool Configuration
652
Assigning a Fixed Address to a Host through a DHCP Server
652
Configuring DHCP Scopes
653
Configuring the DHCP Server's Ping Settings
655
Managing and Troubleshooting the DHCP Server
657
Viewing DHCP Client Bindings
657
Monitoring the DHCP Process
658
Client Receiving the Wrong Fixed DHCP Address
659
Clients Unable to Receive a DHCP Address
659
Configuring a Router Interface as a DHCP Client
660
Configuring a Dynamic Address
661
Setting an Interface's Client ID
662
Preventing the Interface from Taking Other Configurations
663
Setting the Interface's Hostname
663
Default Route
664
Dynamic Address
665
Setting the Interface's Administrative Distance
665
Managing and Troubleshooting the DHCP Client
666
Viewing the Interface's Lease
666
Releasing and Renewing Dynamic Addresses
667
Monitoring DHCP Client Activity
668
Configuring DHCP Relay
670
Quick Start
672
Configuring a DHCP Server for a Network
673
Assigning a Fixed DHCP Address to a Single Host
675
Configuring a Router Interface as a DHCP Client
676
Contents
679
Configuring a Serial Interface for an E1- or T1-Carrier Line
680
Configuring Access to the Web Browser Interface
683
Enabling Access to the Web Browser Interface
683
The Web Browser Interface Navigation Bar
684
Function
685
The Autosynch™ Feature
686
Configuration
687
Firmware
690
Debug
693
Reboot Unit
698
Telnet to Unit
698
Enabling IP Services on the Router
700
Web Access Configuration
702
Configuring Passwords to Control Management Access to the Router
704
Encrypting All the Passwords
704
FTP Access
705
Configuring an Enable Mode Password
706
Configuring a Password for Telnet Access
707
Configuring a Password for Console Access
709
Configuring a Password for SSH Access
710
Configuring a Password for HTTP Access
711
Configuring a Password for FTP Access
712
Using the AAA Subsystem to Control Management Access
713
Configuring Authentication Using a RADIUS Server
714
Configuring Authentication Using a TACACS+ Server
716
Configuring Ethernet Interfaces
718
Enabling the SNMP Server and SNMP Traps
720
SNMP Settings
720
Configuring SNMP Communities
721
Configuring SNMP Views
722
Configuring SNMP Trap Settings
723
IP Settings
725
View SNMP Statistics
725
Dynamic DNS
726
Ethernet Interface Statistics
726
Secondary IP Settings
726
Releasing/Renewing a DCHP IP Address
727
Configuring Pppoe for the Ethernet Interface
728
Dynamic DNS
730
Secondary IP Settings
730
View Statistics for the PPP Interface
730
Configuring E1 and T1 Interfaces
732
Status Information
735
Configuring a Serial Interface for an E1- or T1-Carrier Line
737
Status Information
739
Configure PPP as the Data Link Layer Protocol
740
Interfaces
740
IP Settings
742
Dynamic DNS
743
PPP Authentication
743
Secondary IP Settings
743
Status Information
743
Requiring a Peer to Authenticate Itself to the Local Router
744
Configure Frame Relay as the Data Link Layer Protocol
746
Configure a Permanent Virtual Circuit (Pvc)
748
Configure IP Settings
749
Configure Dynamic DNS
750
Status Information
750
Configure HDLC as the Data Link Layer Protocol
752
Dynamic DNS
754
IP Settings
754
Status Information
755
Configuring ADSL Interfaces
756
Configure an ATM Interface
758
Configure the ATM Subinterface
758
Configuring ATM Only
761
Configuring Pppoe or Pppoa for the ADSL Connection
763
Status Information
763
Dynamic DNS
765
Secondary IP Settings
765
View Statistics for the PPP Interface
765
Configuring an ACL to Define Interesting Traffic
766
Configuring Demand Routing for a Primary or Backup Connection
766
Configuring the BRI Interface
768
Troubleshooting the BRI Interface
770
Configuring an ISDN Group
771
Configuring the Demand Interface
773
Configuring PPP for the Demand Interface
776
Configuring IP Settings for the Demand Interface
777
Resource Pool
778
Configuring Connect Sequences
779
Configuring a Static Route or a Floating Static Route
781
E1 + G.703 and T1 + DSX-1 Modules
783
Status Information
785
Bridging
786
Configuring Bridging
786
Configuring the Spanning Tree Protocol
790
Viewing a Spanning Tree
790
Setting Global Spanning Tree Parameters
791
Interfaces
793
Configuring a Static Route
795
Routing
795
Configuring a Default Route
797
Configuring DNS Support
799
DNS Services
799
Configuring Dynamic DNS
802
Configuring a DHCP Server
804
Dynamic Host Configuration Protocol
804
Configuring a DHCP Pool for a Subnet
805
Assigning a Single Host a Fixed Address
808
Configuring an Interface as a DHCP Client
809
Configuring UDP Relay
810
Updating the Boot Process
813
Advertisement
HP J8752A Product End-Of-Life Disassembly Instructions (2 pages)
Brand:
HP
| Category:
Network Router
| Size: 0.04 MB
Advertisement
Related Products
HP J8705A
HP J8702A
HP J8726A
HP J8706A
HP J8707A
HP J8700A
HP J8715B
HP J8753A
HP J8699A
HP J9539A
HP Categories
Desktop
Laptop
Server
Monitor
Switch
More HP Manuals
Login
Sign In
OR
Sign in with Facebook
Sign in with Google
Upload manual
Upload from disk
Upload from URL