Sign In
Upload
Manuals
Brands
Lenovo Manuals
Desktop
ThinkCentre 9279
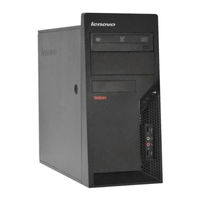
Lenovo ThinkCentre 9279 Manuals
Manuals and User Guides for Lenovo ThinkCentre 9279. We have
4
Lenovo ThinkCentre 9279 manuals available for free PDF download: Hardware Maintenance Manual, User Manual, Hardware Replacement Manual
Lenovo ThinkCentre 9279 Hardware Maintenance Manual (582 pages)
Brand:
Lenovo
| Category:
Desktop
| Size: 10.55 MB
Table of Contents
Table of Contents
5
Chapter 1. About this Manual
7
Important Safety Information
7
Important Information about Replacing Rohs Compliant Frus
8
Chapter 2. Safety Information
9
General Safety
9
Electrical Safety
9
Safety Inspection Guide
11
Handling Electrostatic Discharge-Sensitive Devices
12
Grounding Requirements
12
Safety Notices (Multi-Lingual Translations)
13
Chapter 3. General Information
43
The Thinkvantage Productivity Center Program
43
Additional Information Resources
43
Specifications
44
Types 8700, 8701, 8705, 8717, 8973, 8975, 8979, 8983, 8985, 8991, 8995, 9265, 9269, 9277, 9279, 9283, 9287, 9379, 9383, 9387, 9389, 9631, 9635, 9637, 9646, and 9648
44
Types 8013, 8702, 8706, 8716, 8970, 8972, 8976, 8980, 8982, 8986, 8992, 8994, 9266, 9276, 9278, 9282, 9286, 9288, 9374, 9378, 9380, 9384, 9628, 9632, 9647, and 9649
45
Chapter 4. General Checkout
47
Problem Determination Tips
47
Chapter 5. Diagnostics
49
PC-Doctor for Windows
49
PC-Doctor for DOS
49
Creating a Diagnostic CD Image
50
Creating Diagnostic Diskettes
50
Running Diagnostics from the CD or Diskettes
50
Running Diagnostics from the Rescue and Recovery Workspace
51
PC-Doctor for Windows PE
51
Recovery Workspace
51
Navigating through the Diagnostics Programs
52
Running Tests
52
Test Results
52
Fixed Disk Advanced Test (FDAT)
53
Quick and Full Erase - Hard Drive
54
Viewing the Test Log
55
Chapter 6. Using the Setup Utility
57
Starting the Setup Utility Program
57
Viewing and Changing Settings
57
Using Passwords
57
User Password
57
Administrator Password
58
Selecting a Startup Device
59
Selecting a Temporary Startup Device
59
Changing the Startup Device Sequence
59
Exiting from the Setup Utility Program
59
Chapter 7. Symptom-To-FRU Index
61
Hard Disk Drive Boot Error
61
Power Supply Problems
61
Diagnostic Error Codes
63
Flash the System. See "Flash Update Procedures" on Page 570 2. System Board
63
Flash the System. See "Flash Update
64
Procedures
64
System Board
64
Procedures
65
Flash the System. See "Flash Update Procedures
67
Run Setup
67
System Board
67
Make Sure the Component that Is Called
68
Out Is Connected And/Or Enabled. See Chapter 6, "Using the Setup Utility
68
Press F3 to Review the Log File
68
Re-Run Test
68
Re-Start the Test to Reset the Log File
68
System Board
68
System Board Information Only Re-Start the Test, if Necessary
68
Replace the Component that Is Called out in Warning Statement
69
Replace the Component under Test
69
Flash the System and Retest. See "Flash Update Procedures
70
Make Sure the Component that Is Called out Is Connected And/Or Enabled. See Chapter 6, "Using the Setup Utility,"
70
Flash the System. See "Flash Update Procedures
71
Go to "Undetermined Problems
71
Go to "Undetermined Problems" on Page
71
Replace Component under Function Test
71
System Board
71
Beep Symptoms
84
POST Error Codes
85
Miscellaneous Error Messages
87
Undetermined Problems
88
Chapter 8. Replacing Frus (Desktop Computers)
91
Rear Connectors
92
Removing the Cover
93
Locations
94
Identifying Parts on the System Board
95
Machine Types 8013, 8716, 8976, 8986, 9266, 9282, 9374, 9384, 9646, and 9647
95
Machine Types 8706, 8972, 8982, 8994, 9278, 9288, 9380, 9632, 9648, and 9649
96
Machine Types 8702, 8970, 8980, 8992, 9276, 9286, 9378, and 9628
97
Replacing a Memory Module
97
Replacing the CMOS Battery
100
Replacing the Power Supply
100
Replacing the System Board
103
Types 8702, 8706, 8970, 8972, 8980, 8982, 8992, 8994, 9276, 9278, 9286, 9288, 9378, 9380, 9628, 9632, and 9649
103
Types 8013, 8716, 8976, 8986, 9266, 9282, 9374, 9384, and 9647
107
Replacing the Microprocessor
111
Types 8702, 8706, 8970, 8972, 8980, 8982, 8992, 8994, 9276, 9278, 9286, 9288, 9378, 9380, 9628, 9632, and 9649
111
Types 8013, 8716, 8976, 8986, 9266, 9282, 9374, 9384, and 9647
114
Replacing the Hard Disk Drive
118
Replacing an Optical Drive
121
Replacing the Diskette Drive
123
Replacing the Power Switch/Led Assembly
125
Replacing the Front Panel Card
127
Replacing the System Fan Assembly
128
Replacing a PCI Adapter
130
Completing the FRU Replacement
130
Chapter 9. Replacing Frus (Tower Computers)
133
Rear Connectors
134
Removing the Cover
135
Locations
136
Identifying Parts on the System Board
136
Machine Types 8700, 8717, 8979, 8991, 9269, 9283, 9383, 9631, and 9646
137
Machine Types 8705, 8975, 8985, 9265, 9279, 9379, 9389, 9637, and 9648
138
Machine Types 8701, 8973, 8983, 8995, 9277, 9287, 9387, and 9635
139
Removing and Replacing the Front Bezel
139
Replacing the Power Supply
140
Replacing the System Board
141
Types 8701, 8705, 8973, 8975, 8983, 8985, 8995, 9265, 9277, 9279, 9287, 9379, 9387, 9389, 9635, 9637, and 9648
141
Types 8700, 8717, 8979, 8991, 9269, 9283, 9383, 9631, and 9646
146
Replacing the Microprocessor
149
Types 8701, 8705, 8973, 8975, 8983, 8985, 8995, 9265, 9277, 9279, 9287, 9379, 9387, 9389, 9635, 9637, and 9648
149
Types 8700, 8717, 8979, 8991, 9269, 9283, 9383, 9631, and 9646
153
Replacing a Memory Module
157
Replacing a PCI Adapter
158
Replacing the Hard Disk Drive
159
Replacing an Optical Drive
162
Replacing the Diskette Drive
163
Replacing the System Fan Assembly
163
Replacing the Front Audio/Usb Assembly
165
Replacing the Power Switch/Led Assembly
165
Replacing the CMOS Battery
165
Completing the FRU Replacement
166
Chapter 10. FRU Lists
167
Machine Type 8013
167
Machine Type 8700
174
Machine Type 8701
184
Machine Type 8702
193
Machine Type 8705
203
Machine Type 8706
214
Machine Type 8970
223
Machine Type 8972
231
Machine Type 8973
239
Machine Type 8975
247
Machine Type 8976
255
Machine Type 8979
261
Machine Type 8980
270
Machine Type 8982
278
Machine Type 8983
287
Machine Type 8985
295
Machine Type 8986
304
Machine Type 8991
311
Machine Type 8992
321
Machine Type 8994
331
Machine Type 8995
341
Machine Type 9265
350
Machine Type 9266
360
Machine Type 9269
369
Machine Type 9276
378
Machine Type 9277
385
Machine Type 9278
393
Machine Type 9279
403
Machine Type 9282
412
Machine Type 9283
419
Machine Type 9286
427
Machine Type 9287
435
Machine Type 9288
443
Machine Type 9374
451
Machine Type 9378
460
Machine Type 9379
468
Machine Type 9380
476
Machine Type 9383
485
Machine Type 9384
493
Machine Type 9387
504
Machine Type 9389
512
Machine Type 9628
521
Machine Type 9631
529
Machine Type 9632
539
Machine Type 9635
552
Machine Type 9637
561
Chapter 11. Additional Service Information
575
Security Features
575
Hardware Controlled Passwords
575
Operating System Password
575
Vital Product Data
575
Management Information Format (MIF)
575
BIOS Levels
576
Flash Update Procedures
576
Updating (Flashing) BIOS from a Diskette
576
Recovering from a POST/BIOS Update Failure
576
Power Management
577
Automatic Configuration and Power Interface (ACPI) BIOS
577
Automatic Power-On Features
577
Appendix. Notices
579
Television Output Notice
580
Trademarks
580
Advertisement
Lenovo ThinkCentre 9279 User Manual (94 pages)
Brand:
Lenovo
| Category:
Desktop
| Size: 1.7 MB
Table of Contents
User Guide
1
Table of Contents
5
Conditions that Require Immediate Action
7
Important Safety Information
7
General Safety Guidelines
8
Service and Upgrades
8
Static Electricity Prevention
9
Power Cords and Power Adapters
9
Extension Cords and Related Devices
10
Plugs and Outlets
10
External Devices
11
Batteries
11
Heat and Product Ventilation
11
Operating Environment
12
Electrical Current Safety Information
13
Lithium Battery Notice
13
Laser Compliance Statement
14
Modem Safety Information
14
Additional Safety Information
15
Cleaning and Maintenance
15
Data Safety
15
Power Supply Statement
15
Introduction
17
Chapter 1. Arranging Your Workspace
19
Comfort
19
Glare and Lighting
19
Air Circulation
20
Electrical Outlets and Cable Lengths
20
Chapter 2. Setting up Your Computer
21
Connecting Your Computer
21
Turning on Power
25
Finishing the Software Installation
26
Completing Important Tasks
26
Updating Your Operating System
26
Installing Other Operating Systems
27
Updating Your Antivirus Software
27
Shutting down the Computer
27
Chapter 3. Installing Options
29
Features
29
Specifications
32
Available Options
33
Tools Required
33
Handling Static-Sensitive Devices
34
Installing External Options
34
Locating the Connectors on the Front of Your Computer
35
Locating the Connectors on the Rear of Your Computer
36
Obtaining Device Drivers
37
Removing the Cover
38
Locating Components
39
Identifying Parts on the System Board
40
Installing Memory
43
Installing Adapters
44
Installing Internal Drives
46
Drive Specifications
46
Installing a Drive in Bay 1 or Bay 2
48
Connecting Drives
50
Connecting the First Optical Drive
50
Connecting an Additional Optical Drive, or Parallel ATA Hard Disk Drive
50
Connecting a Serial ATA Hard Disk Drive
51
Installing Security Features
51
Integrated Cable Lock
52
Padlock
53
Password Protection
53
Changing the Battery
53
Erasing a Lost or Forgotten Password (Clearing CMOS)
54
Replacing the Cover and Connecting the Cables
55
Chapter 4. Recovering Software
57
Creating and Using the Product Recovery Disc
57
Performing Backup and Recovery Operations
58
Using the Rescue and Recovery Workspace
59
Creating and Using Rescue Media
60
Creating and Using a Recovery Repair Diskette
61
Recovering or Installing Device Drivers
62
Setting a Rescue Device in the Startup Sequence
63
Solving Recovery Problems
63
Chapter 5. Using the Setup Utility
65
Starting the Setup Utility Program
65
Viewing and Changing Settings
65
Using Passwords
65
Password Considerations
65
User Password
66
Administrator Password
66
Setting, Changing, and Deleting a Password
66
Using Security Profile by Device
66
Selecting a Startup Device
67
Selecting a Temporary Startup Device
67
Changing the Startup Device Sequence
67
Advanced Settings
68
Exiting from the Setup Utility Program
68
Chapter 6. Updating System Programs
69
Using System Programs
69
Updating (Flashing) BIOS from a Diskette
69
Chapter 7. Troubleshooting and Diagnostics
71
Basic Troubleshooting
71
Diagnostic Programs
72
PC-Doctor for Windows
73
PC-Doctor for DOS
73
PC-Doctor for Windows PE
75
Cleaning the Mouse
75
Optical Mouse
75
Non-Optical Mouse
75
Chapter 8. Getting Information, Help, and Service
77
Information Resources
77
Online Books Folder
77
Thinkvantage Productivity Center
77
Access Help
78
Safety and Warranty
78
Www.lenovo.com
78
Help and Service
78
Using the Documentation and Diagnostic Programs
79
Calling for Service
79
Using Other Services
80
Purchasing Additional Services
80
Appendix A. Manual Modem Commands
81
Basic at Commands
81
Extended at Commands
83
Mnp/V.42/V.42Bis/V.44 Commands
84
Fax Class 1 Commands
85
Fax Class 2 Commands
85
Voice Commands
86
Appendix B. Notices
89
Television Output Notice
90
Trademarks
90
Index
91
Lenovo ThinkCentre 9279 User Manual (92 pages)
Brand:
Lenovo
| Category:
Desktop
| Size: 1.64 MB
Table of Contents
Table of Contents
5
Conditions that Require Immediate Action
7
Important Safety Information
7
General Safety Guidelines
8
Service
8
Power Cords and Power Adapters
9
Extension Cords and Related Devices
10
Plugs and Outlets
10
Batteries
10
Heat and Product Ventilation
11
CD and DVD Drive Safety
11
Additional Safety Information
12
Lithium Battery Notice
12
Laser Compliance Statement
13
Modem Safety Information
13
Power Supply Statement
14
Introduction
15
Chapter 1. Arranging Your Workspace
17
Comfort
17
Glare and Lighting
17
Air Circulation
18
Electrical Outlets and Cable Lengths
18
Chapter 2. Setting up Your Computer
19
Connecting Your Computer
19
Turning on Power
23
Finishing the Software Installation
24
Completing Important Tasks
24
Updating Your Operating System
24
Installing Other Operating Systems
25
Updating Your Antivirus Software
25
Shutting down the Computer
25
Chapter 3. Installing Options
27
Features
27
Specifications
30
Available Options
31
Tools Required
31
Handling Static-Sensitive Devices
32
Installing External Options
32
Locating the Connectors on the Front of Your Computer
33
Locating the Connectors on the Rear of Your Computer
34
Obtaining Device Drivers
35
Removing the Cover
36
Locating Components
37
Identifying Parts on the System Board
38
Installing Memory
41
Installing Adapters
42
Installing Internal Drives
44
Drive Specifications
44
Installing a Drive in Bay 1 or Bay 2
46
Connecting Drives
48
Connecting the First Optical Drive
48
Connecting an Additional Optical Drive, or Parallel ATA Hard Disk Drive
48
Connecting a Serial ATA Hard Disk Drive
49
Installing Security Features
49
Integrated Cable Lock
50
Padlock
51
Password Protection
51
Changing the Battery
51
Erasing a Lost or Forgotten Password (Clearing CMOS)
52
Replacing the Cover and Connecting the Cables
53
Lenovo 2005, 2006. Portions © IBM Corp
55
Chapter 4. Recovering Software
55
Creating and Using Product Recovery Discs
55
Backup and Recovery
56
Using the Rescue and Recovery Workspace
57
Solving Recovery Problems
58
Creating and Using Rescue Media
58
Creating and Using a Recovery Repair Diskette
59
Recovering or Installing Device Drivers
60
Setting a Rescue Device in the Startup Sequence
60
Chapter 5. Using the Setup Utility
63
Starting the Setup Utility Program
63
Viewing and Changing Settings
63
Using Passwords
63
User Password
63
Administrator Password
64
Selecting a Startup Device
65
Selecting a Temporary Startup Device
65
Changing the Startup Device Sequence
65
Exiting from the Setup Utility Program
65
Chapter 6. Updating System Programs
67
Using System Programs
67
Updating (Flashing) BIOS from a Diskette
67
Chapter 7. Troubleshooting and Diagnostics
69
Basic Troubleshooting
69
Diagnostic Programs
70
PC-Doctor for Windows
71
PC-Doctor for DOS
71
Cleaning the Mouse
72
Optical Mouse
73
Non-Optical Mouse
73
Chapter 8. Getting Information, Help, and Service
75
Information Resources
75
Online Books Folder
75
Thinkvantage Productivity Center
75
Access Help
76
Warranty and Safety
76
Www.lenovo.com
76
Help and Service
76
Using the Documentation and Diagnostic Programs
77
Calling for Service
77
Using Other Services
78
Purchasing Additional Services
78
Appendix A. Manual Modem Commands
79
Basic at Commands
79
Extended at Commands
81
Mnp/V.42/V.42Bis/V.44 Commands
82
Fax Class 1 Commands
83
Fax Class 2 Commands
83
Voice Commands
84
Appendix B. Notices
87
Television Output Notice
88
Trademarks
88
Index
89
Advertisement
Lenovo ThinkCentre 9279 Hardware Replacement Manual (40 pages)
Lenovo ThinkCentre A55 8705: Supplementary Guide
Brand:
Lenovo
| Category:
Desktop
| Size: 1.08 MB
Table of Contents
Hardware Replacement Guide
1
Table of Contents
5
Overview
7
Safety Information
7
Additional Information Resources
8
Handling Static-Sensitive Devices
8
Tools Required
8
Chapter 1. Locations
9
Locating Components
9
Locating Connectors on the Front of the Computer
10
Locating Connectors on the Rear of the Computer
11
Identifying Parts on the System Board
12
Chapter 2. Replacing Hardware
15
Removing the Computer Cover
15
Removing and Replacing the Front Bezel
17
Replacing the Power Supply
18
Replacing the Heat Sink Assembly
19
Replacing a Memory Module
23
Replacing an Adapter
24
Replacing the Hard Disk Drive
25
Replacing an Optical Drive
29
Replacing the Diskette Drive
30
Replacing the System Fan Assembly
31
Replacing the Keyboard
33
Replacing the Mouse
33
Completing the Installation
34
Updating (Flashing) BIOS from a Diskette or CD-ROM
36
Appendix. Notices
37
Television Output Notice
38
Trademarks
38
Advertisement
Related Products
Lenovo ThinkCentre 9277
Lenovo 9276
Lenovo 9278
Lenovo ThinkCentre 9217
Lenovo 921525U
Lenovo 9215A1U
Lenovo ThinkCentre 9214
Lenovo ThinkCentre 9216
Lenovo ThinkCentre 9215
Lenovo ThinkCentre Edge 92z
Lenovo Categories
Laptop
Desktop
Server
Monitor
Tablet
More Lenovo Manuals
Login
Sign In
OR
Sign in with Facebook
Sign in with Google
Upload manual
Upload from disk
Upload from URL