Sign In
Upload
Manuals
Brands
NEC Manuals
Microcontrollers
78K0/L 3 - See it! Series
NEC 78K0/L 3 - See it! Series Manuals
Manuals and User Guides for NEC 78K0/L 3 - See it! Series. We have
1
NEC 78K0/L 3 - See it! Series manual available for free PDF download: User Manual
NEC 78K0/L 3 - See it! Series User Manual (82 pages)
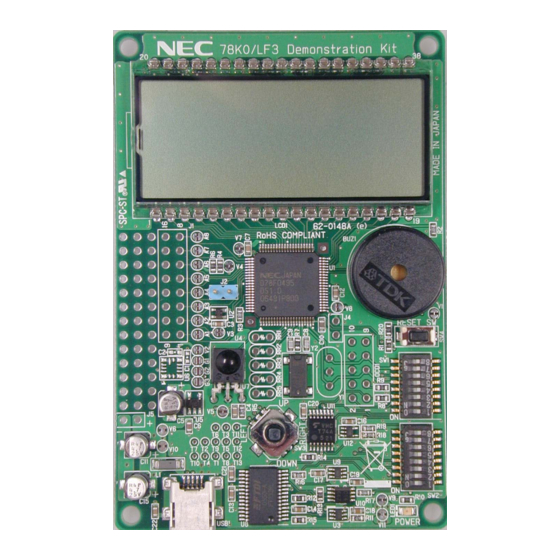
Demonstration Kit for the 78K0 L Series
Brand:
NEC
| Category:
Microcontrollers
| Size: 5.66 MB
Table of Contents
Table of Contents
6
1 Introduction
10
Main Features of 78K0/Lx3 - See It
10
System Requirements
12
Package Contents
12
Trademarks
12
2 K0/Lx3 - See It! System Configuration
13
78K0/Lx3 - See It
13
Host Computer
13
Power Supply Via USB Interface
13
Figure 1: 78K0/Lx3 - See It! System Configuration
13
3 K0/Lx3 - See It! Components
14
Figure 2: 78K0/Lx3 - See It! Board Connectors and Switches, Top View
14
Configuration Switches SW1 / SW2
15
On-Board Debug Mode (TK-78 Debugging)
15
Fpl3(Writeez3) Mode (FLASH Programming Mode)
15
QB-MINI2 Mode (OCD Debugging / Normal Execution Mode)
15
Table 1: Operation Mode Selection SW1 / SW2
15
RESET Button, SW4
16
Navigation Switch, SW3
16
Table 2: Navigation Switch SW3
16
External A/D Measurement Inputs, Connector J1
17
External A/D Measurement Input, Connector J2
17
IDD Measurement, Connector J4
17
External Power Supply Input, Connector J5
17
External Main Oscillator, Y1
17
Table 3: External A/D Measurement Inputs, Connector J1
17
Table 4: External A/D Measurement Input, Connector J2
17
Table 5: External Power Supply Input, J3
17
QB-MINI2 Connector, OCD1
18
Table 6: QB-MINI2 Connector OCD1
18
Table 7: Configuration of SW1 and SW2 When Using QB-MINI2
18
USB Interface Connector, USB1
19
Figure 3: Connector USB1, USB Mini-B Type Host Connector Pin Configuration
19
Table 8: Pin Configuration of Connector USB1
19
LCD1, 224 Segment LCD Panel
20
Figure 4: LCD Outline
20
Table 9: LCD Driver Specification
20
Table 10: LCD Segment Assignment
21
External LCD Resistors, RR1 - RR5
22
Temperature Sensor, U2
22
IR Receiver Module, U4
22
Buzzer, BUZ1
22
Power LED, LED1
22
Connectors T1 - T13 and Wrap Field
23
Figure 5: Connectors T1 - T13 and Wrap Field
23
Table 11: Connectors T1 - T13
23
Soldering Bridges
24
Table 12: Setting of Soldering Bridges A1 - A8, V7
24
Table 13: Setting of Soldering Bridges V1 - V6, V8 - V11
24
78K0/LF3 Memory Map
25
Figure 6: 78K0/LF3 Memory Map
25
4 On-Chip Debugging
26
OCD Via TK-78 Debug Function
26
Figure 7: On-Chip Debugging
26
Table 14: Configuration for TK-78 Debugging
26
OCD Via QB-MINI2 Emulator
27
Table 15: Configuration for QB-MINI2 Debugging
27
5 K0/Lx3 - See It! Installation and Operation
28
Getting Started
28
CD-ROM Contents
28
Table 16: 78K0/Lx3 - See It! CD-ROM Directory Structure
28
6 Hardware Installation
29
7 Software Installation
29
IAR Systems Embedded Workbench for 78K Installation
29
Writeez3 FLASH Programming GUI Installation
29
Sample Program Installation
29
USB Driver Installation
30
Installation on Windows 98Se/Me
30
Figure 8: Add New Hardware Wizard (Windows 98SE)
30
Figure 9: Search Method (Windows 98SE)
30
Figure 10: Search Location Specification (Windows 98SE)
31
Figure 11: Checking Driver to be Installed (Windows 98SE)
31
Installation on Windows 2000
32
Figure 12: Installation Completion (Windows 98SE)
32
Figure 13: Found New Hardware Wizard 1 (Windows 2000)
32
Figure 14: Search Method 1 (Windows 2000)
33
Figure 15: Driver File Location 1 (Windows 2000)
33
Figure 16: Address Specification 1 (Windows 2000)
34
Figure 17: Driver File Search 1 (Windows 2000)
34
Figure 18: USB Driver Installation Completion 1 (Windows 2000)
35
Figure 19: Found New Hardware Wizard 2 (Windows 2000)
35
Figure 20: Search Method 2 (Windows 2000)
36
Figure 21: Driver File Location 2 (Windows 2000)
36
Figure 22: Address Specification 2 (Windows 2000)
37
Figure 23: Driver File Search 2 (Windows 2000)
37
Installation on Windows XP
38
Figure 24: USB Driver Installation Completion 2 (Windows 2000)
38
Figure 25: Found New Hardware Wizard 1 (Windows XP)
38
Figure 26: Search Location Specification 3 (Windows XP)
39
Figure 27: Windows XP Logo Testing 3 (Windows XP)
39
Figure 28: USB Driver Installation Completion 1 (Windows XP)
40
Figure 29: Found New Hardware Wizard 2 (Windows XP)
40
Figure 30: Search Location Specification 2 (Windows XP)
41
Figure 31: Windows XP Logo Testing 2 (Windows XP)
41
Figure 32: USB Serial Port2 Driver Installation Completion (Windows XP)
42
Confirmation of USB Driver Installation
43
Figure 33: Device Manager
43
Driver Deinstallation
44
Figure 34: Driver Uninstallation
44
Figure 35: Driver Uninstaller
44
Figure 36: Completion of Driver Uninstallation
45
8 Writeez3 FLASH Programming Software
46
Introduction
46
Starting up the GUI Software
46
Figure 37: GUI Software Main Window
46
Toolbar
47
Figure 38: Toolbar Buttons
47
Menu Bar
48
File] Menu
48
Figure 39: [File] Menu
48
Figure 40: HEX File Selection Window
48
Device] Menu
49
Figure 41: [Device] Menu
49
Figure 42: Device Setup Window - Standard
51
Figure 43: Device Setup Window - Parameter File Selection
52
Figure 44: Parameter File Selection Window
52
Figure 45: Device Setup Window - Host Connection
53
Figure 46: Device Setup Window - Supply Oscillator Selection
53
Figure 47: Device Setup Window - Operation Mode
54
Figure 48: Device Setup Window - Target Reset Message
54
Figure 49: Device Setup Window - Advance
55
Figure 50: Device Setup Window - Command Options
55
Figure 51: Device Setup Window - Security Flag Settings
56
Figure 52: Device Setup Window - Disable Chip Erase
57
Figure 53: Device Setup Window - Disable Boot Cluster Reprogramming Warning
57
View] Menu
58
Figure 54: [View] Menu
58
Help] Menu
59
Figure 55: [Help] Menu
59
Figure 56: about Writeez3 Window
59
Programmer Parameter Window
60
Figure 57: Programmer Parameter Window
60
9 How to Use Writeez3 FLASH Programming Software
61
Installing the Writeez3 GUI Software
61
Installing the Driver
61
Installing the Parameter File
61
Connecting and Starting
62
Setting the Programming Environment
63
Figure 58: GUI Software Startup Screen
63
Figure 59: <Standard Device Setup> Dialog Box
63
Figure 60: Parameter File Selection
64
Figure 61: Port Selection
64
Figure 62: <Standard Device Setup> Dialog Box after Setting
65
Figure 63: <Advance Device Setup> Dialog Box
65
Selecting a User Program
66
Figure 64: Completion of Parameter Setting
66
Figure 65: after Downloading
66
[Autoprocedure(Epv)] Command Execution
67
Terminating the GUI
67
Execute the "VOLTMETER" Application
67
Restarting the GUI
67
Figure 66: after EPV Execution
67
10 Troubleshooting
68
11 IAR Sample Session
70
Figure 67: IAR Embedded Workbench
71
Figure 68: IAR Project Workspace
72
Figure 69: IAR Debugger Options 1/2
72
Figure 70: IAR Debugger Options 2/2
73
Figure 71: IAR Linker Options
73
Figure 72: TK-78 Hardware Setup Menu
74
Figure 73: IAR Project Download
75
Figure 74: IAR C-SPY Debugger
76
12 Sample Projects
77
Table 17: Example Directory Structure
77
Buzzer Sample
78
Kitchentimer Sample
78
Realtimeclock Sample
78
Remotecontrol Sample
78
Temperature Sample
78
Voltmeter Sample
78
13 Cables
79
USB Interface Cable (Mini-B Type)
79
Figure 75: USB Interface Cable (Mini-B Type)
79
14 Schematics
80
Figure 76: 78K0/Lx3 - See It! Schematics 1/2
80
Figure 77: 78K0/Lx3 - See It! Schematics 2/2
81
Advertisement
Advertisement
Related Products
NEC 78K0S/KA1+
NEC 78K0S/KB1+
NEC 78K/0S Series
NEC 78K0S/KU1+
NEC 78K0/KD1 Series
NEC 78K0S/K 1+ Series
NEC 78K0S/KY1+
NEC 78K0/Fx2
NEC 78K0/KB1+
NEC 78K0R/KE3
NEC Categories
Monitor
Projector
Server
Telephone
Computer Hardware
More NEC Manuals
Login
Sign In
OR
Sign in with Facebook
Sign in with Google
Upload manual
Upload from disk
Upload from URL