Sign In
Upload
Manuals
Brands
PIONEER Manuals
Car Navigation system
AVIC-F220
User Manuals: PIONEER AVIC-F220 Navigation System
Manuals and User Guides for PIONEER AVIC-F220 Navigation System. We have
3
PIONEER AVIC-F220 Navigation System manuals available for free PDF download: Installation Manual, Operation Manual, Important Information For The User
pioneer AVIC-F220 Installation Manual (112 pages)
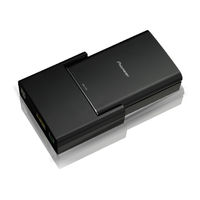
HIDE-AWAY NAVIGATION SYSTEM
Brand:
pioneer
| Category:
Car Navigation system
| Size: 3.88 MB
Table of Contents
English
2
Table of Contents
2
About Your New Navigation System and this Manual
3
System
3
Navigation System and Retain Them for Future Reference
4
Before Installing this Product
5
To Prevent Damage
5
Precautions before Connecting the System
5
Parts Supplied
6
Connecting the System
7
Connecting the Power Cord
8
Tying the Cables
8
Replacing the Fuse
9
Installation
10
Precautions before Installation
10
To Guard against Electromagnetic Interference
10
Before Installing
10
Installation Precautions before Installation
10
Installing the Navigation System
11
Installation Notes
11
Parts Supplied
12
Before Installing the Base Unit
12
Installing with Self-Tapping Screws
13
Installing with the Hook and Loop Fastener
13
Attaching the Detachable Device
14
Installing the GPS Aerial
15
Installation Notes
15
Parts Supplied
15
When Installing the Aerial Inside the Vehicle (on the Dashboard or Rear Shelf)
16
IMPORTANT INFORMATION Installing the RDS-TMC Tuner
17
Engb
17
After Installation after Installing this Navigation System
18
Parts Supplied
17
Wiring the External Aerial
17
Mounting the RDS-TMC Tuner
17
Español
19
Acerca de Su Nuevo Sistema de
20
Navegación y Este Manual
20
Información Importante
20
Lea Todas Estas Instrucciones
21
Relacionadas con Su Sistema de
21
Emplearlas como Referencia en el
21
Futuro
21
Precauciones Importantes
21
Antes de Instalar Este Producto
22
Conexión del Sistema
22
Precauciones Antes de Conectar el
22
Para Impedir Daños
23
Partes Suministradas
23
Conexión del Sistema
24
Atado de Los Cables
25
Conexión del Cable de Alimentación
25
Sustitución del Fusible
26
Antes de la Instalación
27
Instalación
27
Para Impedir que Se Produzcan Interferencias Electromagnéticas
27
Precauciones Antes de la Instalación
27
Instalación del Sistema de Navegación
28
Notas Acerca de la Instalación
28
Partes Suministradas
29
Antes de Instalar la Unidad Base
29
Instalación con Tornillos de Rosca
30
Instalación con el Fijador
30
Conexión del Dispositivo Extraíble
31
Instalación de la Antena GPS
32
Notas Acerca de la Instalación
32
Partes Suministradas
32
Cuando Instale la Antena en el Interior del Vehículo (en el Salpicadero O en la Bandeja Trasera)
33
Instalación del Sintonizador RDS-TMC
35
Partes Suministradas
35
Cableado de la Antena Externa
35
Montaje del Sintonizador RDS-TMC
35
Después de Instalar Este Sistema de
36
Después de la Instalación
36
Deutsch
37
Wichtige Information
38
Über Ihr Neues Navigationssystem und diese Anleitung
38
Bitte Lesen Sie diese Anleitung zum
39
Navigationssystem Aufmerksam
39
Anleitung für Späteres
39
Nachschlagen auf
39
Wichtige Sicherheitshinweise
39
Anschluss des Systems
41
Mitgelieferte Teile
41
Vor dem Einbau dieses Produkts
41
Zur Vermeidung von Schäden
41
Anschluss des Systems
42
Bündeln der Kabel
43
Stromkabel Anschließen
43
Auswechseln der Sicherung
44
Einbau
45
Vor der Installation zu Beachten
45
Zur Vermeidung Elektromagnetischen Rauschens
45
Einbau des Navigationssystems
46
Hinweise zum Einbau
46
Mitgelieferte Teile
47
Vor der Installation des Grundgerätes
47
Einbau mit Selbstschneidenden Schrauben
48
Einbau mit Klettband
48
Anbringen der Abnehmbaren Einheit
49
Vor dem Einbau
46
Einbau der GPS-Antenne
50
Hinweise zur Befestigung
50
Mitgelieferte Teile
50
Einbau der Antenne IM
51
Fahrzeuginnenraum (auf dem Armaturenbrett oder der Hutablage)
51
Einbau des RDS-TMC-Tuners
53
Mitgelieferte Teile
53
Verkabelung der Externen Antenne
53
Befestigung des RDS-TMC-Tuners
53
Nach dem Einbau
54
Nach dem Einbau dieses
54
Navigationssystems
54
Français
55
A Propos de Votre Nouveau Systeme de Navigation Et de Ce Manuel
56
Information Importante
56
Importantes Mesures de Securite
57
Veuillez Lire Toutes Les Explications Relatives a Votre Systeme de Navigation Et Les Conserver Pour Vous y Referer Par la Suite
57
Avant de Raccorder Ce Produit
58
Branchement du Système
58
Précautions À Prendre Avant de Brancher Le
58
Pièces Fournies
59
Pour Éviter Toute Détérioration
59
Branchement du Système
60
Branchement du Cordon D'alimentation
61
Regroupement des Câbles
61
Remplacement du Fusible
62
Installation
63
Pour Protéger Le Système de Navigation Contre Les Parasites Électromagnétiques
63
Précautions À Prendre Avant
63
Avant de Procéder À L'installation
64
Installation du Système de Navigation
64
Remarques Sur L'installation
64
Pièces Fournies
65
Avant D'installer la Base
65
Installation Avec des Vis Autotaraudeuses
66
Installation Avec la Bande Velcro
66
Fixation du Périphérique Amovible
67
Installation de L'antenne GPS
68
Remarques Sur L'installation
68
Pièces Fournies
68
Installation de L'antenne Dans Le Véhicule (Sur Planche de Bord Ou Lunette Arrière)
69
Installation du Tuner RDS-TMC
71
Pièces Fournies
71
Raccordement de L'antenne Extérieure
71
Montage du Tuner RDS-TMC
71
Après Installation de Ce Système de
72
Après L'installation
72
Italiano
73
Informazioni Importanti
74
Uso del Nuovo Sistema DI
74
Manuale
74
Leggere Tutte Le Presenti Istruzioni
75
Riferimenti Futuri
75
Misure DI Sicurezza Importanti
75
Collegamento del Sistema
76
Precauzioni Prima DI Collegare Il Sistema
76
Prima DI Installare Questo Prodotto
76
Per Evitare Danni
77
Pezzi in Dotazione
77
Collegamento del Sistema
78
Collegamento del Cavo DI Alimentazione
79
Legatura Dei Cavi
79
Sostituzione del Fusibile
80
Installazione
81
Per Proteggere L'unità DI Navigazione da Disturbi Elettromagnetici
81
Precauzioni Prima Dell'installazione
81
Prima Dell'installazione
81
Installazione del Sistema DI Navigazione
82
Note Sull'installazione
82
Pezzi in Dotazione
83
Prima DI Installare L'unità DI Base
83
Installazione con Viti Autofilettanti
84
Installazione con L'attacco Biadesivo
84
Rimontaggio del Dispositivo Rimovibile
85
Installazione Dell'antenna GPS
86
Note Sull'installazione
86
Pezzi in Dotazione
86
Quando si Installa L'antenna All'interno del Veicolo (Sul Cruscotto O Sul Piano Portaoggetti Posteriore)
87
Installazione del Sintonizzatore RDS-TMC
89
Pezzi in Dotazione
89
Cablaggio Dell'antenna Esterna
89
Montaggio del Sintonizzatore RDS-TMC
89
Dopo L'installazione
90
Dopo L'installazione DI Questo Sistema DI
90
Dutch
91
Belangrijke Informatie
92
Betreffende Uw Nieuwe Navigatiesysteem en Het Gebruik Van Deze Handleiding
92
Lees Deze Informatie Betreffende Uw
93
Navigatiesysteem Zorgvuldig Door
93
En Bewaar de Informatie Voor
93
Latere Naslag
93
Alvorens U Dit Product Inbouwt
94
Systeemcomponenten Aansluiten
94
Voorzorgen Voor Het Aansluiten Van Het
94
Bijgeleverde Accessoires
95
Voorkomen Van Beschadigingen
95
Systeemcomponenten Aansluiten
96
Het Stroomsnoer Aansluiten
97
Samenbinden Van de Kabels
97
Vervangen Van de Zekering
98
Inbouwen
99
Voor de Installatie
99
Voorkomen Van Elektromagnetische Storingen
99
Voorzorgen Voor Installatie
99
Inbouwen Van Het Navigatiesysteem
100
Opmerkingen Betreffende Het Inbouwen
100
Bijgeleverde Accessoires
101
Vóór Het Installeren Van Het Basistoestel
101
Installeren Met Zelftappende Schroeven
102
Installeren Met Klittenband
102
Bevestigen Van Het Afneembare Paneel
103
Bevestigen Van de GPS-Antenne
104
Opmerkingen Betreffende Het Bevestigen
104
Bijgeleverde Accessoires
104
Bevestigen Van de Antenne Binnen in de Auto (Op Het Dashboard of de Hoedenplank)
105
Installeren Van de RDS-TMC Tuner
107
Bijgeleverde Accessoires
107
De Externe Antenne Aansluiten
107
Monteren Van de RDS-TMC Tuner
107
Na Het Inbouwen Van Dit
108
Navigatiesysteem
108
Na Installatie
108
Advertisement
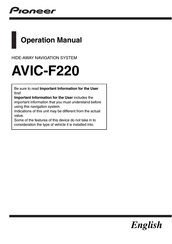
PIONEER AVIC-F220 Operation Manual (76 pages)
Hide-away navigation system
Brand:
PIONEER
| Category:
Car Navigation system
| Size: 4.52 MB
Table of Contents
Table of Contents
2
Introduction
5
Manual Overview
5
How to Use this Manual
5
Conventions Used in this Manual
5
Terms Used in this Manual
5
Map Coverage
5
Resetting the Microprocessor
5
Before You Start
7
Checking Part Names and Functions
7
Removing and Attaching the Detachable Device
7
Removing the Detachable Device
7
Attaching the Detachable Device
8
Charging the Battery of the Detachable Device
8
Monitoring the Battery Status
8
Inserting and Ejecting an SD Memory Card
9
Inserting an SD Memory Card
9
Ejecting an SD Memory Card
9
Protecting Your Product from Theft
10
Flow from Startup to Termination
10
On First-Time Startup
11
Regular Startup
11
How to Use the Navigation Menu Screens
12
Screen Switching Overview
12
What You Can Do on each Menu
13
Shortcut Menu
13
Selecting the Shortcut
13
Cancelling the Shortcut
14
Operating Menu Screens (E.g. "Navigation Menu" Screen)
14
Operating List Screens (E.g. POI List)
14
Operating the On-Screen Keyboard
15
How to Use the Map
16
How to Read the Map Screen
16
Audio Information Bar
17
Enlarged Map of the Intersection
17
Display During Motorway Driving
17
Types of the Road Stored in the Map Database
18
Operating the Map Screen
18
Changing the Scale of the Map
18
Switching the Map Orientation
18
Switching the Map between 2D and 3D
19
Displaying "Eco Graph
19
Scrolling the Map to the Position You Want to See
20
Viewing Information about a Specified Location
20
Displaying "Eco Graph
22
Reading the Screen
22
Eco-Driving Function
22
Displaying Eco Drive Level Guidance
23
Sudden Start Alert
23
Changing the Eco-Function Setting
23
Searching for and Selecting a Location
25
The Basic Flow of Creating Your Route
25
Searching for a Location by Address
26
Searching for a Name by Entering Multiple Keywords
27
Finding the Location by Specifying the Postcode
27
Setting up a Route to Your Home
28
Searching for Points of Interest (POI)
28
Searching for Pois by Preset Categories
28
Searching for a POI Directly from the Name of the Facilities
29
Searching for a Nearby POI
30
Searching for Pois Around the Destination
30
Searching for Pois Around the City
30
Selecting Destination from "Favourites
31
Searching for Pois by Using the Data on the SD Memory Card
31
Selecting a Location You Searched for Recently
32
Searching for a Location by Coordinates
32
Searching for a Location by Scrolling the Map
33
After the Location Is Decided
34
Setting a Route to Your Destination
34
Displaying the "Route Info" Screen
35
Checking and Modifying the Current
35
Modifying the Route Calculation Conditions
35
Items that Users Can Operate
35
Checking the Current Itinerary
36
Editing Waypoints
36
Adding a Waypoint
36
Deleting a Waypoint
37
Sorting Waypoints
37
Cancelling the Route Guidance
38
Storing a Location in "Favourites
39
Registering a Location by "Favourites
39
Registering a Location by Scroll Mode
39
Registering and Editing Locations
39
Editing Registered Locations
39
Editing the Entry in the "Favourites" List
39
Editing Your Home
40
Sorting the Entry in the "Favourites" List
40
Deleting the Entry from the "Favourites" List
41
Registering and Editing Your Home
41
Registering Your Home
41
Editing Your Home
42
Deleting the Entry from the "History" List
42
Exporting and Importing "Favourites" Items
43
Exporting "Favourites" Items
43
Importing the "Favourites" Items Edited on Navgate FEEDS
43
Using the "Fuel Details" Function
45
Inputting the Fuel Consumption Information for Calculating the Fuel Cost
45
Calculating the Fuel Consumption
45
Exporting the Data of Fuel Cost Information
46
Exporting the Data of "Fuel Details" from "Export/Import Menu" Screen
46
Fuel Cost Management
45
Using Applications
48
Preparing in Advance
48
Launching the Application
48
Displaying the "Settings Menu" Screen
49
Customising Preferences
49
Setting the Volume for Navigation System
49
Customising the Regional Settings
49
Selecting the Language
49
Setting the Time Difference
50
Changing the Unit between Km and Miles
50
Changing the Virtual Speed of the Vehicle
51
Setting the Keyboard Layout
51
Customising the Map Screen Settings
52
Displaying POI on the Map
52
Switching the Map between 2D and 3D
53
Displaying Manoeuvres
53
Setting the Map Colour Change between Day and Night
53
Changing the Road Colour
54
Setting the Auto-Zoom Display
54
Setting the "Favourites" Icon Display
54
Setting the Current Street Name Display
54
Displaying the Fuel Consumption Information
55
Setting the Speed Limit Display
55
Checking the Version Information
55
Registering and Editing Your Home
56
Correcting the Current Location
56
Checking the Connections of Leads
56
Using the Demonstration Guidance
56
Recording Your Travel History
57
Setting the Safe Mode
57
Other Functions
58
Replicating the Settings
58
Returning the Navigation System to the Default or Factory Settings
58
Restoring the Default Setting
58
Returning the Navigation System to the Initial State
59
Setting Items to be Deleted
60
Interruption of the AV Receiver Screen
61
When a Phone Call Is Received
61
When News or Traffic Announcement Is Received
61
When the Rear View Camera Is Activated
61
Appendix Troubleshooting
62
Appendix
62
Troubleshooting
62
Messages and How to React to Them
64
Positioning Technology
65
Positioning by GPS
65
Map Matching
65
Handling Large Errors
65
When Positioning by GPS Is Impossible
66
Conditions Likely to Cause Noticeable Positioning Errors
66
Route Setting Information
68
Route Search Specifications
68
Common Notes about the SD Memory Card
69
SD and SDHC Logo
69
Navigation Menu" Screen
70
Settings Menu" Screen
70
Display Information
70
Settings Menu" Screen
71
Glossary
72
Specifications
73
Pioneer AVIC-F220 Important Information For The User (48 pages)
hide-away navigation system
Brand:
Pioneer
| Category:
Car Navigation system
| Size: 3.43 MB
Table of Contents
English
8
Table of Contents
8
Precaution
9
Information for Users on Collection and Disposal of Old Equipment and Used Batteries
9
Cautions for the Built-In Battery
9
Replacing the Battery
10
Disposing of the Battery
10
Licence Agreement
11
Pioneer Avic-F220
11
Terms and Conditions for Tele Atlas Data
13
End User Licensing Terms
13
About the Database
18
About the Data for the Map Database
18
Important Safety Information
19
Cautions for the Detachable Device
20
Charging the Battery of Detachable Device
20
Eco-Driving Function
21
Fuel Cost Management
21
Speed Limit Indication
21
Additional Safety Information
22
Handbrake Interlock
22
To Avoid Battery Exhaustion
22
Handling the SD Card Slot
22
Handling the USB Port (Mini-B)
22
Notes before Using the System
23
In Case of Trouble
23
Visit Our Web Site
23
Supplied CD-ROM
23
Русский
24
Меры Предосторожности Для Встроенной Батареи
26
Замена Батареи
26
Утилизация Батареи
26
Pioneer Avic-F220
28
Лицензионное Соглашение
28
Условия И Положения Для Данных Tele Atlas
31
Условия Лицензионного Соглашения Для Конечного Пользователя
31
База Данных
38
О Данных Для Базы Данных Карт
38
Важные Сведения О Безопасности
39
Меры Предосторожности Для Съемного
41
Устройства
41
Зарядка Батареи Съемного Устройства
41
Индикация Ограничения Скорости
42
Учет Стоимости Топлива
42
Функция Eco-Вождения
42
Блокировка Стояночного Тормоза
43
Во Избежание Разрядки Аккумуляторных Батарей
43
Дополнительные Сведения О
43
Использования Слота Для SD-Карты
43
Обращение С USB-Портом (Mini-B)
43
Информация Для Пользователей По Сбору Информация Об Изделии
45
И Утилизации Бывшего В Эксплуатации Входящий В Комплект CD-ROM
45
Меры Предосторожности Посетите Наш Веб-Сайт
45
Перед Эксплуатацией Системы Изучите Приведенную Ниже Информацию В Случае Неисправности
45
Advertisement
Advertisement
Related Products
PIONEER AVIC-F20BT
Pioneer AVIC-F250
Pioneer AVIC-F260
Pioneer AVIC-F260-2
Pioneer AVIC-F960DAB
Pioneer AVIC-F960DBT
Pioneer AVIC-F860BT
Pioneer AVIC-F970DAB
Pioneer AVIC-F900BT/XS/RE
Pioneer AVIC-F160
PIONEER Categories
Car Receiver
Receiver
Stereo Receiver
Amplifier
CD Player
More PIONEER Manuals
Login
Sign In
OR
Sign in with Facebook
Sign in with Google
Upload manual
Upload from disk
Upload from URL