Sign In
Upload
Manuals
Brands
Pioneer Manuals
Home Theater System
SX-LX70SW
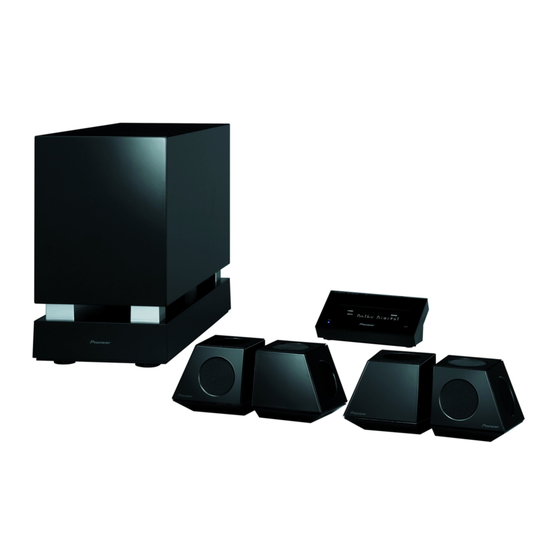
Pioneer SX-LX70SW Manuals
Manuals and User Guides for Pioneer SX-LX70SW. We have
6
Pioneer SX-LX70SW manuals available for free PDF download: Operating Instructions Manual, Service Manual
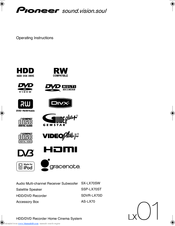
Pioneer SX-LX70SW Operating Instructions Manual (182 pages)
HDD/DVD Recorder Home Cinema System
Brand:
Pioneer
| Category:
Home Theater System
| Size: 13.04 MB
Table of Contents
Section One
4
Table of Contents
4
What's in the Box
5
1 Speaker Setup Guide
6
Safety Precautions When Setting up
6
Home Theater Sound Setup
6
Standard Surround Setup
6
Front Surround Setup
6
Preparing the Speakers
6
Using the Supplied Speaker Bases
6
When Not Using the Supplied Speaker Bases
7
Connect the Speaker System
7
Additional Notes on Speaker Placement
7
2 Connecting up
8
Receiver Subwoofer
8
Rear Panel
8
Side Panel
8
Back of Display Unit
9
HDD/DVD Recorder
9
Rear Panel
9
Front Panel
9
Basic Connections
10
3 Controls and Displays
14
Display Unit
14
Display
15
HDD/DVD Recorder
16
Display
16
Common Interface
17
Inserting a CA Module
17
Remote Control
18
Operating the Receiver Subwoofer
18
Operating the Built-In FM/AM Tuner
19
Operating the Supplied HDD/DVD Recorder
20
Operating Pioneer Flat Screen TV and Tvs
22
Operating a Pioneer Blu-Ray Disc Player
23
Operating a Pioneer DVD Player
25
Putting the Batteries in the Remote Control
26
Using the Remote Control
26
4 Before You Start
27
Switching on
27
Setting up
27
Using the Auto MCACC Setup for Optimal Surround Sound
27
Basic Operation
29
Operating the Remote Control
29
Using the LCD Touch Screen
29
Watching a DVD
30
Listening to a CD
30
Watching a Title Recorded on the HDD
30
Listening to the Radio
30
5 Listening to Your System
31
Effective Sound (for Optimum Sound)
31
Auto Listening Mode
31
Listening in Surround Sound
31
Dolby Pro Logic II Music Settings
32
Center Image Setting
32
Using Advanced Surround
32
Using Front Stage Surround Advance
33
Listening in Stereo
33
Genre Sync Mode
33
Using the Sound Retriever
33
Listening with MCACC Effect
34
Using Midnight, Loudness and Quiet Listening Modes
34
Adjusting the Bass and Treble
34
Adjusting Sound Delay
34
6 Listening to the Radio
35
Improving Poor FM Reception
35
Improving Poor am Sound
35
Changing the Noise Cut Mode
35
Memorizing Stations
35
Listening to Station Presets
36
Using RDS
36
Displaying RDS Information
36
Searching for RDS Programs
36
7 Surround Sound Settings
37
Using the Sound Setup Menu
37
Channel Level Setting
37
Speaker Distance Setting
37
Dynamic Range Control
38
Dual Mono Setting
38
Using the Virtual Surround Back Mode
39
LFE Attenuate
39
Adjusting the Channel Levels Using the Test Tone
39
8 Other Connections
40
Using this Unit for TV Audio
40
Audio Input Settings from Tvs (TV Input)
40
Connecting Auxiliary Components
40
Connecting for Digital Audio
41
Connecting an Analog Audio Component
41
Connecting an Ipod
41
Listening to an External Audio Source
42
Connecting External Antennas
42
About Control out Connections
42
Connecting Using HDMI
42
HDMI Mode Setting
43
Setting the Auto Delay
43
About HDMI
43
9 HDMI Control
44
Making the HDMI Control Connections
44
Setting the HDMI Options
45
Setting the HDMI Control Mode
45
Before Using Synchronization
46
Synchronized Amp Mode
46
Synchronized Amp Mode Operations
46
Canceling Synchronized Amp Mode
46
Additional Information
47
Dimming the Display
47
Setting the Sleep Timer
47
Setting up the Remote to Control Your TV
47
TV Preset Code List
48
Resetting the System
48
Installation and Maintenance
48
Hints on Installation
48
Surround Sound Formats
49
Dolby
49
Dts
49
Troubleshooting
50
General
50
Tuner
51
Hdmi
51
Displayed Messages
52
Specifications
53
Microphone (for Auto MCACC Setup)
53
These Operating Instructions
53
Warranty Card
53
Section Two
54
Recorder (SDVR-LX70D)
54
Section Two
55
1 Before You Start
57
Symbols Used in this Manual
57
Disc/Content Format Playback Compatibility
57
Compatible Media
57
Compressed Audio Compatibility
59
DIVX Video Compatibility
60
About the Internal Hard Disk Drive
61
2 Recorder Connections
62
Connecting a TV Antenna
62
Easy Connections
62
Connecting to a Cable Box or Satellite Receiver
63
Connecting an External Decoder Box (1)
64
Connecting an External Decoder Box (2)
65
Connecting Using HDMI
65
Connecting a DV Camcorder
66
Connecting a USB Device
67
Plugging in
67
3 Getting Started
68
Switching on and Setting up
68
For Users Receiving Digital Broadcast Services
70
Setting up the GUIDE Plus+® System
71
4 Using the GUIDE Plus+ Electronic Programme Guide
74
The GUIDE Plus+ System
74
Using the GUIDE Plus+ System
74
Areas
76
GUIDE Plus+ FAQ and Troubleshooting
83
5 Using the Digital Electronic Programme Guide
85
The Digital EPG System
85
Using the Digital EPG
86
Setting Timer Programmes
86
Other Useful EPG Functions
90
6 Recording
91
About DVD Recording
91
About HDD Recording
91
Recorded Audio
92
Restrictions on Video Recording
92
Using the Built-In A.TV and D.TV Tuners
93
Setting the Picture Quality/Recording Time
95
Basic Recording from the TV
95
Pause Live TV
96
About Timer Recordings
98
Timer Recording FAQ
99
Simultaneous Recording and Playback (Chase Play)
100
Recording from an External Component
100
Playing Your Recordings on Other DVD Players
101
Initializing Recordable DVD Discs
102
DVD-RW Auto Initialize
102
7 Playback
103
Introduction
103
Basic Playback
103
Using the Disc Navigator with Recordable Discs and the HDD
106
Using the Disc Navigator with Playback-Only Discs
107
Scanning Discs
108
Playing in Slow Motion
109
Frame Advance/Frame Reverse
109
The Play Mode Menu
109
Repeat Play
110
Displaying and Switching Subtitles
111
Switching DVD and DIVX Soundtracks
111
Switching Audio Channels
111
Switching Camera Angles
112
Displaying Disc Information On-Screen
112
8 Playing and Recording from a DV Camcorder
114
Playing from a DV Camcorder
114
Recording from a DV Camcorder
114
About DV
116
9 Editing
117
Editing Options
117
The Disc Navigator Screen
118
Copying and Backup
127
Introduction
127
One Touch Copy
127
Using Copy Lists
128
Recording Mode
131
Using Disc Backup
132
Using the Jukebox
134
Copying Music to the HDD
134
Copying Files Via USB
135
Playing Music from the Jukebox
137
Changing the Display Style of the Jukebox
139
Copying Albums/Tracks
139
Editing the HDD Jukebox
139
The Photoviewer
140
Locating JPEG Picture Files
140
Changing the Display Style of the Photoviewer
141
Playing a Slideshow
141
Reloading Files from a Disc or USB Device
142
Importing Files to the HDD
142
Selecting Multiple Files or Folders
143
Copying Files to a DVD-R/-RW
143
Copying Selected Files to a DVD-R/-RW
144
Editing Files on the HDD
144
Printing Files
146
The Disc Setup Menu
147
Basic Settings
147
Initialize Settings
147
Finalize Settings
148
Optimize HDD
148
Initialize HDD
148
The Video Adjust Menu
149
Setting the Picture Quality for TV and External Input
149
Setting the Picture Quality for Disc Playback
150
The Initial Setup Menu
152
Using the Initial Setup Menu
152
Selecting Other Languages for Language Options
162
Using Software Update (Digital Tuner)
162
Technical Information
162
Additional Information
163
Minimum Copying Times
163
Manual Recording Modes
164
Troubleshooting
165
If the Picture Freezes and the Front Panel and Remote Control Buttons Stop Working
169
On-Screen Displays
170
Front Panel Displays
172
Language Code List
172
Country/Area Code List
173
Screen Sizes and Disc Formats
173
Handling Discs
174
Cleaning the Pickup Lens
174
Cleaning the Recorder's Exterior
174
Condensation
174
Hints on Installation
175
Moving the Recorder
175
Resetting the Recorder
175
Specifications (SDVR-LX70D)
176
Advertisement
Pioneer SX-LX70SW Operating Instructions Manual (179 pages)
HDD/DVD Recorder Home Cinema System
Brand:
Pioneer
| Category:
Home Theater System
| Size: 6.94 MB
Table of Contents
Section One
4
Operating Environment
2
Table of Contents
4
What's in the Box
5
1 Speaker Setup Guide
6
Safety Precautions When Setting up
6
Home Theater Sound Setup
6
Standard Surround Setup
6
Front Surround Setup
6
Preparing the Speakers
6
Using the Supplied Speaker Bases
6
When Not Using the Supplied Speaker Bases
7
Connect the Speaker System
7
Additional Notes on Speaker Placement
7
2 Connecting up
8
Receiver Subwoofer
8
Rear Panel
8
Side Panel
8
Back of Display Unit
9
HDD/DVD Recorder
9
Rear Panel
9
Front Panel
9
Basic Connections
10
3 Controls and Displays
14
Display Unit
14
Display
15
HDD/DVD Recorder
16
Display
16
Common Interface
17
Inserting a CA Module
17
Remote Control
18
Operating the Receiver Subwoofer
18
Operating the Built-In FM/AM Tuner
19
LCD Touch Screen
19
Operating the Supplied HDD/DVD Recorder
20
Operating Pioneer Plasma Televisions and Tvs
22
Operating a Pioneer Blu-Ray Disc Player
24
Operating a Pioneer DVD Player
25
Putting the Batteries in the Remote Control
26
Using the Remote Control
26
4 Before You Start
27
Switching on
27
Setting up
27
Basic Operation
28
Operating the Remote Control
28
Using the LCD Touch Screen
28
Watching a DVD
28
Listening to a CD
29
Watching a Title Recorded on the HDD
29
Listening to the Radio
29
5 Getting Started
30
Using the Auto MCACC Setup for Optimal Surround Sound
30
6 Listening to Your System
31
Effective Sound (for Optimum Sound)
31
Auto Listening Mode
31
Listening in Surround Sound
31
Dolby Pro Logic II Music Settings
32
Center Image Setting
32
Using Advanced Surround
32
Using Front Stage Surround Advance
33
Listening in Stereo
33
Genre Sync Mode
33
Using the Sound Retriever
33
Listening with MCACC Effect
34
Using Midnight, Loudness and Quiet Listening Modes
34
Adjusting the Bass and Treble
34
Adjusting Sound Delay
34
7 Listening to the Radio
35
Improving Poor FM Reception
35
Improving Poor am Sound
35
Changing the Noise Cut Mode
35
Memorizing Stations
35
Listening to Station Presets
36
Using RDS
36
Displaying RDS Information
36
Searching for RDS Programs
36
8 Surround Sound Settings
37
Using the Sound Setup Menu
37
Channel Level Setting
37
Speaker Distance Setting
37
Dynamic Range Control
38
Dual Mono Setting
38
Using the Virtual Surround Back Mode
39
LFE Attenuate
39
Adjusting the Channel Levels Using the Test Tone
39
9 Other Connections
40
Connecting Auxiliary Components
40
Connecting for Digital Audio
40
Connecting an Analog Audio Component
40
Connecting an Ipod
41
Listening to an External Audio Source
41
Connecting External Antennas
42
About Control out Connections
42
Connecting Using HDMI
42
HDMI Mode Setting
43
About HDMI
43
HDMI Control
44
Making the HDMI Control Connections
44
Setting the HDMI Options
45
Setting the HDMI Control Mode
45
Setting the Auto Delay
46
Audio Input Settings from Plasma Televisions (TV Input)
46
Before Using Synchronization
46
Synchronized Amp Mode
46
Synchronized Amp Mode Operations
46
Canceling Synchronized Amp Mode
46
Additional Information
47
Dimming the Display
47
Setting the Sleep Timer
47
Setting up the Remote to Control Your TV
47
TV Preset Code List
48
Resetting the System
48
Installation and Maintenance
48
Hints on Installation
48
Surround Sound Formats
49
Dolby
49
Dts
49
Troubleshooting
50
General
50
Tuner
51
Hdmi
51
Displayed Messages
52
Specifications
53
Section Two
54
Operating Instructions for HDD/DVD Recorder (SDVR-LX70D)
54
Section Two
55
1 Before You Start
57
Disc/Content Format Playback Compatibility
57
Compressed Audio Compatibility
59
Symbols Used in this Manual
57
About the Internal Hard Disk Drive
61
Connecting a TV Antenna
62
Easy Connections
62
2 Recorder Connections
62
Connecting to a Cable Box or Satellite Receiver
63
Connecting an External Decoder Box (1)
64
Connecting an External Decoder Box (2)
65
Connecting Using HDMI
65
Connecting a DV Camcorder
66
Connecting a USB Device
67
Plugging in
67
3 Getting Started
68
Switching on and Setting up
68
For Users Receiving Digital Broadcast Services
70
Setting up the GUIDE Plus+ ® System
71
The GUIDE Plus+ System
74
4 Using the GUIDE Plus+ Electronic Programme Guide
74
Using the GUIDE Plus+ System
74
Areas
76
GUIDE Plus+ FAQ and Troubleshooting
83
The Digital EPG System
85
5 Using the Digital Electronic Programme Guide
85
Setting Timer Programmes
86
Using the Digital EPG
86
Other Useful EPG Functions
90
About DVD Recording
91
About HDD Recording
91
6 Recording
91
Recorded Audio
92
Restrictions on Video Recording
92
Using the Built-In A.TV and D.TV Tuners
93
Basic Recording from the TV
95
Setting the Picture Quality/Recording Time
95
Pause Live TV
96
About Timer Recordings
98
Timer Recording FAQ
99
Recording from an External Component
100
Simultaneous Recording and Playback (Chase Play)
100
Playing Your Recordings on Other DVD Players
101
DVD-RW Auto Initialize
102
Initializing Recordable DVD Discs
102
Basic Playback
103
Introduction
103
7 Playback
103
Using the Disc Navigator with Recordable Discs and the HDD
106
Using the Disc Navigator with Playback-Only Discs
107
Scanning Discs
108
Frame Advance/Frame Reverse
109
Playing in Slow Motion
109
Search Mode
109
The Play Mode Menu
109
Displaying and Switching Subtitles
111
Switching Audio Channels
111
Switching DVD and DIVX Soundtracks
111
Displaying Disc Information On-Screen
112
Switching Camera Angles
112
8 Playing and Recording from a DV Camcorder
114
Playing from a DV Camcorder
114
Recording from a DV Camcorder
114
About DV
116
9 Editing
117
Editing Options
117
The Disc Navigator Screen
118
Copying and Backup
127
Introduction
127
One Touch Copy
127
Using Copy Lists
128
Recording Mode
131
Using Disc Backup
132
Copying Music to the HDD
134
Using the Jukebox
134
Copying Files Via USB
135
Playing Music from the Jukebox
137
Changing the Display Style of the Jukebox
139
Copying Albums/Tracks
139
Editing the HDD Jukebox
139
Locating JPEG Picture Files
140
The Photoviewer
140
Changing the Display Style of the Photoviewer
141
Playing a Slideshow
141
Importing Files to the HDD
142
Reloading Files from a Disc or USB Device
142
Copying Files to a DVD-R/-RW
143
Selecting Multiple Files or Folders
143
Copying Selected Files to a DVD-R/-RW
144
Editing Files on the HDD
144
Printing Files
146
Basic Settings
147
Initialize Settings
147
The Disc Setup Menu
147
Finalize Settings
148
Initialize HDD
148
Optimize HDD
148
Setting the Picture Quality for TV and External Input
149
The Video Adjust Menu
149
Setting the Picture Quality for Disc Playback
150
The Initial Setup Menu
152
Using the Initial Setup Menu
152
Selecting Other Languages for Language Options
162
Using Software Update (Digital Tuner)
162
Technical Information
162
Additional Information
163
Minimum Copying Times
163
Manual Recording Modes
164
Troubleshooting
165
If the Picture Freezes and the Front Panel and Remote Control Buttons Stop Working
169
On-Screen Displays
170
Front Panel Displays
172
Language Code List
172
Country/Area Code List
173
Screen Sizes and Disc Formats
173
Cleaning the Pickup Lens
174
Cleaning the Recorder's Exterior
174
Condensation
174
Handling Discs
174
Hints on Installation
175
Moving the Recorder
175
Resetting the Recorder
175
Specifications (SDVR-LX70D)
176
Pioneer SX-LX70SW Operating Instructions Manual (114 pages)
5.1 CH SURROUND SYSTEM
Brand:
Pioneer
| Category:
Home Theater System
| Size: 4.1 MB
Table of Contents
English
6
Table of Contents
6
What's in the Box
7
1 Speaker Setup Guide
8
Safety Precautions When Setting up
8
Home Theater Sound Setup
8
Standard Surround Setup
8
Front Surround Setup
8
Preparing the Speakers
8
Using the Supplied Speaker Bases
8
When Not Using the Supplied Speaker Bases
9
Connect the Speaker System
9
Additional Notes on Speaker Placement
9
Non-Skid Pads X16
9
2 Connecting up
10
Receiver Subwoofer
10
Side Panel
10
Rear Panel
11
Back of Display Unit
11
Basic Connections
12
3 Controls and Displays
16
Display Unit
16
Display
17
Remote Control
18
Operating the Receiver Subwoofer
18
Operating the Built-In FM/AM Tuner
19
Operating XM Radio or SIRIUS Radio
20
Operating Pioneer Plasma Displays and Tvs
21
Operating a Pioneer Blu-Ray Disc Player
22
Operating a Pioneer DVD Player
23
Operating a Pioneer HDD/DVD Recorder
24
Putting the Batteries in the Remote Control
25
Using the Remote Control
26
Operating the Remote Control
26
Using the LCD Touch Screen
27
4 Getting Started
28
Using the Auto MCACC Setup for Optimal Surround Sound
28
5 Listening to Your System
29
Effective Sound (for Optimum Sound)
29
Auto Listening Mode
29
Listening in Surround Sound
29
Dolby Pro Logic II Music Settings
30
Center Image Setting
30
Using Advanced Surround
30
Using Front Stage Surround Advance
31
Listening in Stereo
31
Genre Sync Mode
31
Using the Sound Retriever
31
Listening with MCACC Effect
32
Using Midnight, Loudness and Quiet Listening Modes
32
Adjusting the Bass and Treble
32
Adjusting Sound Delay
32
6 Listening to the Radio
33
Improving Poor FM Reception
33
Improving Poor am Sound
33
Changing the Noise Cut Mode
33
Memorizing Stations
34
Listening to Station Presets
34
Changing the Frequency Step
34
7 Surround Sound Settings
35
Using the Sound Setup Menu
35
Channel Level Setting
35
Speaker Distance Setting
35
Dynamic Range Control
36
Dual Mono Setting
36
Using the Virtual Surround Back Mode
37
LFE Attenuate
37
Adjusting the Channel Levels Using the Test Tone
37
8 Other Connections
38
Connecting Auxiliary Components
38
Connecting for Digital Audio
38
Connecting an Analog Audio Component
38
Connecting an Ipod
39
Listening to an External Audio Source
39
Using XM Radio
40
Connecting Your XM Radio Receiver
40
Listening to XM Radio
40
Saving Channel Presets
40
Using the XM Menu
41
About XM Satellite Radio
41
XM Ready Legal
41
XM Ready Subscriptions
41
Using SIRIUS Radio
42
Connecting Your SIRIUS Connect Tuner
42
Listening to SIRIUS Radio
42
Saving Channel Presets
43
Using the SIRIUS Menu
43
Connecting External Antennas
44
About Control out Connections
44
Connecting Using HDMI
44
HDMI Mode Setting
45
About HDMI
45
9 HDMI Control
46
Making the HDMI Control Connections
46
Setting the HDMI Options
47
Setting the HDMI Control Mode
47
Setting the Auto Delay
48
Audio Input Settings from Plasma Displays (TV Input)
48
Before Using Synchronization
48
Synchronized Amp Mode
48
Synchronized Amp Mode Operations
48
Canceling Synchronized Amp Mode
48
Additional Information
49
Dimming the Display
49
Setting the Sleep Timer
49
Setting up the Remote to Control Your TV
49
TV Preset Code List
50
Resetting the System
50
Installation and Maintenance
50
Hints on Installation
50
Surround Sound Formats
51
Dolby
51
Dts
51
Troubleshooting
52
General
52
Tuner
53
Hdmi
53
Displayed Messages
54
XM Radio
55
SIRIUS Radio
55
Specifications
56
Français
62
Contenu de L'emballage
63
1 Guide D'installation des Enceintes
64
Précautions de Sécurité Lors de L'installation
64
Installation du Son Home Theater
64
Installation D'ambiance Standard
64
Installation Frontale des Enceintes D'ambiance
64
Préparation des Enceintes
64
Utilisation des Bases de Enceintes Fournies
64
Si Les Bases des Enceintes Fournies Ne Sont Pas Utilisées
65
Connexion des Enceintes Acoustiques
65
Remarques Complémentaires Sur la Disposition des Enceintes
65
2 Connexions
66
Caisson de Basses À Récepteur
66
Panneau Latéral
66
Panneau Arrière
67
Arrière de L'unité D'affichage
67
Connexions de Base
68
3 Commandes Et Écrans
72
Unité D'affichage
72
Ecran D'affichage
73
Télécommande
74
Fonctionnement du Caisson de Basses À Récepteur
74
Fonctionnement du Synthétiseur FM/AM Intégré
75
Fonctionnement de la Radio XM Ou de la Radio
76
Sirius
76
Fonctionnement D'écrans Plasma Pioneer Et de Téléviseurs
77
Fonctionnement D'un Lecteur de Disque Blu-Ray Pioneer
78
Fonctionnement D'un Lecteur de DVD Pioneer
79
Fonctionnement D'un Enregistreur HDD/DVD Pioneer
80
Mise en Place des Piles Dans la Télécommande
81
Utilisation de la Télécommande
82
Utilisation de L'écran Tactile
83
4 Pour Commencer
84
Utilisation de la Configuration Auto MCACC Pour Obtenir un Son D'ambiance Optimal
84
5 Ecoute de Votre Système
85
Effective Sound (Pour un Son Optimal)
85
Mode D'écoute Auto
85
Ecoute de Sonorités D'ambiance
85
Réglages Dolby Pro Logic II Music
86
Réglage de L'image Centrale
86
Utilisation de "Advanced Surround
86
Utilisation de "Front Stage Surround Advance
87
Ecoute en Stéréo
87
Mode Genre Sync
87
Utilisation de "Sound Retriever
87
Ecoute Avec L'effet MCACC
88
Utilisation des Modes Minuit, Correction du Son Et Silencieux
88
Réglage des Graves Et des Aigus
88
Réglage du Retard du Son
88
6 Ecoute de la Radio
89
Amélioration D'une Réception FM de Mauvaise Qualité
89
Amélioration D'un Son am de Mauvaise Qualité
89
Changement du Mode de Coupure des Parasites
89
Mémorisation des Stations
90
Ecoute des Stations Préréglées
90
Changement du Pas de Fréquence
90
7 Réglages de Sonorités D'ambiance
91
Utilisation du Menu Sound Setup (Configuration du Son)
91
Réglage du Niveau des Canaux
91
Réglage de la Distance des Enceintes
91
Contrôle de la Plage Dynamique
92
Réglage Dual Mono
92
Utilisation du Mode Virtual Surround Back
93
Atténuation LFE
93
Réglage du Niveau des Canaux Au Moyen de la Tonalité D'essai
93
8 Autres Connexions
94
Connexion de Composants Auxiliaires
94
Raccordement Pour L'écoute du Son Audio
94
Numérique
94
Connexion D'un Composant Audio Analogique
94
Raccordement D'un Ipod
95
Ecoute D'une Source Audio Externe
95
Utilisation du Système XM Radio
96
Raccordement D'un Récepteur XM Radio
96
Écoute D'une Émission XM Radio
96
Sauvegarde des Chaînes Préréglées
96
Utilisation du Menu XM
97
A Propos de la XM Satellite Radio
97
Droits Légaux XM Ready
97
Souscriptions XM Ready
97
Utilisation du Système SIRIUS Radio
98
Raccordement À Votre Syntoniseur SIRIUS Connect
98
Écoute D'une Émission SIRIUS Radio
98
Sauvegarde des Stations Préréglées
99
Utilisation du Menu SIRIUS
99
Connexion D'antennes Extérieures
100
A Propos des Connexions Pour Le Transfert du Signal de Commande
100
Raccordement Avec un Câble HDMI
100
Réglage du Mode HDMI
101
À du HDMI
101
9 HDMI Control
102
Raccordements Pour la Commande HDMI
102
Réglage des Options HDMI
103
Réglage du Mode de Commande HDMI
103
Réglage du Retard Automatique
104
Réglages de L'entrée Audio des Écrans Plasma
104
(Entrée TV)
104
Avant la Synchronisation
104
Mode Amp Synchronisé
104
Opérations Dans Le Mode Amp Synchronisé
104
Annulation du Mode Amp Synchronisé
104
Informations Complémentaires
105
Régler la Luminosité de L'affichage
105
Réglage du Minuteur de Mise en Veille
105
Réglage du Boîtier de Télécommande Pour Agir Sur Le Téléviseur
105
Liste des Codes de Préréglage des Téléviseurs
106
Réinitialisation du Système
106
Installation Et Entretien
106
Conseils D'installation
106
Formats de Son D'ambiance
107
Dolby
107
Dts
107
Guide de Dépannage
108
Problèmes D'ordre Général
108
Syntoniseur
109
Hdmi
109
Messages D'erreur
110
Radio XM
111
Radio SIRIUS
111
Caractéristiques Techniques
112
Boîte D'accessoires (As-Lx)
113
Boîte du Caisson de Basses À Récepteur
113
Advertisement
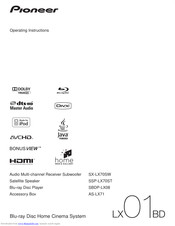
Pioneer SX-LX70SW Operating Instructions Manual (116 pages)
Blu-ray Disc Home Cinema System
Brand:
Pioneer
| Category:
Home Theater System
| Size: 8.4 MB
Table of Contents
Table of Contents
5
What's in the Box
7
1 Speaker Setup Guide
8
Safety Precautions When Setting up
8
Home Theater Sound Setup
8
Front Surround Setup
8
Standard Surround Setup
8
Preparing the Speakers
8
Non-Skid Pads X16
8
Using the Supplied Speaker Bases
8
When Not Using the Supplied Speaker Bases
9
Connect the Speaker System
9
Additional Notes on Speaker Placement
9
Non-Skid Pads X16
9
2 Connecting up
10
Receiver Subwoofer
10
Rear Panel
10
Side Panel
10
Display Unit
11
Blu-Ray Disc Player
11
Basic Connections
12
AM Loop Antenna
13
Display Cable
13
Control Cable
14
3 Controls and Displays
16
Display Unit
16
Display
16
Blu-Ray Disc Player
17
Display
17
Remote Control
18
Operating the Receiver Subwoofer
18
Operating the Built-In FM/AM Tuner
19
Operating the Supplied Blu-Ray Disc Player
20
Operating Pioneer Flat Screen TV and Tvs
21
Operating a Pioneer HDD/DVD Recorder
22
Operating a Pioneer DVD Player
24
Putting the Batteries in the Remote Control
25
Using the Remote Control
25
4 Before You Start
26
Switching on
26
Setting up
26
Using the Auto MCACC Setup for Optimal Surround Sound
26
Basic Operation
27
Operating the Remote Control
27
Using the LCD Touch Screen
28
Watching a Blu-Ray Disc/DVD
28
Listening to a CD
29
Listening to the Radio
29
5 Listening to Your System
30
Effective Sound
30
(For Optimum Sound)
30
Auto Listening Mode
30
Listening in Surround Sound
30
Center Image Setting
31
Dolby Pro Logic II Music Settings
31
Using Advanced Surround
31
Using Front Stage Surround Advance
32
Listening in Stereo
32
Genre Sync Mode
32
Using the Sound Retriever
32
Listening with MCACC Effect
33
Using Midnight, Loudness and Quiet Listening Modes
33
Adjusting the Bass and Treble
33
Adjusting Sound Delay
33
6 Listening to the Radio
34
Improving Poor FM Reception
34
Improving Poor am Sound
34
Changing the Noise Cut Mode
35
Memorizing Stations
35
Listening to Station Presets
35
Using RDS
35
Displaying RDS Information
35
Searching for RDS Programs
36
7 Surround Sound Settings
37
Using the Sound Setup Menu
37
Channel Level Setting
37
Speaker Distance Setting
37
Dual Mono Setting
38
Dynamic Range Control
38
Using the Virtual Surround Back Mode
38
LFE Attenuate
39
Adjusting the Channel Levels Using the Test Tone
39
8 Other Connections
40
Using this Unit for TV Audio
40
Audio Input Settings from Tvs (TV Input)
40
Connecting Auxiliary Components
41
Connecting an Analog Audio Component
41
Connecting for Digital Audio
41
Connecting an Ipod
42
Listening to an External Audio Source
42
Connecting External Antennas
42
About Control out Connections
42
Ipod Cable
42
Connecting Using HDMI
43
HDMI Mode Setting
43
About HDMI
44
Setting the Auto Delay
44
9 HDMI Control
45
Making the HDMI Control Connections
45
Setting the HDMI Options
46
Setting the HDMI Control Mode
46
Before Using Synchronization
46
Synchronized Amp Mode
47
Canceling Synchronized Amp Mode
47
Synchronized Amp Mode Operations
47
Additional Information
48
Dimming the Display
48
Setting the Sleep Timer
48
Setting up the Remote to Control Your TV
49
TV Preset Code List
49
Resetting the System
50
Installation and Maintenance
50
Hints on Installation
50
Surround Sound Formats
50
Dolby
50
Dolby Truehd
51
Dts
51
Dts Digital Surround
51
Troubleshooting
52
General
52
Optical Digital Cable
52
Displayed Messages
53
Hdmi
53
Tuner
53
FM Wire Antenna
53
Specifications
54
Microphone (for Auto MCACC Setup)
55
Section Two
56
Blu-Ray Disc Player (SBDP-LX08)
56
Section Two
57
1 Before You Start
58
Types of Discs/Files that Can be Played
58
Playable Discs
58
Discs that Cannot be Played
59
Playing Dvds
59
Playable Files
60
Playing Cds
60
2 Getting Started
62
Making Settings Using the Setup Navigator Menu
62
Using the TOOLS Menu
64
Erasing the Additional Data from BD-Roms
65
Switching the Output Video Resolution
65
Switching the Video Output Terminal
65
3 Playback
67
Playing Discs or Files
67
Forward and Reverse Scanning
68
Playing in Slow Motion
68
Playing Specific Titles, Chapters or Tracks
68
Skipping Content
68
Step Forward and Step Reverse
69
Switching the Camera Angles
69
Switching the Subtitles
69
Displaying the Disc Information
70
Switching the Audio Streams/Channels
70
Switching the Secondary Video
70
Using the Play Mode Functions
71
Playing a Specific Title, Chapter or Track (Search)
71
Playing from a Specific Time (Time Search)
71
A-B Repeat
72
Playing a Specific Section Within a Title or Track Repeatedly
72
Playing in Random Order (Random Play)
73
Playing Repeatedly (Repeat Play)
73
About Play Mode Types
74
Playing from the Home Media Gallery
75
Playing Discs
75
Playing Movie Files
75
Playing Music Files
76
Playing in the Desired Order (HMG Playlist)
77
4 Adjusting Audio and Video
79
Adjusting the Video
79
Adjusting the Audio DRC
80
5 Advanced Settings
81
Changing the Settings (Initial Setup)
81
Operating the Initial Setup Screen
81
Changing to Other Language at Language Setting
84
Adjusting the Output Level of the Various Speakers (Channel Level)
85
Changing the Speaker Setup
85
Registering or Changing the Password
86
Changing the Age Restriction for Watching BD-Roms
87
Changing the Parental Lock Level for Watching Dvds
87
Changing the Country/Area Code
88
Changing the Terminals for Outputting Video and Audio Signals (Output Terminal Priority)
89
Restoring All the Settings to the Factory Default Settings
89
About the Audio Output Settings
90
Connecting a TV
91
Connecting Using the HDMI Cable
91
Connecting to a TV with no HDMI Input
93
6 Other Player Connections
91
Connecting the Other Audio Component
94
7 Additional Information
95
Troubleshooting
95
Playback
95
When Connected Using an HDMI Cable
98
Others
99
Language Code Table and Country/Area Code Table
100
Country/Area Code Table
100
Language Code Table
100
Specifications
101
Cautions on Use
102
Caution for When the Unit Is Installed in a Rack with a Glass Door
102
Cleaning the Pickup Lens
102
Cleaning the Player
102
Condensation
102
Moving the Player
102
Place of Installation
102
Turn the Power off When Not Using the Player
102
Handling Discs
103
Glossary
103
Aspect Ratio
103
Audio Language
103
Cleaning Discs
103
Storing Discs
103
Dynamic Range
104
Parental Lock
104
Progressive Scan
104
Secondary Audio
105
Subtitle Language
105
Licenses
106
Pioneer SX-LX70SW Service Manual (141 pages)
AUDIO MULTI-CHANNEL RECEIVER SUBWOOFER
Brand:
Pioneer
| Category:
Subwoofer
| Size: 15.89 MB
Table of Contents
Safety Information
2
Table of Contents
4
1 Service Precautions
5
2 Specifications
6
Accessories
6
Specifications
7
Panel Facilities
8
3 Basic Items for Service
12
Check Points after Servicing
12
Pcb Locations
13
Jigs List
14
Cleaning
14
4 Block Diagram
16
Overall Wiring Connection Diagram
16
Overall Block Diagram
18
5 Diagnosis
20
Hdmi Troubleshooting
20
Dsp Troubleshooting
27
XM Troubleshooting
42
Sirius Troubleshooting
44
Circuit Description of Digital Amp. Section
45
Specifications for the Protection Circuits for the Digital Amplifier
46
Conditions for Switching the Rotaions Speed of the Fan
47
Error List
48
6 Service Mode
52
Test Mode
52
Service Test Mode
54
7 Disassembly
57
8 Each Setting and Adjustment
62
Adjustment
62
How to Update the Flash Roms for Various Microcomputers
62
How to Update the Dsp Flash Rom by Playing Back a CD
64
9 Exploded Views and Parts List
66
Tel 13942296513
66
Packing (Sx-Lx70Sw)
66
Packing (As-Lx70)
68
Exterior Section
70
Receiver Unit
72
Display Unit
74
Remote Control
76
10 Schematic Diagram
78
Main Assy (1/7)
78
Main Assy (2/7)
80
Main Assy (3/7)
82
Main Assy (4/7)
84
Main Assy (5/7)
86
Main Assy (6/7)
88
Main Assy (7/7)
90
Amp Assy (1/2)
92
Amp Assy (2/2)
94
CONNECTION and EARTH ASSYS
96
Hdmi Assy (1/2)
98
Hdmi Assy (2/2)
100
Ainb Assy
102
FL, REMOCON and BTOB ASSYS
104
Power Supply Unit
106
Pioneer SX-LX70SW Service Manual (141 pages)
AUDIO MULTI-CHANNEL RECEIVER SUBWOOFER
Brand:
Pioneer
| Category:
Subwoofer
| Size: 13.09 MB
Table of Contents
Safety Information
2
Table of Contents
4
Service Precautions
5
Specifications
6
Accessories
6
Specifications
7
Panel Facilities
8
Basic Items for Service
12
Check Points after Servicing
12
Pcb Locations
13
Jigs List
14
Cleaning
14
Block Diagram
16
Overall Wiring Connection Diagram
16
Overall Block Diagram
18
Diagnosis
20
Hdmi Troubleshooting
20
Dsp Troubleshooting
27
XM Troubleshooting
42
Sirius Troubleshooting
44
Circuit Description of Digital Amp. Section
45
Specifications for the Protection Circuits for the Digital Amplifier
46
Conditions for Switching the Rotaions Speed of the Fan
47
Error List
48
Service Mode
52
Test Mode
52
Service Test Mode
54
Disassembly
57
Each Setting and Adjustment
62
Adjustment
62
How to Update the Flash Roms for Various Microcomputers
62
How to Update the Dsp Flash Rom by Playing Back a CD
64
Exploded Views and Parts List
66
Packing (Sx-Lx70Sw)
66
Packing (As-Lx70)
68
Exterior Section
70
Receiver Unit
72
Display Unit
74
Remote Control
76
Schematic Diagram
78
Main Assy (1/7)
78
Main Assy (2/7)
80
Main Assy (3/7)
82
Main Assy (4/7)
84
Main Assy (5/7)
86
Main Assy (6/7)
88
Main Assy (7/7)
90
Amp Assy (1/2)
92
Amp Assy (2/2)
94
CONNECTION and EARTH ASSYS
96
Hdmi Assy (1/2)
98
Hdmi Assy (2/2)
100
Ainb Assy
102
FL, REMOCON and BTOB ASSYS
104
Advertisement
Related Products
Pioneer SX-LX70W
Pioneer SX-LX08
Pioneer SX-LX03
Pioneer SX-SW330
Pioneer SX-SWR2
Pioneer SX-SWR1
Pioneer SX-SW560
Pioneer SX-SW505HX
Pioneer S-DV272T
Pioneer S-DV2T
Pioneer Categories
Car Receiver
Receiver
Stereo Receiver
Amplifier
CD Player
More Pioneer Manuals
Login
Sign In
OR
Sign in with Facebook
Sign in with Google
Upload manual
Upload from disk
Upload from URL