Sign In
Upload
Manuals
Brands
Sharp Manuals
Projector
XG-C465X - Notevision XGA LCD Projector
Sharp XG-C465X - Notevision XGA LCD Projector Manuals
Manuals and User Guides for Sharp XG-C465X - Notevision XGA LCD Projector. We have
2
Sharp XG-C465X - Notevision XGA LCD Projector manuals available for free PDF download: Operation Manual, Setup Manual
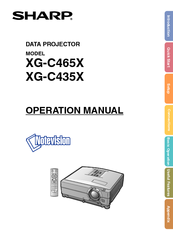
Sharp XG-C465X - Notevision XGA LCD Projector Operation Manual (71 pages)
Sharp Data Projector Operation Manual
Brand:
Sharp
| Category:
Projector
| Size: 5.07 MB
Table of Contents
Blue
2
Comp
3
Setting up the Screen
4
Picture
4
Table of Contents
5
How to Read this Operation Manual
5
Screen Size and Projection Distance
5
Press MENU
5
The "Picture" Menu Screen for the Se
5
Lected Input Mode Is Displayed
5
Menu Screens
5
The Menu Icon for the Selected Menu
5
Screen Is Highlighted
5
Menu Icon Menu Screen
5
Contents
6
Picture
6
Fine Sync
6
Options1
6
Options2
6
Language
6
Troubleshooting
7
How to Access the PDF Operation Manuals
8
Language
8
Important Safeguards
9
Changing the Lens
11
Picture
11
Accessories
12
Connecting Pin Assignments
13
Throw Distance
13
Part Names and Functions
14
Picture
14
RS-232C Specifications and Commands
15
Picture
16
Using the Remote Control
17
Usable Range
17
Inserting the Batteries
17
Quick Start
18
Setting up the Projector Network
20
Setting up the Projector
20
Environment
20
Picture
20
Projection (PRJ) Mode
21
Picture
21
Options2
21
Storing the Projector
22
How to Use the Storage Case
22
Samples of Cables for Connection
23
Connecting to a Computer
25
Controlling the Projector Via LAN
26
Connecting to Video Equipment
27
Controlling the Projector by a Computer
29
Connecting to a Monitor with RGB Input Terminal
30
Setting up the Projector Using
31
Connecting to an Amplifier or Other Audio Equipment
31
RS-232C or Telnet
31
Turning the Projector On/Off
32
Connecting the Power Cord
32
Turning the Projector on
32
Turning the Power off (Putting the Projector into Standby Mode)
32
Language
32
Image Projection
33
Using the Adjustment Feet
33
Options1
33
Correcting Trapezoidal Distortion
34
Options1
34
Adjusting the Lens
35
Switching the INPUT Mode
36
Adjusting the Volume
37
Displaying the Black Screen and Turning off the Sound Temporarily
37
Displaying an Enlarged Portion of an Image
37
Freezing an Image
37
Displaying and Setting the Break Timer
38
Switching the Eco+Quiet Mode
38
Selecting the Picture Mode
38
Picture
38
Resize Mode
39
Resetting the Lamp Timer
41
Using the Remote Control as the Wireless Computer Mouse
41
Of the Projector Via LAN
41
Menu Items
42
Picture
42
Fine Sync
42
Troubleshooting
43
Options1
43
Options2
43
Language
43
Using the Menu Screen
44
This Operation Can also be Performed by Using the Buttons on the Projector
44
Menu Screens
44
The Menu Icon for the Selected Menu
44
Press MENU
45
Picture
45
Picture Adjustment ("Picture" Menu)
46
Selecting the Picture Mode
46
Adjusting the Image
46
Computer/Component
44
Picture Mode Contrast
44
Bright
44
Menu Selections
44
Press MENU
44
The "Picture" Menu Screen for the Se
44
Lected Input Mode Is Displayed
44
Picture Adjustment (“Picture” Menu)
46
Dimensions
46
Adjusting the Color Temperature
47
Selecting the Progressive Mode
47
Signal Type Setting
47
Selecting the Dynamic Range
47
Setting the Video System
47
Picture
47
Computer Image Adjustment ("Fine Sync" Menu)
48
Adjusting the Computer Image
48
Resolution Setting
48
Auto Sync Adjustment
48
Checking the Input Signal
48
Fine Sync
48
Using the “Options1” Menu
49
Using the "Options1" Menu
49
Checking the Lamp Life Status
49
Setting the Resize Mode
49
Adjusting the Image Position
49
Options1
49
Keystone Correction
50
Setting On-Screen Display
50
Selecting a Startup and Background Image
50
Eco+Quiet Mode Setting
50
Auto Power off Function
50
Options1
50
Setting the System Sound
51
Selecting the Menu Screen Position
51
System Lock Function
51
Options1
51
Keylock Function
52
Auto Restart Function
52
Options1
52
Helpful Functions Set During Installation ("Options2" Menu)
53
Setting a Password
53
If You Forget Your Password
53
Options2
53
Speaker Setting
54
Audio Output Type Setting
54
Reversing/Inverting Projected Images
54
Fan Mode Setting
54
Monitor Output
54
Lan/Rs232C
54
Selecting the Transmission Speed (RS-232C)
54
Options2
54
DHCP Client Setting
55
TCP/IP Setting
55
Confirming the Network Information for the Projector
56
Returning to the Default Settings
56
Selecting the On-Screen Display Language
56
Fine Sync
56
Options1
56
Options2
56
Appendix
57
Maintenance
57
Replacing the Air Filter
58
Maintenance Indicators
60
Picture
60
Regarding the Lamp
62
Lamp
62
Caution Concerning the Lamp
62
Replacing the Lamp
62
Picture
62
Removing and Installing the Lamp Unit
63
Resetting the Lamp Timer
64
Computer Compatibility Chart
65
Troubleshooting
66
Fine Sync
66
Picture
66
(RGB) Mode
67
Standard
67
For SHARP Assistance
68
Specifications
69
Index
70
Advertisement
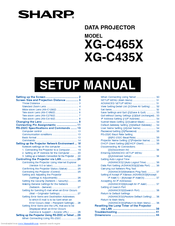
Sharp XG-C465X - Notevision XGA LCD Projector Setup Manual (45 pages)
Sharp XG-C435X: Install Guide
Brand:
Sharp
| Category:
Projector
| Size: 1.84 MB
Table of Contents
Table of Contents
1
Setting up the Screen
2
Screen Size and Projection Distance
3
Throw Distance
3
Standard Zoom Lens
4
Wide-Zoom Lens (AN-C12MZ)
5
Tele-Zoom Lens (AN-C18MZ)
6
Tele-Zoom Lens (AN-C27MZ)
7
Tele-Zoom Lens (AN-C41MZ)
8
Changing the Lens
9
Connecting Pin Assignments
11
RS-232C Specifications and Commands
13
Computer Control
13
Communication Conditions
13
Basic Format
13
Commands
14
Setting up the Projector Network Environment
18
Network Settings on the Computer
18
1 Connecting the Projector to a Computer
19
2 Setting an IP Address for the Computer
20
3 Setting up a Network Connection for the Projector
22
Controlling the Projector Via LAN
24
Controlling the Projector Using Internet Explorer (Version 5.0 or Later)
24
Confirming the Projector Status (Status)
25
Controlling the Projector (Control)
25
Setting and Adjusting the Projector (Settings & Adjustments)
26
Setting the Security (Network - Security)
26
Making General Settings for the Network (Network - General)
27
Setting for Sending E-Mail When an Error Occurs (Mail - Originator Settings)
27
Setting Error Items and Destination Addresses to Which E-Mail Is to be Sent When an Error Occurs (Mail - Recipient Settings)
28
To Which E-Mail Is to be Sent When an Error Occurs (Mail – Recipient Settings)
28
Setting Error Items and the URL that Are to be Displayed When an Error Occurs (Service & Support - Access URL)
28
Setting up the Projector Using RS-232C or Telnet
29
When Connecting Using RS-232C
29
When Connecting Using Telnet
30
SETUP MENU (Main Menu)
31
Advanced Setup Menu
31
View Setting Detail List ([V]View All Setting)
32
Set Items
32
Save Settings and Quit ([S]Save & Quit)
33
Quit Without Saving Settings ([Q]Quit Unchanged)
33
IP Address Setting ([1]IP Address)
34
Subnet Mask Setting ([2]Subnet Mask)
34
Default Gateway Setting ([3]Default Gateway)
34
User Name Setting ([4]User Name)
34
Password Setting ([5]Password)
35
RS-232C Baud Rate Setting ([6]RS-232C Baud Rate)
35
Projector Name Setting ([7]Projector Name)
35
DHCP Client Setting ([8]DHCP Client)
35
Disconnecting All Connections ([D]Disconnect All)
36
Entering ADVANCED SETUP MENU ([A]Advanced Setup)
36
Setting Auto Logout Time (Advanced[1]Auto Logout Time)
36
Data Port Setting (Advanced[2]Data Port)
36
Carrying out Network Ping Test (Advanced[5]Network Ping Test)
37
Setting of Accept IP Address (Advanced[6]Accept IP Addr(1) - [8]Accept IP Addr(3))
37
Accepting All IP Addresses (Advanced[9]Accept All IP Addr)
37
Setting of Search Port (Advanced[0]Search Port)
38
Return to Default Settings (Advanced[!]Restore Default Setting)
38
Return to Main Menu (Advanced[Q]Return to Main Menu)
38
Resetting the Lamp Timer of the Projector Via LAN
39
Troubleshooting
41
Dimensions
44
Advertisement
Related Products
Sharp Notevision XG-C465X-L
Sharp XG C465X/L
Sharp Notevision XG-C430X
Sharp Notevision XG-C455W
Sharp Notevision XG-C435X-L
Sharp Notevision XG-C435X
Sharp Notevision XG-C40XU
Sharp Notevision XG-C40XE
Sharp XG C40XU - Notevision XGA LCD Projector
Sharp XG-C40X
Sharp Categories
Microwave Oven
LCD TV
TV
Stereo System
All in One Printer
More Sharp Manuals
Login
Sign In
OR
Sign in with Facebook
Sign in with Google
Upload manual
Upload from disk
Upload from URL