Sign In
Upload
Manuals
Brands
Sony Manuals
Camcorder
Handycam DCR-IP1
User Manuals: Sony Handycam DCR-IP1 Camcorder
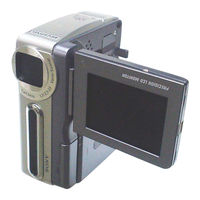
Manuals and User Guides for Sony Handycam DCR-IP1 Camcorder. We have
6
Sony Handycam DCR-IP1 Camcorder manuals available for free PDF download: Guia De Operaciones, Operation Manual, Service Manual, Applications, Operating Instructions Manual, Note
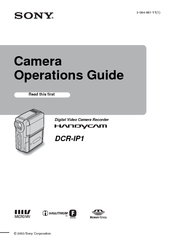
Sony Handycam DCR-IP1 Operation Manual (116 pages)
Digital Video Camera Recorder
Brand:
Sony
| Category:
Camcorder
| Size: 2.5 MB
Table of Contents
Read this First
2
Notes on Use
3
Table of Contents
5
Quick Start Guide
8
Recording Movies on a Tape
8
Recording Still Images on a "Memory Stick Duo
10
Getting Started
12
Step 1: Checking Supplied Items
12
Step 2: Charging the Battery Pack
13
Using an Outside Power Source
15
Playing Time
15
Recording Time
15
Step 3: Turning the Power on
16
Step 4: Adjusting the LCD Panel
16
Step 5: Setting the Date and Time
17
Step 6: Inserting the Recording Media
18
Inserting a Cassette Tape
18
Inserting a "Memory Stick Duo
19
Step 7: Setting the Screen Language
20
Recording
21
Recording Movies
21
To Select the Recording Mode of the MPEG Format Picture
22
Using Zoom
23
Recording in Mirror Mode
24
Using the Self-Timer
24
Recording Still Images
25
Memory Photo Recording
25
Selecting Image Quality or Size
26
Using the Self-Timer
27
Recording a Still Image on a "Memory Stick Duo" While Recording Movies on a Tape
28
Adjusting the Exposure
28
Adjusting the Exposure for Backlit Subjects
28
Fixing the Exposure for the Selected Subject - Flexible Spot Meter
28
Adjusting the Exposure Manually
29
Recording in a Dark Place
30
Color Slow Shutter
30
Adjusting the Focus
31
Adjusting the Focus for an Off-Center Subject - SPOT FOCUS
31
Adjusting the Focus Manually
31
Recording a Picture Using Various Effects
32
Fading in and out of a Scene - FADER
32
Using Special Effects - Digital Effect
33
Overlaying Still Images on Tape Movies - MEMORY MIX
35
Searching for the Last Scene of the most Recent Recording
37
End Search
37
Playback
38
Viewing Movies Recorded on a Tape
38
Playing Back in Various Modes
39
Viewing Recordings with Added Effects - Digital Effect
39
Viewing Recordings on a "Memory Stick Duo
40
Playing Back in Various Modes on a "Memory Stick Duo
41
Various Playback Functions
42
Magnifying Pictures - Tape Playback Zoom/Memory Playback Zoom
42
Displaying the Screen Indicators
43
Displaying the Date/Time and Camera Settings Data - Data Code
43
Playing the Picture on a TV
45
Locating a Scene on a Tape for Playback
46
Searching Quickly for a Particular Scene - Multi-Picture Search
46
Searching for a Scene Using Titles - Title Search
47
Searching for a Scene by Date of Recording - Date Search
47
Using the Menu
49
Selecting Menu Items
49
Using the (CAMERA SET) Menu
51
WIDE, Etc
51
Program Ae
51
Spot Meter
52
White Bal
52
Auto Shutter
53
Spot Focus
53
Digital Zoom
53
Using the (MEMORY SET) Menu
55
BURST/QUALITY/IMAGE SIZE/ALL ERASE/NEW FOLDER, Etc
55
Still Set
55
Movie Set
56
Pb Size
56
New Folder
57
Rec Folder
58
Pb Folder
58
Using the (PICT. APPLI.) Menu
59
PICT. EFFECT/SLIDE SHOW/ INT.REC-STL, Etc
59
Using the
59
Memory MIX
60
Slide Show
60
Rec Ctrl
63
TITLE, Etc
63
Var.spd Pb
63
Titl Erase
65
Title Disp
65
Tape Title
66
(EDIT/PLAY) Menu
67
Using the (STANDARD SET) Menu
67
USB-CAMERA, Etc
67
Using the (TIME/LANGU.) Menu
67
Video Input
68
Remote Ctrl
69
Menu Rotate
70
CLOCK SET/WORLD TIME, Etc
71
Customizing Personal Menu
72
Dubbing/Editing
75
Connecting to a VCR or TV
75
Dubbing to Another Tape
76
Recording Pictures from a VCR or TV
77
Dubbing Pictures from a Tape Onto a "Memory Stick Duo
78
Dubbing Still Images from a "Memory Stick Duo" Onto a Tape
79
Deleting Recorded Pictures
80
Changing the Still Image Size
81
Resize
81
Marking Recorded Images with Specific
82
Image Protection/Print Mark
82
Print Mark
83
Troubleshooting
84
Cassette Tapes
85
Lcd Screen
86
Warning Indicators and Messages
91
Warning Messages
92
Additional Information
95
Using Your Camcorder Abroad
95
Usable Cassette Tapes
96
About the "Memory Stick
97
About the "Infolithium" Battery Pack
99
About I.link
101
Maintenance and Precautions
102
Moisture Condensation
102
Video Head
103
Specification
105
Quick Reference
107
Identifying Parts and Controls
107
Remote Commander
110
Index
113
Advertisement
Sony Handycam DCR-IP1 Service Manual (82 pages)
Brand:
Sony
| Category:
Camcorder
| Size: 9.06 MB
Table of Contents
Table of Contents
4
1 Service Note
5
Note for Repair
5
Power Supply During Repairs
5
To Take out a Cassette When Not Eject (Force Eject)
6
Self-Diagnosis Function
7
Self-Diagnosis Display
7
Self-Diagnosis Code Table
8
2 Disassembly
10
Service Position: LCD Module/Service Position to Check the Vtr Section
11
Service Position to Check the VTR Section
11
Service Position: LCD Module
11
F Panel Block Assembly
12
Top Cabinet Assembly
12
Gear with Motor (Lens Cover) (M904)
13
Flexible Board
13
Lens Shutter, Lens Ornamental Plate
13
Cabinet R Block Assembly
14
FP-732/FP-734 Flexible Board
14
Board
15
Board, LCD Module
15
Hinge Assembly, FP-733 Flexible Board
16
Installation of FP-733 Flexible Board
17
2-10.If-108 Board
18
2-11.Se-139 Board, MIC Unit
18
Board
19
2-12.Lens Block Assembly
19
Cabinet G
20
2-14. Cabinet G
20
2-15.Cabinet L Assembly
20
Q; 2-16. VC-333 Board
21
Qa 2-17. Mechanism Deck
21
Board
37
Printed Wiring Boards and Schematic Diagrams
37
Frame Schematic Diagrams
37
Frame Schematic Diagram (1/2)
37
Frame Schematic Diagram (2/2)
37
Flexible (CCD Imager)
37
Cf4720, Ss4720, Pw4720
39
Control Switch Block
39
Printed Wiring Boards
50
Flexible
51
Mounted Parts Location
60
5 Repair Parts List
61
Cabinet L Block Assembly-1
61
Cabinet L Block Assembly-2
61
Cabinet R Block Assembly-2
61
Exploded Views
61
F Panel Block Assembly
61
Cabinet R Block Assembly-1
61
Lens Block Assembly
61
MIC Block Assembly
61
Electrical Parts List
75
Overall Assembly
61
Sony Handycam DCR-IP1 Applications (48 pages)
Sony Digital Video Camera Recorder Application Guide
Brand:
Sony
| Category:
Camcorder
| Size: 2.1 MB
Table of Contents
Read this First
2
Table of Contents
4
Connecting to a Windows Computer
6
Introduction to Editing Pictures on a Computer
6
Features
6
Overview of the Preparation
7
Step 1: Installing the USB Driver on a Computer
8
Step 2: Installing the Image Editor Software (Imagemixer Ver.1.5 for Sony)
9
Step 3: Installing the Image Exchange Software (Image Transfer)
11
Step 4: Connecting Your Camcorder to a Computer
13
Connecting with the USB Cable (Supplied)
14
Connecting with an I.link Cable (Optional) (DV Format Models Only)
16
Step 5: Checking the Connection
17
Playing Pictures Recorded on a Tape on Your Computer
17
Viewing Pictures Recorded on a "Memory Stick" on Your Computer
18
Managing Pictures on a Windows Computer
19
Copying and Viewing Pictures Recorded on a Tape
19
Copying Movies Onto Your Computer
19
Copying Still Images Extracted from a Movie on Your Computer
21
Editing Pictures on Your Computer
21
Viewing Pictures on Your Computer Via the USB Port - USB Streaming
23
Creating Video Cds
24
Copying and Viewing Pictures Recorded on a "Memory Stick
26
Editing Still Images on Your Computer
28
Copying Pictures Edited on Imagemixer Ver.1.5 for Sony to a "Memory Stick
29
Connecting to a Macintosh Computer ("Memory Stick" Only)
31
Stick” Only)
31
Step 1: Installing the USB Driver on a Computer
31
Step 2: Connecting Your Camcorder to a Computer
32
Copying Pictures Recorded on a "Memory Stick
33
Other Functions
34
Creating Dvds (on Sony VAIO Series Computers Only)
34
Connecting an Analog VCR to the Computer Via Your Camcorder
37
(DV Format Models Only) - Digital Convert Function
37
Additional Information
40
Troubleshooting
40
Index
46
Advertisement
Sony Handycam DCR-IP1 Operating Instructions Manual (48 pages)
Ver.3.1 for MICROMV
Brand:
Sony
| Category:
Software
| Size: 1.04 MB
Table of Contents
Operating Instructions
1
Table of Contents
3
Before Use
5
What You Can Do with Movieshaker
5
Precautions for Use
6
About the MICROMV
6
Using Movieshaker
7
How to Use this Manual
9
How to Use this Help
9
Installing the Software
11
To Install Movieshaker
11
To Install Quicktime 5
16
To Install Directx 8.0A
17
If You Are Running Windows 2000
17
If You Are Running Windows Me
17
Basic Operation
18
Starting Movieshaker
18
Workflow
19
Collecting Clips
20
To Capture Multiple Images (Batch Capture)
20
To Capture an Image While Playing It Back
23
To Capture All Images that Have an Index and Arrange Them on the Product Tray (Dubbing)
25
To Make a Shaken Scene with Collected Clips
27
Placing Clips to Make a Movie
29
To Place a Clip (on the Storyboard)
29
To Place a Transition Effect between Scenes
31
Editing Effects, Etc
33
To Select a Scene for Processing
33
To Apply Effects to a Scene
35
To Apply Text Effects to a Scene
37
To Change the Volume or Playback Speed of a Scene
39
Exporting a Final Movie Product
41
To Preview a Final Movie Product
41
To Export a Final Movie Product
42
Additional Information
45
Troubleshooting
45
Sony Handycam DCR-IP1 Note (2 pages)
Sony Handycam DCR-IP1: Release Note
Brand:
Sony
| Category:
Camcorder
| Size: 0.11 MB
(Spanish) Sony Handycam DCR-IP1 Guia De Operaciones (232 pages)
digital video camera recorder
Brand:
Sony
| Category:
Camcorder
| Size: 4.35 MB
Table of Contents
Español
5
Lea Esto Primero
2
Table of Contents
5
Guía de Inicio Rápido
8
Grabación de Películas en una Cinta
8
Grabación de IMágenes Fijas en un "Memory Stick Duo
10
Procedimientos Iniciales
12
Paso 1: Comprobación de Los Artículos Incluidos
12
Paso 2 : Carga de la Batería
13
Uso de una Fuente de Alimentación Externa
16
Paso 3: Encendido
16
Paso 4: Ajuste del Panel de Cristal Líquido
17
Paso 5: Ajuste de la Fecha y la Hora
18
Paso 6: Inserción del Soporte de Grabación
19
Inserción de una Cinta de Casete
19
Inserción de un "Memory Stick Duo
19
Paso 7: Selección del Idioma de la Pantalla
20
Grabación
21
Grabación de Películas
21
Para Seleccionar el Modo de Grabación de la Imagen con Formato MPEG
22
Uso del Zoom
24
Grabación en Modo de Espejo
24
Uso del Disparador Automático
24
Grabación de IMágenes Fijas
25
Grabación de Fotos en Memoria
25
Selección de la Calidad y del Tamaño de la Imagen
26
Uso del Disparador Automático
27
Grabación de una Imagen Fija en un "Memory Stick Duo" Durante la Grabación de Películas en una Cinta
28
Ajuste de la Exposición
28
Ajuste de la Exposición para Motivos en Contraluz
28
Fijación de la Exposición para el Motivo Seleccionado - Medidor de Punto Flexible
28
Ajuste Manual de la Exposición
29
Grabación en un Lugar Oscuro
30
Color Slow Shutter
30
Ajuste del Enfoque
31
Ajuste de un Enfoque para un Motivo Fuera de Centro - SPOT FOCUS
31
Ajuste Manual del Enfoque
31
Grabación de una Imagen Utilizando Distintos Efectos
32
Aumento y Desvanecimiento Gradual de una Escena - FADER
32
Utilización de Efectos Especiales - Efecto Digital
34
Superposición de IMágenes Fijas sobre Películas de Cinta - MEMORY MIX
35
Búsqueda de la Última Escena de la Grabación Más Reciente
37
End Search
37
Reproducción
38
Ver Películas Grabadas en una Cinta
38
Reproducción en Diversos Modos
39
Ver Grabaciones con Efectos Agregados - Efectos Digitales
39
Visualización de Grabaciones en un "Memory Stick Duo
40
Reproducción en Diversos Modos desde un "Memory Stick Duo
41
Diversas Funciones de Reproducción
42
Aumento de IMágenes - Pantalla de Zoom Durante la Reproducción de Cintas/Pantalla de Zoom Durante la Reproducción de Memoria
42
Visualización de Los Indicadores de la Pantalla
43
Visualización de la Fecha/Hora y de Los Datos de Ajustes de la Cámara - Código de Datos
43
Reproducción de la Imagen en un TV
45
Localización de una Escena en una Cinta para Su Reproducción
46
Búsqueda Rápida de una Escena en Particular - Búsqueda de Varias IMágenes
46
Búsqueda de una Escena Utilizando Títulos - Búsqueda de Títulos
47
Búsqueda de una Escena por Fecha de Grabación - Búsqueda por Fechas
48
Operaciones Avanzadas
49
Uso del Menú
49
Selección de Elementos de Menú
49
Uso del Menú (AJUS. CÁMARA)
51
PROGR AE/BAL. BLANCOS/PAN 16:9, Etc
51
Zoom Digital
53
Uso del Menú (AJUS. MEMOR.)
55
Ráfaga/Calidad/Tam. Imagen/Bor. Todo/Nueva
55
CARP, Etc
55
IMAGEN/BOR. TODO/NUEVA CARP, Etc
55
Uso del Menú (APLIC. IMAGEN) - EFECTO IMAG./PRES.DIAP./ GRAB.INT.FIJ, Etc
59
Modo Demo
62
Uso del Menú (EDIC y REP)
63
Búsq. Múlt
63
TÍTULO/TÍT.CINTA, Etc
63
Uso del Menú (AJUSTE EST.) - USB-CAMERA, Etc
67
Apagado Auto
71
Uso del Menú (HORA/IDIOMA)
72
AJUS. RELOJ/HORA MUNDIAL, Etc
72
Personalización del Menú Personalizado
73
Copiado/Edición
76
Conexión a una Videograbadora O un TV
76
Copiado a Otra Cinta
77
Grabación de IMágenes desde una Videograbadora O un TV
78
Copiado de IMágenes de una Cinta a un "Memory Stick Duo
79
Copiado de IMágenes de un "Memory Stick Duo" a una Cinta
80
Borrado de IMágenes Grabadas
81
Cambio del Tamaño de la Imagen Fija
82
Cambio de Tamaño
82
Marcación de IMágenes Grabadas con
83
Protección de IMágenes/Marca de
83
Impresión
83
Solución de Problemas
85
Indicadores y Mensajes de Advertencia
92
Información Complementaria
96
Utilización de la Videocámara en el Extranjero
96
Cintas de Videocasete Recomendadas
97
Acerca del "Memory Stick
98
Acerca de la Batería "Infolithium
100
Acerca de I.link
102
Mantenimiento y Precauciones
103
Especificaciones
106
Referencia Rápida
109
Identificación de Piezas y Controles
109
Índice
115
Português
121
Leia Isto Primeiro
118
Guia de Início Rápido
124
Gravando Imagens Em Movimento Em Uma Fita
124
Gravando Imagens Estáticas Em um "Memory Stick Duo
126
Preparativos
128
Passo 1: Verificando Itens Fornecidos
128
Passo 2: Carregando a Bateria
129
Utilizando Uma Fonte de Alimentação Externa
132
Passo 3: Ligando O Aparelho
132
Passo 4: Ajustando O Painel LCD
133
Passo 5: Ajustando a Data E a Hora
134
Passo 6: Inserindo a Mídia de Gravação
135
Inserindo Uma Fita
135
Inserindo um "Memory Stick Duo
136
Passo 7: Ajustando O Idioma da Tela
136
Gravação
137
Gravando Filmes
137
Para Selecionar O Modo de Gravação da Imagem Com Formato MPEG
138
Utilizando O Zoom
140
Gravando no Modo de Espelho
140
Utilizando O Temporizador Automático
140
Gravando Imagens Estáticas
141
Gravação de Fotos Na Memória
141
Selecionando a Qualidade Ou O Tamanho da Imagem
142
Utilizando O Temporizador Automático
143
Gravando Uma Imagem Estática Em um "Memory Stick Duo" Durante a Gravação de Filmes Em Uma Fita
144
Ajustando a Exposição
144
Ajustando a Exposição para Motivos Em Contraluz
144
Fixando a Exposição Do Motivo Selecionado - Medidor de Ponto Flexível
144
Ajustando a Exposição Manualmente
145
Gravando Em Locais Escuros
146
Color Slow Shutter
146
Ajustando O Foco
147
Ajustando O Foco para um Motivo Descentrado - SPOT FOCUS
147
Ajustando O Foco Manualmente
147
Gravando Uma Imagem Com Vários Efeitos
148
Aparecimento E Desaparecimento Gradual de Uma Cena - FADER
148
Utilizando Efeitos Especiais - Efeito Digital
149
Sobrepondo Imagens Estáticas Em Filmes Gravados Em Fita - MEMORY MIX
151
Procurando a Última Cena da Gravação Mais Recente
153
End Search
153
Reprodução
154
Visualizando Filmes Gravados Em Uma Fita
154
Reproduzindo Em Vários Modos
155
Visualizando Gravações Com Efeitos Adicionais - Efeito Digital
155
Visualizando Gravações Em um "Memory Stick Duo
156
Reproduzindo Em Vários Modos Em um "Memory Stick Duo
157
Vários Recursos de Reprodução
158
Ampliando Imagens - Zoom de Reprodução de Fita/Zoom de Reprodução de Memória
158
Exibindo os Indicadores da Tela
159
Exibindo a Data/Hora E os Dados de Ajuste da Câmera - CóD. Dados
159
Reproduzindo a Imagem Em Uma TV
161
Localizando Uma Cena Em Fita para Reprodução
162
Procurando Rapidamente Uma Cena Específica - Busca de Multi-Imagens
162
Procurando Uma Cena Utilizando Títulos - Busca Pelo Título
163
Procurando Uma Cena Pela Data da Gravação - Busca Pela Data
163
Operações Avançadas
165
Utilizando O Menu
165
Selecionando Itens de Menu
165
Utilizando O Menu (AJUS. CÂMERA)
167
PROGRAM AE/EQ. BRANCO/MODO 16:9, Etc
167
Utilizando O Menu (AJUSTE MEM.) - BURST/QUALIDADE/TAM. IMAGEM/APAG.TUDO/NOVA PASTA, Etc
171
Utilizando O Menu (APLIC. IMAGEM)
175
EFEITO IMAG/APRES.SLIDES/ GRV.FIXA INT, Etc
175
Utilizando O Menu (EDITAR&REPR.)
179
- MULTI-BUSCA/TÍTULO/TÍT.FITA., Etc
179
Utilizando O Menu (AJUST.PADRÃO) - USB-CAMERA, Etc
183
Utilizando O Menu (HORA/IDIOMA)
187
Ajust. Relóg/Hr. Mundial
187
Etc
187
Personalizando O Menu Pessoal
188
Duplicando/Editando
191
Conectando a um VCR Ou a Uma TV
191
Duplicando Em Outra Fita
192
Gravando Imagens a Partir de um VCR Ou Uma TV
193
Duplicando Imagens de Uma Fita Em um "Memory Stick Duo
194
Duplicando Imagens Estáticas de um "Memory Stick Duo" Em Uma Fita
195
Apagando Imagens Gravadas
196
Alterando O Tamanho da Imagem Estática - Reaj.tamanho
197
Marcando Imagens Gravadas Com
198
Informações Específicas
198
Proteção de Imagem/Marca
198
De Impressão
198
Solução de Problemas
201
Mensagens E Indicadores de Aviso
208
Informações Adicionais
212
Utilizando Sua Videocâmera no Exterior
212
Fitas Cassetes Utilizáveis
213
Sobre O "Memory Stick
214
Sobre a Bateria "Infolithium
216
Sobre I.link
218
Manutenção E Precauções
219
Especificações
222
Referência Rápida
224
Identificação das Peças E Dos Controles
224
Índice Remissivo
230
Advertisement
Related Products
Sony Handycam DCR-IP1E
Sony Handycam DCR-IP55
Sony Handycam DCR-IP45E
Sony DCR-IP5E/IP7E
Sony DCR-IP5/IP7BT
Sony DCR-IP7BT - Network Handycam Ip
Sony DCR-IP5 MovieShaker v3.1
Sony DCR-IP7
Sony DCR-IP5 Network Function
Sony Handycam DCR-IP220
Sony Categories
Laptop
TV
CD Player
Camcorder
Digital Camera
More Sony Manuals
Login
Sign In
OR
Sign in with Facebook
Sign in with Google
Upload manual
Upload from disk
Upload from URL