Sign In
Upload
Manuals
Brands
Sony Manuals
Camcorder
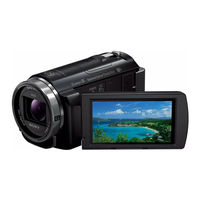
Handycam HDR-PJ610E
Sony Handycam HDR-PJ610E Manuals
Manuals and User Guides for Sony Handycam HDR-PJ610E. We have
3
Sony Handycam HDR-PJ610E manuals available for free PDF download: Help Manual, Service Manual, Operating Manual
Sony Handycam HDR-PJ610E Help Manual (394 pages)
Brand:
Sony
| Category:
Camcorder
| Size: 3.34 MB
Table of Contents
Table of Contents
3
Before Use
12
Model Information
12
Parts and Controls
12
Recording
14
Playback
15
Parts and Controls (Back/Bottom)
24
Parts and Controls (Front/Top)
24
Parts and Controls (LCD Monitor)
24
Parts and Controls (Side)
24
Screen Indicators
24
Getting Started
24
Checking the Supplied Items
24
About the Dedicated Software for this Product
26
Creating a Blu-Ray Disc
26
Saving Images on an External Media Device
26
Notes on Use of the External Media
26
Saving the Desired Images in this Product to the External Media Device
26
Playing Back Images in the External Media Device on this Product
26
Deleting Images in the External Media Device
26
Creating a Disc with a Recorder
26
Using the Wi-Fi Function
26
What You Can Do with the Wi-Fi Function
26
Supplied Items
39
Power Source Preparations
40
Attaching the Battery Pack
40
Charging the Battery Pack Using the AC Adaptor
40
Charging the Battery Pack Using Your Computer
40
Turning the Power on
40
Using this Product Supplying Power from a Wall Outlet
40
Initial Setup
41
Setting the Language, Date and Time
41
Adjusting the Angle of the LCD Monitor for Easier Viewing
41
Displaying Items on the LCD Monitor
41
Preparing a Memory Card
42
Inserting a Memory Card
42
Types of Memory Card You Can Use with this Product
42
Recording Movies/Photos
43
Recording Movies
43
Shooting Photos
43
Useful Functions for Recording
44
Zooming
44
Capturing Photos During Movie Recording (Dual Capture)
44
Recording in Mirror Mode
44
Intelligent Auto
44
Decreasing the Voice Volume of the Person Recording the Movie
44
Recording the Selected Subject Clearly (Face Priority)
44
Recording Subjects Other than People (Tracking Focus)
44
Playing Images Using Event View
45
Playing Movies and Photos from the Event View Screen
45
Screen Display on the Event View Screen
45
Playing Images Using Highlight Playback
46
Playing Back a Short Movie (Highlight Playback)
46
Changing the Settings for Highlight Playback
46
Saving Highlight Playback
46
Playing Back a Saved Scenario
46
Playing MP4 Movies (HD Movie) (Switching the Movie Format)
47
Editing Images from the Playback Screen
48
Notes on Editing
48
Deleting the Selected Images
48
Deleting by Date
48
Dividing a Movie
48
Capturing a Photo from a Movie
48
Viewing Trajectory of a Moving Object
48
Using the Built-In Projector
49
Notes on Using the Projector (Models with the Projector)
49
Using the Built-In Projector (Models with the Projector)
49
Using the Projector for Your Computer or Smartphone
49
Playing Images on a High Definition TV
50
Connecting this Product to a High Definition TV
50
Enjoying 5.1Ch Surround Sound
50
Using BRAVIA Sync
50
On Photo TV HD
50
On the HDMI Cable
50
Playing Images on a Non-High-Definition TV
51
Connecting this Product to a Non-High-Definition TV
51
Using the Playmemories Home Software
52
Checking the Computer System
52
Controlling Via a Smartphone
56
Using Your Smartphone or Tablet as a Wireless Remote Commander
56
Using Your Smartphone or Tablet as a Wireless Remote Commander Using the NFC Function (NFC One-Touch Remote)
56
Transferring Images to a Smartphone
57
Transferring Movies (MP4) and Photos to Your Smartphone or Tablet
57
Transferring Movies (MP4) and Photos to Your Smartphone or Tablet Using the NFC Function (NFC One-Touch Sharing)
57
Transferring Images to a Computer
58
Send to Computer
58
Transferring Images to a TV
59
Playing Images on a TV
59
Connecting a Smartphone
60
Connecting to an Android Smartphone or Tablet
60
Connecting to an Iphone or Ipad
60
Connecting to an NFC-Enabled Smartphone or Tablet
60
Installing Playmemories Mobile
61
About the Playmemories Mobile Software
61
Using Menu Items
62
Setting up Menu Items
62
How to Use the Keyboard
62
Shooting Mode
63
Movie
63
Photo
63
Camera/MIC
64
White Balance
64
Spot Meter/Fcs
64
Spot Meter
64
Spot Focus
64
Exposure
64
Focus
64
AE Shift
64
White Balance Shift
64
Low Lux
64
Picture Effect
65
Cinematone
65
Fader
65
Self-Timer
65
Steadyshot(Movie)
65
Steadyshot (Photo)
65
Digital Zoom
65
Auto Back Light
65
Face Detection
65
Smile Shutter
65
Red Eye Reduction (Only When Connecting an External Flash)
66
Premium Closervoice
66
My Voice Canceling
66
Blt-In Zoom MIC
66
Auto Wind NR
66
Audio Mode
66
Audio Rec Level
66
Ctrl with Smartphone
66
My Button
66
Grid Line
66
Image Quality/Size
67
REC Mode
67
Frame Rate
67
Dual Video REC
67
Image Size
67
Playback Function
68
Event View
68
Scenario
68
Edit/Copy
69
Send to Smartphone
69
View on TV
69
Send to Computer
69
Delete
69
Protect
69
Copy
69
Direct Copy
69
Setup
70
Media Select
70
Media Info
70
Format
70
Empty
70
Repair Img. DB F
70
File Number
70
Data Code
70
Volume
70
Motion Interval ADJ
70
Empty Music (HDR-CX540/PJ540)
71
WPS Push
71
Access Point Settings
71
Edit Device Name
71
Disp MAC Address
71
SSID/PW Reset
71
Network Info Reset
71
TV Type
71
HDMI Resolution
71
Ctrl for Hdmi
71
USB LUN Setting
72
Beep
72
Monitor Brightness
72
Airplane Mode
72
Power on W/Monitor
72
Language Setting
72
Calibration
72
Battery Info
72
Power Save
72
Initialize
72
Charging Time/Recording Time of Movies/Number of Recordable Photos
74
Check the Charging Time
74
Expected Recording and Playback Times for Individual Batteries
75
Expected Recording Time with each Battery Pack
75
Expected Playback Time with each Battery Pack
75
Expected Movie Recording Time and Number of Recordable Photos for the Internal Memory
76
Notes on Recording Movies
76
Expected Recording Time of Movies
76
Expected Number of Recordable Photos
76
Expected Movie Recording Time and Number of Recordable Photos for Memory Cards
77
Notes on Recording Movies
77
Expected Recording Time of Movies
77
Expected Number of Recordable Photos
77
Bit-Rate for each Recording Mode
78
Bit-Rate and Recording Pixels
78
Pixels Recorded at each Image Size of Photos
79
Recording Pixels and Aspect Ratio
79
Precautions
80
About the AVCHD Format
80
About the Memory Card
80
About the Infolithium Battery Pack
80
Handling of this Product
81
On Use and Care
81
On Connecting to a Computer or Accessory Etc
81
Notes on Optional Accessories
81
On Moisture Condensation
81
Notes on Disposal/Transfer the Ownership of this Product
81
Maintenance
82
On Handling the LCD Monitor
82
To Clean the Casing and the Projector Lens Surface
82
About Care and Storage of the Lens
82
Using this Product Abroad
83
World Time Difference
83
Trademarks
84
On Trademarks
84
License
85
Notes on the License
85
Zoom Magnifications
86
Troubleshooting
87
If You Have Problems
87
Overall Operations
88
The Power Does Not Turn on
88
This Product Does Not Operate Even When the Power Is Set to on
88
The Menu Settings Have Been Changed Automatically
88
This Product Gets Warm
88
A Rattling Noise Is Heard When this Product Is Shaken
88
Intelligent Auto Is Canceled
88
Batteries/Power Sources
89
The Power Abruptly Turns off
89
The POWER/CHG (Charge) Lamp Does Not Light While the Battery Pack Is Being Charged
89
The POWER/CHG (Charge) Lamp Flashes While the Battery Pack Is Being Charged
89
The Remaining Battery Power Is Not Displayed Correctly
89
The Battery Pack Is Quickly Discharged
89
Monitor
90
Menu Items Are Grayed out
90
The Buttons Do Not Appear on the LCD Monitor
90
The Buttons on the Touch Panel Do Not Work Correctly or Do Not Work at All
90
The Buttons on the LCD Monitor Quickly Disappear
90
There Are Dots in the Shape of a Grid on the Monitor
90
The Backlight of the LCD Monitor Turns off if You Do Not Attempt to Operate this Product for a While
90
Memory Card
91
Operations Using the Memory Card Cannot be Performed
91
Images Stored on the Memory Card Cannot be Deleted
91
The Data File Name Is Not Indicated Correctly or Flashes
91
Images Cannot be Played Back or the Memory Card Is Not Recognized
91
Recording
92
Pressing START/STOP or PHOTO Does Not Record Images
92
Photos Cannot be Recorded
92
The Access Lamp Remains Lit or Flashing Even if Recording Has Stopped
92
The Imaging Field Looks Different
92
The Actual Recording Time for Movies Is Less than the Expected Recording Time of the Recording Media
92
This Product Stops Recording
92
There Is a Slight Time Lag between the Moment When START/STOP Is Pressed and the Actual Movie Recordingstarts or Stops
92
The Auto Focus Does Not Function
92
Steadyshot Does Not Function
92
Sound Is Not Recorded Correctly
93
Photos Are Recorded Automatically
93
Playback
94
Images Cannot be Played Back
94
Photos Cannot be Played Back
94
The Movie Freezes
94
An Icon Appears on a Thumbnail
94
No Sound or Only a Quiet Sound Is Heard During Playback
94
Left and Right Sound Is Heard Unbalanced When Playing Back Movies on Computers or Other Devices
94
Wi-Fi
95
The Wireless Access Point You Want to Connect to Does Not Appear
95
[WPS Push] Does Not Work
95
[Ctrl with Smartphone], [Send to Smartphone], [Send to Computer] or [View on TV] Terminates Prematurely
95
Cannot Transfer Movies to Your Smartphone
95
The Shooting Screen Does Not Display Smoothly. the Connection Is Cut off
95
The NFC Connection Does Not Work
95
Editing Movies/Photos on this Product
96
Unable to Edit
96
A Movie Cannot be Divided
96
The Demonstration Movies Cannot be Deleted
96
Playback on a TV
97
Neither Image nor Sound Is Played on the Connected TV
97
The Top, Bottom, Right, and Left Edges of Images Are Trimmed Slightly on a Connected TV
97
The Image Appears Distorted on the 4:3 TV
97
Black Bands Appear at the Top and Bottom of the LCD Monitor of the 4:3 TV
97
Copying/Connecting to Other Devices
98
Images Are Not Copied Correctly
98
Connecting to a Computer
99
Playmemories Home Cannot be Installed
99
Playmemories Home Does Not Work Correctly
99
This Product Is Not Recognized by the Computer
99
Self-Diagnosis Display/Warning Indicators
100
Self-Diagnosis Display
100
Warning Messages
101
Warning Indicators
101
How to Use
102
Notes on Use
112
Using the Built-In Projector (Models with the Projector)
157
Installing the Playmemories Home Software in Your Computer
167
Installing the Playmemories Home Software in Your Computer
169
Disconnecting this Product from the Computer
170
Charging Time
293
Advertisement
Sony Handycam HDR-PJ610E Service Manual (76 pages)
Digital HD Video Camera Recorder
Brand:
Sony
| Category:
DVR
| Size: 6.99 MB
Table of Contents
Safety Check-Out
2
Unleaded Solder
2
Electrical Parts List
3
Overall Block Diagram
8
Power Block Diagram
12
Frame Schematic Diagram
15
Schematic Diagrams and Printed Wiring Boards
17
Schematic Diagrams
18
Power Control
21
Usb Power Management
22
Memory Card Connector
34
Microphone Unit
36
Hdmi Receiver
38
Led Drive
64
Control Switches
68
Printed Wiring Boards
69
Sony Handycam HDR-PJ610E Operating Manual (32 pages)
Digital HD Video Camera Recorder
Brand:
Sony
| Category:
Camcorder
| Size: 0.74 MB
Table of Contents
Read this First
2
Declaration of Conformity
4
Regulatory Information
4
Table of Contents
7
Camcorder (Help Guide)
7
Getting Started
8
Supplied Items
8
Charging the Battery Pack
9
Charging the Battery Using Your Computer
10
Turning the Power on
11
Inserting a Memory Card
12
Recording/Playback
13
Recording
13
Recording Movies
13
Open the Lens Cover
13
Start Recording
13
Shooting Photos
14
Playback
15
Playback Operations
16
Viewing Images at a Larger Size
17
Saving Images
18
Using Playmemories Home
18
Connecting an External Media Device
19
Using the Wi-Fi Function
20
Customizing Your Camcorder
24
Using the Menus
24
Others
25
Precautions
25
Specifications
26
Troubleshooting
26
Rechargeable Battery
28
Parts and Controls
30
Advertisement
Advertisement
Related Products
Sony Handycam HDR-PJ600V
Sony Handycam HDR-PJ650VE
Sony Handycam HDR-PJ650E
Sony Handycam HDR-PJ660
Sony Handycam HDR-PJ660E
SONY Handycam HDR-PJ600
Sony Handycam HDR-PJ660V
Sony HDR-PJ620
Sony Handycam HDR-PJ600E
Sony HDR-PJ675
Sony Categories
Laptop
TV
CD Player
Camcorder
Digital Camera
More Sony Manuals
Login
Sign In
OR
Sign in with Facebook
Sign in with Google
Upload manual
Upload from disk
Upload from URL