Sign In
Upload
Manuals
Brands
Sony Manuals
DVD Recorder
RDR-HXD970
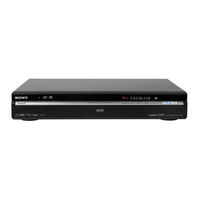
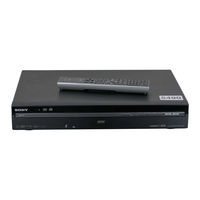
Sony RDR-HXD970 Manuals
Manuals and User Guides for Sony RDR-HXD970. We have
2
Sony RDR-HXD970 manuals available for free PDF download: Operating Instructions Manual
Sony RDR-HXD970 Operating Instructions Manual (172 pages)
Sony DVD Recorder Operating Instructions
Brand:
Sony
| Category:
DVD Recorder
| Size: 11.27 MB
Table of Contents
DVD Recorder
1
Warning
2
Precautions
3
Table of Contents
5
Quick Guide to Disc Types
10
Recordable and Playable Discs
10
Playable Discs
12
Hookups and Settings
14
Hooking up the Recorder
14
Checking Hookup and Setting Methods
14
Step 1: Connecting the Aerial Cable and Set Top Box Controller
15
Using the Set Top Box Receiver Control Function
15
A: Receiving Freeview (for Digital Broadcasting)
16
B: Receiving Cable or Satellite (for Analogue Broadcasting)
17
C: Receiving Terrestrial (for Analogue Broadcasting)
18
Step 2: Connecting the Video Cords/Hdmi Cord
19
About the SMARTLINK Features (for SCART Connections Only)
21
About the HDMI Control Functions for 'BRAVIA' Theatre Sync (for HDMI Connections Only)
21
Step 3: Connecting the Audio Cords/Hdmi Cord
22
Step 4: Connecting the Mains Lead
23
Step 5: Preparing the Remote
24
Controlling Tvs with the Remote
24
Recorder
25
Changing Programme Positions of the Recorder Using the Remote
26
Step 6: Easy Setup
26
Setting up Your Set Top Box Receiver for the GUIDE Plus+ System (for Analogue Broadcasting)
28
Connecting a VCR or Similar Device
31
Connecting to the LINE 1/DECODER Jack
31
Connecting to the LINE 2 in Jacks on the Front Panel
32
Connecting an External Decoder
33
Connecting a Decoder
33
Setting External Decoder (PAY-Tv/Canal Plus Analogue Decoder) Programme Positions
34
1 Inserting a Disc
36
2 Recording a Programme
36
Checking the Disc Status While Recording
37
3 Playing the Recorded Programme (Title List)
38
4 Displaying the Playing Time and Play Information
40
Disc Information
41
5 Changing the Name of a Recorded Programme
42
6 Labelling and Protecting a Disc
43
Labelling a Disc
43
Protecting a Disc
44
7 Playing the Disc on Other DVD Equipment (Finalise)
45
Unfinalising a Disc
46
8 Reformatting a Disc
47
Guide to Digital Services (for Freeview Users Only)
48
EPG (Electronic Programme Guide)
48
Viewing a List of Available Channels
48
Programme Information
49
Displaying the Programme Information
49
Viewing a Digital Text Service
50
Selecting Digital Text from Dedicated Digital Teletext Channels
50
Selecting Digital Text from Other Channels
51
Timer Recording (for Freeview Users Only)
52
Before Recording
52
Recording Mode
52
Unrecordable Pictures
53
Timer Recording (Standard/Epg)
53
Setting the Timer Manually (Standard)
53
Recording TV Programmes Using the EPG
55
Recording Programmes Using Series Recording
57
Using the Quick Timer Function
58
Adjusting the Recording Picture Quality
59
Creating Chapters in a Title
59
Checking/Changing/Cancelling Timer Settings (Timer List)
60
Recording from Connected Equipment
61
GUIDE Plus+ (for Analogue Broadcasting Only)
63
Introduction to the GUIDE Plus+ System
63
Learning the Common Elements
63
Troubleshooting Guide
64
Watching TV Using the GUIDE Plus+ System
65
Searching for a Programme Using the GUIDE Plus+ System
66
Listing up Your Favourite Programme Information (My TV)
67
Setting a Profile
67
Selecting and Watching a Programme from My TV
68
Making Changes to the GUIDE Plus+ System
68
Searching for the GUIDE Plus+ Host Channel
68
Changing the GUIDE Plus+ Host Channel Manually
69
Checking Programme Positions
69
Disabling Programme Positions
70
Timer Recording (for Analogue Broadcasting Only)
71
Before Recording
71
Recording Mode
71
Recording Stereo and Bilingual Programmes
72
Unrecordable Pictures
72
Timer Recording (GUIDE Plus+/Manual)
73
One Button Recording (GUIDE Plus+ (in the UK Only))
73
Setting the Timer Manually
74
Using the Quick Timer Function
75
Adjusting the Recording Picture Quality
76
Creating Chapters in a Title
77
Checking/Changing/Cancelling Timer Settings
77
Changing Timer Settings
77
Cancelling Timer Settings
78
Recording from Connected Equipment
79
Playback
80
Playing the Recorded Programme/DVD
80
Playback Options
82
Playing a Specific Portion Repeatedly (A-B Repeat)
84
Playing Repeatedly (Repeat)
84
Creating Your Own Programme (Programme)
85
Adjusting the Picture Quality
85
Pausing a TV Broadcast (TV Pause/Pause Live TV)
87
Playing from the Beginning of the Programme You Are Recording (Chase Play)
88
Playing a Previous Recording While Making Another (Simultaneous Rec and Play)
88
Searching for a Time/Title/Chapter/Track, Etc
89
Erasing and Editing
91
Before Editing
91
Erasing and Editing a Title
92
Editing Multiple Titles (Multi-Mode)
93
Erasing a Section of a Title (A-B Erase)
93
Dividing a Title (Divide)
94
Erasing and Editing a Chapter
95
Dividing a Chapter (Divide)
95
Erasing a Chapter (Erase)
96
Combining Multiple Chapters (Combine)
96
Creating and Editing a Playlist
96
Moving a Playlist Title (Move)
97
Combining Multiple Playlist Titles (Combine)
97
Dividing a Playlist Title (Divide)
97
Moving a Chapter (Move)
97
Dubbing (HDD y DVD)
98
Before Dubbing
98
HDD/DVD Dubbing
99
Dubbing Using Dubbing List
100
Making a Backup Disc (DVD Backup)
103
DV Camcorder Dubbing
104
Before DV Camcorder Dubbing
104
Preparing for DV Camcorder Dubbing
104
Dubbing an Entire DV Format Tape (DV One Touch Dubbing)
106
Dubbing Selected Scenes (Manual Dubbing)
106
Playing from a DV Camcorder
107
Audio Tracks
108
Playing Audio Tracks from CD/DVD
108
Playback Options
108
Playing a Specific Portion Repeatedly (A-B Repeat)
109
Playing Repeatedly (Repeat)
109
Creating Your Own Programme (Programme)
110
Searching for an Audio Track
111
About Jukebox
112
Preparing for Using Jukebox
112
Connecting the USB Device
112
Copying Audio Tracks (DISC T HDD)
113
Copying an Album (USB T HDD)
113
Playing Audio Tracks Using Jukebox/Usb Device
114
Playback Options
115
Playing Repeatedly (Repeat)
115
Creating Your Own Programme (Programme)
116
Managing Audio Tracks on the Music Jukebox
117
About the "Photo Album" Function
118
JPEG Image Files
118
Preparing for Using the "Photo Album" Function
118
Connecting the USB Device
118
Copying JPEG Image Files to the HDD (DISC/USB T HDD)
118
Copying All JPEG Image Files from the Connected USB Device (USB T DVD-RW/DVD-R)
119
Copying JPEG Image Files or Albums on the HDD (HDD y HDD)
119
Copying JPEG Image Albums to a Disc (HDD T DVD-RW/DVD-R)
120
Copying JPEG Image Files to a Disc (HDD T DVD-RW/DVD-R)
121
Using the "Photo Album" List
122
Viewing a JPEG Image File
124
Playing a Slideshow
124
Managing JPEG Image Files on the HDD
125
Printing JPEG Image Files
126
Settings and Adjustments
128
Disc Settings (Disc Setup)
128
Recorder Settings (Basic)
129
Aerial Reception Settings (Digital Tuner)
131
Replace Channels
131
Add New Channels
131
Channel Sort
131
Channel Options
132
Auto Skip
132
Signal Check
132
D.TV Language
132
Aerial Reception Settings (Analog Tuner)
133
Auto Channel Setting
133
Manual CH Setting
133
Channel Swapping
135
Video Settings (Video In/Out)
136
Audio Input Settings (Audio In)
137
Audio Output Settings (Audio Out)
138
Language Settings (Language)
140
Recording Settings (Recording)
141
Playback Settings (Playback)
144
Limitation Settings (Parental Lock)
145
HDMI Settings (HDMI Output)
147
Other Settings (Options)
149
Options
149
Options 2
150
Additional Information
151
Troubleshooting
151
Remote Control
156
Resetting the Recorder
158
Notes about this Recorder
159
Specifications
160
Files
161
The Recorder Can Play
162
About I.link
163
Guide to Parts and Controls
164
Front Panel
165
Rear Panel
166
Language Code List
167
Country/Area Code
168
Index
169
Advertisement
Sony RDR-HXD970 Operating Instructions Manual (156 pages)
DVD Recorder
Brand:
Sony
| Category:
DVD Recorder
| Size: 9.74 MB
Table of Contents
DVD Recorder
1
Warning
2
Precautions
2
Table of Contents
5
Quick Guide to Disc Types
10
Recordable and Playable Discs
10
Playable Discs
12
Hookups and Settings
14
Hooking up the Recorder
14
Step 1: Connecting the Aerial Cable
14
A: Receiving Digital Terrestrial Broadcasting (for Digital Broadcasting)
15
B: Receiving Terrestrial (for Analogue Broadcasting)
16
Step 2: Connecting the Video Cords/Hdmi Cord
17
About the HDMI Control Functions for 'BRAVIA' Theatre Sync (for HDMI Connections Only)
19
Step 3: Connecting the Audio Cords/Hdmi Cord
20
Step 4: Connecting the AC Power Cord (Mains Lead)
22
Step 5: Preparing the Remote
22
Controlling Tvs with the Remote
23
Recorder
24
Changing Programme Positions of the Recorder Using the Remote
24
Step 6: Easy Setup
24
Connecting a VCR or Similar Device
26
Connecting to the LINE 1 Jack
26
Connecting to the LINE 2 in Jacks on the Front Panel
27
Eight Basic Operations - Getting to Know Your DVD Recorder
28
1 Inserting a Disc
28
2 Recording a Programme
28
Checking the Disc Status While Recording
29
3 Playing the Recorded Programme (Title List)
30
4 Displaying the Playing Time and Play Information
33
5 Changing the Name of a Recorded Programme
34
6 Labelling and Protecting a Disc
36
Labelling a Disc
36
Protecting a Disc
36
7 Playing the Disc on Other DVD Equipment (Finalise)
37
Unfinalising a Disc
39
8 Reformatting a Disc
40
Guide to Digital Services (for Digital Terrestrial Broadcasting Only)
41
EPG (Electronic Programme Guide)
41
Viewing a List of Available Channels
41
Programme Information
42
Displaying the Programme Information
42
Viewing Teletext (Not Available in some Areas)
43
Timer Recording (for Digital Terrestrial Broadcasting Only)
44
Before Recording
44
Recording Mode
44
Unrecordable Pictures
45
Timer Recording (Standard/Epg)
45
Setting the Timer Manually (Standard)
45
Recording TV Programmes Using the EPG
47
Using the Quick Timer Function
48
Adjusting the Recording Picture Quality
49
Creating Chapters in a Title
49
Checking/Changing/Cancelling Timer Settings (Timer List)
50
Recording from Connected Equipment
51
Timer Recording (for Analogue Broadcasting Only)
53
Before Recording
53
Recording Mode
53
Recording Stereo and Bilingual Programmes
54
Unrecordable Pictures
54
Timer Recording (Standard/G-Code)
55
Setting the Timer Manually (Standard)
55
Recording TV Programmes Using the G-Code System
57
Using the Quick Timer Function
58
Adjusting the Recording Picture Quality
58
Creating Chapters in a Title
59
Checking/Changing/Cancelling Timer Settings (Timer List)
60
Recording from Connected Equipment
61
Playback
63
Playing the Recorded Programme/DVD
63
Playback Options
65
Playing a Specific Portion Repeatedly (A-B Repeat)
67
Playing Repeatedly (Repeat)
67
Creating Your Own Programme (Programme)
68
Adjusting the Picture Quality
68
Pausing a TV Broadcast (TV Pause)
70
Playing from the Beginning of the Programme You Are Recording (Chase Play)
71
Playing a Previous Recording While Making Another (Simultaneous Rec and Play)
71
Searching for a Time/Title/Chapter/Track, Etc
72
Erasing and Editing
74
Before Editing
74
Erasing and Editing a Title
75
Editing Multiple Titles (Multi-Mode)
76
Erasing a Section of a Title (A-B Erase)
76
Dividing a Title (Divide)
77
Erasing and Editing a Chapter
78
Dividing a Chapter (Divide)
78
Erasing a Chapter (Erase)
79
Combining Multiple Chapters (Combine)
79
Creating and Editing a Playlist
79
Moving a Playlist Title (Move)
80
Combining Multiple Playlist Titles (Combine)
80
Dividing a Playlist Title (Divide)
80
Moving a Chapter (Move)
80
Dubbing (HDD y DVD)
81
Before Dubbing
81
HDD/DVD Dubbing
82
Dubbing Using Dubbing List
83
Making a Backup Disc (DVD Backup)
86
DV Camcorder Dubbing
87
Before DV Camcorder Dubbing
87
Preparing for DV Camcorder Dubbing
87
Dubbing an Entire DV Format Tape (DV One Touch Dubbing)
89
Dubbing Selected Scenes (Manual Dubbing)
89
Playing from a DV Camcorder
90
Audio Tracks
91
Playing Audio Tracks from CD/DVD
91
Playback Options
91
Playing a Specific Portion Repeatedly (A-B Repeat)
92
Playing Repeatedly (Repeat)
92
Creating Your Own Programme (Programme)
93
Searching for an Audio Track
94
About Jukebox
95
Preparing for Using Jukebox
95
Connecting the USB Device
95
Copying Audio Tracks (DISC T HDD)
96
Copying an Album (USB T HDD)
96
Playing Audio Tracks Using Jukebox/Usb Device
97
Playback Options
98
Playing Repeatedly (Repeat)
98
Creating Your Own Programme (Programme)
99
Managing Audio Tracks on the Music Jukebox
100
About the "Photo Album" Function
101
JPEG Image Files
101
Preparing for Using the "Photo Album" Function
101
Connecting the USB Device
101
Copying JPEG Image Files to the HDD (DISC/USB T HDD)
101
Copying All JPEG Image Files from the Connected USB Device (USB T DVD-RW/DVD-R)
102
Copying JPEG Image Files or Albums on the HDD (HDD y HDD)
102
Copying JPEG Image Albums to a Disc (HDD T DVD-RW/DVD-R)
103
Copying JPEG Image Files to a Disc (HDD T DVD-RW/DVD-R)
104
Using the "Photo Album" List
105
Viewing a JPEG Image File
107
Playing a Slideshow
107
Managing JPEG Image Files on the HDD
108
Printing JPEG Image Files
109
Settings and Adjustments
111
Disc Settings (Disc Setup)
111
Recorder Settings (Basic)
112
Aerial Reception Settings (Digital Tuner)
113
Replace Channels
114
Add New Channels
114
Channel Sort
114
Channel Options
115
Auto Skip
115
Signal Check
115
Aerial Power
115
Aerial Reception Settings (Analog Tuner)
116
Auto Channel Setting
116
Manual CH Setting
116
Channel Swapping
119
G-Code CH Setting
119
Video Settings (Video In/Out)
120
Audio Input Settings (Audio In)
121
Audio Output Settings (Audio Out)
122
Language Settings (Language)
124
Recording Settings (Recording)
125
Playback Settings (Playback)
128
Limitation Settings (Parental Lock)
129
HDMI Settings (HDMI Output)
131
Other Settings (Options)
133
Options
133
Options 2
135
Additional Information
136
Troubleshooting
136
Remote Control
141
Resetting the Recorder
142
Notes about this Recorder
142
Specifications
143
Files
144
The Recorder Can Play
145
About I.link
146
Guide to Parts and Controls
148
Front Panel
149
Rear Panel
150
Language Code List
151
Country/Area Code
152
Index
153
Advertisement
Related Products
Sony RDR-HXD990
Sony RDR-HXD995
Sony RDR-HXD910
Sony RDR-HXD790
Sony RDR-HXD890
Sony RDR-HXD895
Sony RDR-HXD1095
Sony RDR-HXD770
Sony RDR-HXD560
Sony RDR-HXD710
Sony Categories
Laptop
TV
CD Player
Camcorder
Digital Camera
More Sony Manuals
Login
Sign In
OR
Sign in with Facebook
Sign in with Google
Upload manual
Upload from disk
Upload from URL