Sign In
Upload
Manuals
Brands
Tascam Manuals
Recording Equipment
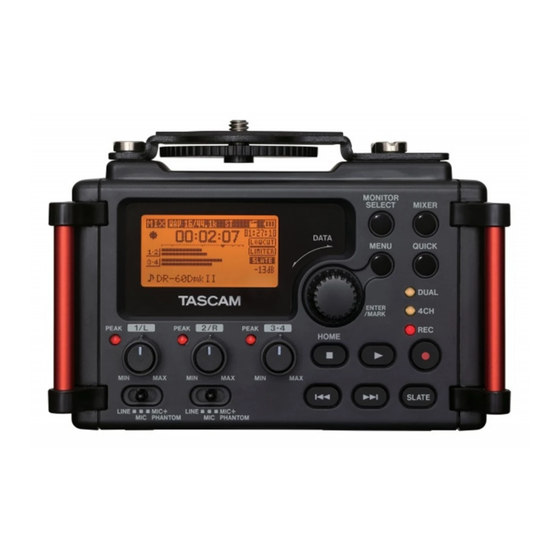
DR-60DmkII
Tascam DR-60DmkII Manuals
Manuals and User Guides for Tascam DR-60DmkII. We have
1
Tascam DR-60DmkII manual available for free PDF download: Reference Manual
Tascam DR-60DmkII Reference Manual (90 pages)
Linear PCM Recorder
Brand:
Tascam
| Category:
Recording Equipment
| Size: 2.08 MB
Table of Contents
Table of Contents
2
1 Introduction
5
Features
5
Conventions Used in this Manual
6
2 Names and Functions of Parts
7
Front Panel
7
Left Side Panel
10
Right Side Panel
11
Rear Panel
12
Top Panel
13
Bottom Panel
13
Home Screen
14
Recording Screen
16
Menu Item List
18
Using Menus
19
Basic Operation
20
3 Preparation
22
Powering the Unit
22
Power Sources
22
Using AA Batteries
22
Using an AC Adaptor (Sold Separately)
23
Using an External Battery Pack (Sold Separately)
23
Using USB Bus Power
24
Turning the Power on and off (Putting It in Standby)
25
Starting up the Unit
25
Shutting down (Putting the Unit in Standby)
25
Resume Function
26
Setting the Date and Time
26
Inserting and Removing SD Cards
27
Inserting the SD Card
27
Removing the Card
27
SD Card Write Protection Switches
28
Preparing an SD Card for Use
29
Camera Connection and Attachment
29
Connecting Monitors and Headphones
30
Monitoring
30
Enabling Monitoring
30
Selecting the Monitored Signal
31
4 Recording
32
Selecting File Format, Sampling Frequency
32
And Maximum File Size
32
Preparing the Recording Inputs
33
Connecting Microphones
33
Recording an External Device (LINE IN)
34
Setting the Input Types
34
Using Phantom Power
35
Using Plug-In Power
36
Adjusting the Input Level/Muting
36
Using the Limiter
38
Using the Low-Cut Filter
39
Set Where to Save the File
39
Overview of Recording Modes
39
Recording (MONO/STEREO Recording)
40
Make Recording Settings
40
Starting the Recording
41
File Names When Recording in MONO/STEREO
41
Simultaneously Recording Two Files at Different Input Levels (DUAL REC)
42
Enabling Dual Recording
42
Starting Dual Recording
43
Dual Recording File Names
44
Recording 4 Channels
44
Making 4-Channel Recording Settings
44
Starting 4-Channel Recording
45
File Names When Recording in 4-Channel
46
Recording Automatically (AUTO REC)
46
Creating and Changeover to a New File During Continued Recording (Track Increment)
48
Manual Track Increment During Recording
48
Automatic Track Increment by File Size
48
Mark Function
49
Adding Marks Manually to a Recording
49
Adding Marks Automatically to a Recording
49
Moving to a Mark Position
49
Recording the Moment before Pushing RECORD (PRE REC)
50
Delaying the Start of Recording (REC DELAY)
50
Self-Timer Function
51
Using the Auto Tone Function
51
Setting the Auto Tone Function
51
Setting Auto Tone Length
52
Adjusting the Volume of the Auto Tone and the Slate Tone
52
Adding Slate Tones
52
Recording Duration
53
5 Working with Files and Folders (BROWSE Screen)
54
Screen Navigation
54
Icons on the BROWSE Screen
55
File Operations
55
Folder Operations
56
Creating a New Folder
57
6 Playback
58
Adjusting Playback Volume
58
Setting the Playback Area (AREA)
58
Selecting a Folder for the Playback Area (1)
59
Selecting a Folder for the Playback Area (2)
60
Selecting Files for Playback (Skip)
60
Playback
61
Pausing
61
Stopping
61
Rewinding and Fast-Forwarding (Search)
61
Changing the Playback Position
61
Repeat Playback (REPEAT)
61
Moving Back a few Seconds for Replay (Jump-Back Playback)
62
Playback of Files Recorded Using Dual Recording
62
7 QUICK Button Operations
63
Features of the QUICK Button
63
Opening the Quick Menu
64
Closing the Quick Menu
65
Deleting the Selected File (Quick Delete)
65
Dividing the Selected File (DIVIDE)
65
Increasing the Perceived Overall Sound Pressure to Enhance Listenability (Level Alignment)
67
Using the Playback Equalizer
68
Setting MIC Input Gain with the Quick Menu
68
8 Mixer
69
Making Mixer Settings
69
Using the MS Decoder
70
Decoding the Input Sound as You Record
70
Decoding the Playback Sound
71
MS Decoder Settings
71
9 Connecting with a Computer
72
Transferring Files to a Computer
73
Transferring Files from a Computer
73
Disconnecting from a Computer
73
10 - Settings and Information
74
Viewing Information (INFORMATION)
74
File Information Page
74
Card Information Page
75
System Information Page
75
System Settings and Formatting (SYSTEM)
76
Setting the Automatic Power Saving Function
76
Setting the Backlight
76
Adjusting the Display Contrast
76
Setting the Type of AA Batteries
76
Setting the Phantom Power Voltage
76
Restoring the Factory Settings
77
Using QUICK FORMAT
77
Using FULL FORMAT
77
Setting the Format of File Names
78
File Name Format
78
Setting the WORD Item
78
Resetting the Number (COUNT)
78
11 - Using the REMOTE Jack
79
Footswitch (TASCAM RC-3F)
79
Setting Footswitch Operation
79
Using the Footswitch
80
Remote Control (TASCAM RC-10)
80
Setting the Wired Remote Control
80
Using the Wired Remote Control
80
Overview of Mode Functions
80
12 - Messages
81
13 - Troubleshooting
84
14 - Specifications
86
Ratings
86
Inputs and Outputs
86
Analog Audio Input and Output
86
Control Input and Output
87
Audio Performance
87
Computer Compatibility
87
Other Specifications
88
Dimensional Drawings
89
Advertisement
Advertisement
Related Products
Tascam DR-60D
Tascam DR-680
Tascam DR-2d
Tascam DR-40
Tascam dr-44wl
Tascam DR-10C
Tascam DR-10CH
Tascam DR-10CS
Tascam DR-10L Pro
Tascam DR-100 MKIII
Tascam Categories
Recording Equipment
Music Mixer
Voice Recorder
CD Player
Accessories
More Tascam Manuals
Login
Sign In
OR
Sign in with Facebook
Sign in with Google
Upload manual
Upload from disk
Upload from URL