Sign In
Upload
Manuals
Brands
Thermador Manuals
Refrigerator
T24ID80NLP/45
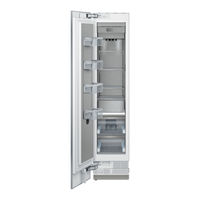
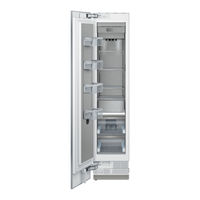
User Manuals: Thermador T24ID80NLP/45 Built-in Freezer
Manuals and User Guides for Thermador T24ID80NLP/45 Built-in Freezer. We have
2
Thermador T24ID80NLP/45 Built-in Freezer manuals available for free PDF download: Installation Instructions Manual
Thermador T24ID80NLP/45 Installation Instructions Manual (118 pages)
Built-in freezer column model T18 Series, T24 Series, T30 Series
Brand:
Thermador
| Category:
Refrigerator
| Size: 38.76 MB
Table of Contents
English
4
Table of Contents
4
Installation
5
Installation Options
6
Individual Unit
6
Side-By-Side
6
Individual Appliances with Partition
6
At the End of the Kitchen Units
6
Installation
7
Installation Room
7
Installation Cavity
7
Furniture/Fixtures
7
Base
7
Connecting the Power
8
Onnecting the Water
8
Installation Dimensions
9
Single Installation
9
Side-By-Side Installation
10
Water Connection
11
Appliance Dimensions
12
18" Appliance (Freezer/Freezer with Ice and Water Dispenser)
12
18" Appliance (Wine Unit)
13
24' Appliance
14
With Ice and Water Dispenser)
14
24' Appliance (Wine Unit)
15
30" Appliance (Refrigerator/Freezer/Freezer with Ice and Water Dispenser)
16
Required Accessories and Tools
17
Supplied Accessories
17
Optional Accessories
17
Other Required Accessories from Specialist Outlets
17
Tools
17
Other
17
Instructions
18
Checking the Installation Cavity
18
Transport of the Appliance
18
Removing the Packaging
19
Installation Preparation
19
Changing over the Door Hinges
19
Preparing the Installation Cavity
22
Attaching an Alternative Anti-Tip Device
23
Preparing to Connect the Water
24
Attaching the Edge Protection
24
Side-By-Side Installation
24
Pushing the Appliance into the Installation Cavity
25
12, Installing and Aligning the Appliance
26
13, Attaching the Appliance to the Top of the Cavity
27
14, Attaching the Individual Appliance
27
To the Side of the Cavity
27
15, Checking that the Finger Guard Moves Easily
28
16, Connecting the Water to the Appliance
28
17, Attaching the Toe Kick Panel
29
18, Commissioning the Appliance
30
19, Preparing the Furniture Doors
30
20, Loading the Appliance Door
31
21, Attaching the Adjusting Rail to the Furniture Door
32
22, Attaching and Aligning the Furniture Door
33
Attaching the Furniture Door
34
24, Attaching the Lower Bracket
35
25, Attaching the Finger Guard
36
26, Attaching the Covers
36
27, Aligning the Ice-Water Dispenser
38
28, Attaching the Cover Strips
39
29, Mounting of Air Separator
40
30, Adjusting the Door Opening Angle
40
31, Changing the Door Spring
40
Français
41
A I'extromit6 des Cuisines Intogroes
43
Appareils Indmduels Avec Soparation
43
Cote
43
Options D'installation
43
Unit6 Individuelle
43
Lieu D'installation
44
Local D'installation
44
Oavit6 D'installation
44
Sol
44
Raccordement & I'alimentation Electrique
45
Raccordement de I'eau
45
Dimensions D'installation
46
Installation Individuelle
46
Installation Cote
47
Le Raccordement de I'eau
48
Appareil de
49
Avec Une Distributeur de Glagons Et D'eau)
49
Dimensions de I'appareil
49
Appareil de 18" (Cave
50
Appareil de
51
Appareil de 24" (Rofrig@Ateur/Congelateur/Congolateur Avec Une Distributeur de Glagons Et D'eau)
51
Appareil de 24" (Cave
52
Et D'eau)
53
Accessoires en Option
54
Accessoires Et Outillage Requis
54
Accessoires Fournis
54
Autres
54
Autres Accessoires Requis de Fournisseurs
54
Outils
54
Spocialisos
54
D'installation
55
V@Ification de la Cavit6 D'installation
55
Transport of the Appliance
55
Enovement de I'emballage
56
Proparation du Montage
56
Inversion du Sens D'ouverture des Portes
57
Proparation de la Cavit6 D'installation
59
Fixation D'un Dispositif Anti-Renversement Alternatif
60
Proparation du Raccordement de I'eau
61
Fixation du Protege-Bordures
62
Installation Cote
62
Pousser I'appareil Darts la Cavit6
63
D'installation
63
12, Installation Et Alignement de I'appareil
64
13, Fixation de I'appareil Contre 18 Sommet de la Cavit6
65
14, Fixation de I'appareil Individuel
65
Contre Les Cotosde la Cavit6
65
15, V@Ification de la Mobilit6 du Bandeau Protege-Doigts
66
16, Raccordement de I'eau _ I'appareil
66
17, Fixation du Bandeau de Socle
67
18, Mise en Service de I'appareil
68
19, Proparation des Portes de Meubtes
68
20, Application D'une Charge
70
De I'appareil
70
21, Fixation du Rail D'ajustage Contre la Porte du Meuble
70
22, Fixation Et Alignement de la Porte de Meubte
71
Fixation de la Porte de Meubte
72
24, Fixation des Brides Inf@Ieures
74
25, Fixation du Bandeau Protege-Doigts
75
26, Fixation des Couvercles
75
27, Alignement du Distributeur
77
De Glagons Et D'eau
77
28, Fixation des Baguettes Couvre-Joints
78
29, Montage du Soparateur D'air
79
30, Ajustage de I'angle D'ouverture de Porte
79
31, Changement du Ressort de Porte
79
Español
80
De Instalacion
80
En el Final de las Unidades de Cocina
82
Opciones de Instalaci6N
82
Side-By-Side (Lado a Lado)
82
Ambiente de Emplazamiento
83
Base
83
Cavidad de Instalaci6N
83
Emplazamiento de la Instalacion
83
Muebles y Adomos
83
Conexion a la Red de Alimentacion
84
Conexion del Agua
84
Instalaci6N Simple
85
Medidas de Instalacion
85
Instalaci6N Side-By-Side (Lado a Lado)
86
Conexi6N del Agua
87
Con Dispensador de Agua)
88
Electrodom6Stico de
88
Medidas del Electrodomestico
88
Electrodom6Stico de
89
Electrodom6Stico de 18" (Conservadorde Vinos)
89
Congetador con Dispensador de Agua)
90
Electrodom6Stico de
90
Electrodom6Stico de 24" (Conservadorde Vinos)
91
Congetador con Dispensador de Agua)
92
Accesorios Opcionales
93
Accesorios que Forman Parte Volumen
93
Accesorios y Herramientas Necesarias
93
De Entrega
93
Herramientas
93
Otros
93
Otros Accesorios Necesarios para Salidas Especiales
93
1 Control de la Cavidad para la Instalaoi6N
94
Instrucciones de Instalaci6N
94
2 Transporte del Equipo
94
Desembalaje
95
4 Preparativos para el Montaje
95
5 Cambiando las Bisagras
96
6 Preparaci6N de la Cavidad de Instalaci6N
98
7 Montaje de un Dispositivo
99
Antivuelco Adicional
99
8 Preparaci6N para Conectar el Agua
100
9 Protecci6N de Los Bordes
100
(Lado a Lado)
100
On la Cavidad de Instalaci6N
101
12 , Instalaci6N y Alineaci6N del Electrodom6Stico
102
13 , Sujetando el Electrodom6Stico a la Parte Superior de la Cavidad
103
14 , Sujeci6N del Electrodom6Stico Individual on Los Laterales de la Cavidad
104
15 , Verificar la Movilidad de la Protecci6N de Los Dedos
104
16 Conexiondet Agua al Etectrodom6Stico
104
17 , Sujeci6N del Panel de Protecci6N
105
18 , Puesta on Marcha del Equipo
106
19 Preparaci6N de las Puertas Muebte
106
Electrodom6Stico
107
21 , Montaje del Riel de Ajuste on la Puerta del Muebte
108
Del Muebte
109
23 Sujeci6N de la Puerta del Muebte
110
24 , Montaje de Los Soportes Inferiores
111
25 , Montaje de la Protecci6N para Los Dedos
112
26 , Montaje de las Cubiertas
112
27 , Orientaci6N del Dispensador de Hielo y Agua
114
Y del Deposito
115
29 Montaje del Separador de Aire
116
30 , Ajuste del _Ngulo de Apertura de la Puerta
116
31 , Cambio del Muelle de la Puerta
116
Advertisement
Thermador T24ID80NLP/45 Installation Instructions Manual (118 pages)
Brand:
Thermador
| Category:
Freezer
| Size: 38.71 MB
Table of Contents
English
4
Table of Contents
4
Installation Instructions
18
Checking the Installation Cavity Oo
18
Transport of the Appliance Oo
18
Removing the Packaging Wee
19
Installation Preparation Voces
19
Changing over the Door Hinges
19
Preparing the Installation Cavity
22
7, Attaching an Alternative Anti-Tio Device
23
Preparing to Connect the Water
24
Attaching the Edge Protection
24
Side-By-Side Installation Vo
24
Pushing the Appliance into the
25
Installing and Aligning the Appliance
26
Attaching the Appliance to the
27
Attaching the Individual Appllance to the Side of the Cavity wo
27
Checking that the Finger Guard
28
Ect Eeeteeiee
28
Connecting the Water to the Appliance
28
Attaching the Toe Kick Panel
29
Commissioning the Appliance
30
Preparing the Furniture Doors We
30
Loading the Appliance Door
31
Attaching the Adjusting Rail
32
Attaching and Aligning
33
Attaching the Furniture Door Ve
34
24, Attaching the Lower Bracket Ve
35
Attaching the Finger Guard We
36
Attaching the Covers Jee
36
Aligning the Ice-Water Dispenser
38
Attaching the Cover Strips We
39
Mounting of Air Separator Oe
40
Adjusting the Door Opening Angle
40
Changing the Door Spring Wn
40
Français
41
29, Montage du Séparateur Cairo
19
Ce Dome
19
Oot Ett Tte Etteeeees
19
Instructions C'installation
54
Vérification de la Cavité D'installation
55
Transport of the Appliance We
55
Enlévement Ce 'Emballage Woe
56
Préparation du Montage Wee
56
Inversion du Sens D'ouverture
57
Préparation de la Cavité D'installation
59
Fixation D'un Dispositif
60
Anti-Renversement Alternatif We
60
Préparation Duraccordement Del'eau
61
Fixation du Protége-Bordures Wc
62
Installation Cdte a COTE
62
Pousser L'appareil Dans la Cavité
63
Installation et Alignement
64
Fixation de L'appareil Contre le
65
Fixation de L'appareil Individuel
65
Contre les Cotés de la Cavité We
65
Vérification de la Mobilité du
66
Bandeau Protége-Doigts We
66
Raccordement de L'eau a L'appareil
66
Fixation du Bandeau de Socle "0
67
Mise en Service de L'appareil
68
Préparation des Portes de Meubles
68
Application D'une Charge a la Porte
70
Fixation du Rail D'ajustage Contre
70
La Porte du Meuiie Lee
70
22, Fixation et Alignement de la Porte
71
Fixation de la Porte de Meuble
72
24, Fixation des Brides Inférieures
74
Fixation du Bandeau
75
Fixation D@S COUVEFCIES
75
2/, Alignement du Cistriouteur
77
Fixation des Baguettes
78
COUVWE-JOINS Ooo Ceesscsssetteeneeteeeeeeenesaees
78
Ajustage de Langle D'ouverture
79
Changement du Ressort de Porte
79
Español
80
Electrodomésticos Individuales con Separacidn
82
Opciones de Instalacionn
82
Unidad Ingividual Oo
82
Emplazamiento de la Instalacion
83
Conexion a la Red de Alimentacin
84
Conexion del AQUA
84
Medidas de Instalacion
85
Medidas del Electrodoméstico
88
Electrodoméstico de 18" (Conservador de Vinos)
89
Electrodoméstico de 24" (Conservador de Vinos)
91
Accesorios y Herramientas Necesarias
93
Instrucciones de Instalacion
94
Control de la Cavidad para
94
Transporte del Equipo Oe
94
Desembalaje 0
95
Preparativos para el Montaje
95
Cambiando las Bisagras We
96
Preparacién de la Cavidad Ce Instalacion
98
Montaje de un Dispositivo ANTIVUEICO Acicional
99
Instalacién Side-By-Side
100
Preparacién para Conectar el Agua
100
Proteccidn de Los Bordes
100
Colocando el Electrodoméstico en la Cavidad de Instalacion Oe
101
Instalacién y Alineacién del Electrodoméstico Oo. Eee
102
Sujetando el Electrodoméstico Ala Parte Superior de Ia Cavidad
103
Conexidn Dei Agua al Electrodoméstico
104
Sujecién del Panel de Proteccién
105
Puestaen Marcna del Equipo
106
Preparacién de las Puertas Mueble
106
Carga Acmisible en la Puerta
107
Sujecién del Electrodoméstico
104
Individual en Los Laterales
104
Verificar la Movilidad de la Proteccion de Los Dedos
104
Montaje del Riel de Ajuste en
108
La Puerta del Mueble Wee
108
Sujecién y Alineacidn de la Puerta
109
Sujecién de la Puerta del Mueble
110
Montaje de Los Soportes Inferiores
111
Colocacién del Cuadre de Cobertura
115
Ajuste del Angulo de Apertura
116
Cambio Dei Muelle de la Puerta
116
Montaje del Separador de Aire wo
116
Advertisement
Related Products
Thermador T24ID80NLP/13
Thermador T24ID80NLP/01
Thermador T24ID80NLP/03
Thermador T24ID80NLP/99
Thermador T24ID80NLP/05
Thermador T24ID80NLP/46
Thermador T24ID80NLP/41
Thermador T24ID80NLP/47
Thermador T24ID80NRP/08
Thermador T24ID80NRP/99
Thermador Categories
Cooktop
Ventilation Hood
Ranges
Refrigerator
Oven
More Thermador Manuals
Login
Sign In
OR
Sign in with Facebook
Sign in with Google
Upload manual
Upload from disk
Upload from URL