Sign In
Upload
Manuals
Brands
Toshiba Manuals
All in One Printer
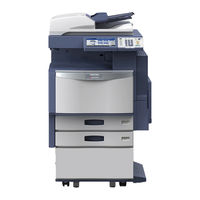
e-studio 3040c
Toshiba e-studio 3040c Manuals
Manuals and User Guides for Toshiba e-studio 3040c. We have
2
Toshiba e-studio 3040c manuals available for free PDF download: Imaging Manual, Troubleshooting Manual
Toshiba e-studio 3040c Imaging Manual (338 pages)
Brand:
Toshiba
| Category:
Copier
| Size: 12.32 MB
Table of Contents
Table of Contents
9
1 General Adjustments - Copying, Printing and E-Filing (Output from Box)
14
To Obtain a Darker Image
14
To Adjust the Density of an Entire Copy
18
To Adjust the Density on a Solid Colored Image
18
To Adjust the Density on a Photo or Gradational Image
21
To Achieve the Image Quality most Suitable for the Paper Used (to Eliminate Blur and Graininess from an Image)
24
To Minimize Variations in the Image Quality under the Operating Conditions (to Optimally Program Image Quality Control)
29
To Correct Out-Of-Registration Colors
36
To Customize the Image Density
40
2 Copier-Specific Adjustments
42
To Copy Text Clearly (to Eliminate Faint, Smudged or Blurred Text)
42
To Adjust the Copy Image Quality in the Black Mode
43
To Adjust the Copy Image Quality in the Full Color Mode
46
To Adjust the Copy Image Quality in the Auto Color Mode
48
To Closely Match the Color Balance of the Original
50
To Improve the Reproducibility of Gray
54
To Copy in VIVID Colors
56
To Make the Pale Area of the Original Look Darker and Sharper (to Improve the Highlight Reproducibility)
60
To Eliminate the Background Color
64
To Adjust the Copy Image Quality in the Black Mode
65
To Adjust the Copy Image Quality in the Full Color Mode
67
To Avoid Copying the Image Seen through the Back of a Page Printed on Thin Paper
71
To Adjust the Copy Image Quality in the Black Mode
72
To Adjust the Copy Image Quality in the Full Color Mode
75
To Eliminate Moiré
77
To Copy Sharply (to Enhance Sharpness)
81
To Make Photo Edges Look Softer
84
To Make Solid Filled Bold Text (Logo) Highly Colored
89
To Adjust the Copy Image Quality of a Black Logo
90
To Adjust the Copy Image Quality of a Colored Logo
92
To Sharply Contrast the Hues of Highlighters on the Copy
94
To Obtain a Good Color Balance on Thick Paper
97
To Obtain Smooth Gray-Scale Photo Images
101
To Change the Threshold in Auto Color Mode
102
To Adjust the Twin-Color Copy Image Quality
105
To Adjust the Tint of Colors Other than Black
106
To Adjust the Reproducibility of Black in the Red and Black Mode
107
To Adjust the Boundary between Black and Colors Other than Black
108
To Adjust the Tint of Specified Colors for Twin-Color or Single-Color
109
Copying
109
To Adjust the Image Quality Scanned from the RADF
111
To Program Frequently Used Copy Settings
114
(To Use Custom Mode)
114
To Adjust Custom Mode Settings in Black Mode
114
To Adjust Custom Mode Settings in Full Color Mode
119
To Copy While Erasing Shadow Outside of Image
123
To Avoid Copying Blank Page of Original Scanned with RADF
124
To Obtain Image in Even Density Level
126
3 Printer-Specific Adjustments
128
To Maintain a Steady Color Balance
128
To Maintain a Steady Color Balance on Thick Paper or Special Paper
130
To Obtain the Desired Color Balance
132
To Closely Match the Color Balance on the Monitor
140
To Maintain a Uniform Gray Hue (to Maintain Consistency in Gray Among Text, Photos and Graphics)
143
To Use Only the Black Toner to Reproduce Gray Areas (to Use Only the Black Toner to Reproduce Black-And-White Photos or Gradational Images)
146
To Easily Adjust the Overall Brightness
150
To Adjust the Overall Saturation
153
To Easily Adjust the Overall Contrast
157
To Obtain a Sharper Print Image
160
To Obtain a Softer Image
163
To Make Low-Resolution Data Look Finer (to Soften an Image)
166
To Eliminate Smudges from Highly Colored Text and Lines
169
To Clearly Print Light-Colored Thin Lines or Text
173
To Adjust the Print Image Quality in the Color Mode
174
To Adjust the Print Image Quality in the Black and White Mode
182
For Macintosh
183
To Make the Light-Colored Area Darker on the Printout
186
To Clearly Print Thin Lines/Double Lines
192
To Decrease the Image Density and Save Toner
195
To Adjust the Image Density in the Toner Save Mode
198
To Print Illegible Gray or Colored Text in Black
201
To Ignore Blank Pages for Printing
203
To Sharply Print Black Text
206
To Prevent Dark Toner from Coming off
216
To Register the Image Quality Adjusted Corresponding to a Preference
218
To Print a Full-Color Original in Two Colors
221
To Adjust Colors
222
To Adjust the Sharpness
227
To Print a Full-Color Original in Two Colors
229
To Use ICC Profile
230
To Create ICC Profiles for Printing on the Paper to be Used
231
To Print Precise Colors Using Existing RGB Source ICC Profiles
235
To Perform Simulated Printing with CMYK Inks of each Ink Manufacturer
239
To Convert Colors with Specified Source ICC Profiles
243
Profiles)
243
To Perform Further Adjustment after Using ICC Profiles
248
To Switch Overprint (Overlaid) Images
251
4 E-Filing-Specific Adjustments
254
To Clearly Store a B/W Image in the Auto Color Mode
254
To Store an Original While Reducing the File Size
256
To Store a Color Photo Image, While Minimizing Moiré
258
To Match the Color Balance on the Original
261
Print to Box
261
To Scan and Print, While Minimizing Moiré
263
To Finely Print the Image Stored in the E-Filing Box (to Print Images Stored through Copy to Box or Print to Box)
265
To Store an Image Suitable for Displaying on the Monitor or Image Editing
267
To Finely Print Color Images Scanned and Stored (to Print Images Stored through Scan to Box)
269
Appendix
271
5 Scanning-Specific Adjustments
272
To Clearly Scan Text (to Reduce Noise Around Text)
272
To Scan an Original, While Eliminating the Background Color (to Eliminate the Background Density)
274
To Clearly Scan and Print an Original in Black and White (to Improve Gradation and Reduce Graininess)
276
To Scan the Original, While Reducing the File Size
277
To Reduce the File Size by Changing the Options When Scanning the Original
278
Original
278
To Reduce the File Size in Slim PDF
281
To Sharply Scan the Original (to Increase the Sharpness Intensity)
283
To Scan an Original, While Enhancing Black
285
To Scan an Original with the Desired Gradation
287
To Register the Original Mode Optimal for a Particular Type of Original (to Have "Custom" Selected)
289
6 Printer-Specific Adjustments (GA-1211)
294
To Maintain a Steady Color Balance (Calibration)
294
To Check Calibration History
295
Types of Calibration and Their Order
297
To Calibrate for Thick 2/3/4 (Default Output Profiles and Calibration Sets)
301
Confirmation of Calibration Result
306
To Calibrate Measurement Page (Target) in both Directions
312
To Use Different Profile for each Media When Media Types Are Mixed
315
To Print in Desired Color Balance (How to Use Color Editor)
318
To Print with Profile Attached to Image
324
To Adjust Tone of Gray or Black Area
326
To Print Gray Areas Only with K Toner
327
To Adjust Tone of Black Areas on Text or Line Arts
329
To Make Low-Resolution Images Look Smoother
331
To Suppress Moiré or Jagginess on Photographs
333
To Adjust Sharpness
335
To Adjust Sharpness Level of Image
336
To Change Default Setting of Sharpness Level
337
Advertisement
Toshiba e-studio 3040c Troubleshooting Manual (120 pages)
MULTIFUNCTIONAL DIGITAL COLOR SYSTEMS
Brand:
Toshiba
| Category:
All in One Printer
| Size: 12.02 MB
Table of Contents
Troubleshooting Guide
1
Preface
3
Table of Contents
5
Chapter 1 TROUBLESHOOTING for the HARDWARE
10
When this Screen Is Displayed
10
Messages Displayed on the Touch Panel
12
Clearing a Paper Misfeed
16
Locating a Paper Misfeed
16
Clearing a Paper Misfeed
17
Paper Misfeed in the Reversing Automatic Document Feeder (Optional) (Lower)
18
Paper Misfeed in the Reversing Automatic Document Feeder (Optional) (Upper)
19
Paper Misfeed in the Drawer Feeding Portion
20
Paper Misfeed in the Large Capacity Feeder (Optional)
21
Paper Misfeed in the Paper Feed Pedestal (Optional)
21
Paper Misfeed in the Drawers
22
Paper Misfeed in the Drawer of the Large Capacity Feeder (Optional)
22
Paper Misfeed in the Bypass Tray
23
Paper Misfeed in the Automatic Duplexing Unit
23
Paper Misfeed in the Misfeed Releasing Cover
24
Paper Misfeed in the Fuser Unit
24
Paper Misfeed in the Bridge Unit (Optional)
26
Paper Misfeed in the Finisher MJ-1101 and the Hole Punch Unit MJ-6103 (both Optional)
27
Paper Misfeed in the Saddle Stitch Finisher MJ-1106 and the Hole Punch Unit MJ-6103 (both Optional)
31
Paper Misfeed in the Hanging Finisher MJ-1031 (Optional)
35
Paper Misfeed in the Saddle Stitch Unit (Optional)
36
Clearing Paper Misfeeds Caused by a Wrong Paper Size Setting
40
Misfeed When Printing from the Fax
43
Clearing a Staple Jam
45
Staple Jam in the Finisher
45
Staple Jam in the Saddle Stitch Unit (MJ-1106)
49
Replacing a Toner Cartridge
51
Replacing a "Near Empty" Toner Cartridge
54
Replacing the Waste Toner Box
57
Refilling with Staples
59
Refilling Finisher Staples
59
Refilling Saddle Stitch Unit Staples (MJ-1106)
62
Cleaning the Slit Glass and Main Chargers
65
Cleaning the Slit Glass
65
Cleaning the Main Chargers
67
Cleaning the Hole Punch Dust bin
68
Chapter 2 TROUBLESHOOTING for COPYING
69
Copying Problems
70
Chapter 3 TROUBLESHOOTING for PRINTING
74
Print Job Problems
74
Clearing Print Job Errors
74
Cannot Remember the Document Password for a Private Print Job
75
Printing a Document Including Many Graphics Takes Time
75
Printer Driver Problems
76
Cannot Print (Port Setting Problems)
76
Cannot Print (SNMP Community Name Problems)
76
Command Line Options Not Processed
76
Retrieval of Printer Configuration Failed
77
Cannot Change Settings on the [Device Settings] Tab
77
Network Connection Problems
78
Cannot Print with the Equipment (Network Connection Problems)
78
Cannot Print with SMB Print
78
Cannot Print Properly with Appletalk Print
78
Client Problems
79
Checking the Client Status
79
Hardware Problems
80
Print Jobs Not Output
80
Chapter 4 TROUBLESHOOTING for SCANNING
81
Scanning Problems
82
Cannot E-Mail My Scans
82
Cannot Find the Data Saved in the Shared Folder
82
Chapter 5 TROUBLESHOOTING for E-Filing
84
E-Filing Web Utility Problems
84
E-Filing Web Utility Terminates the Session
84
Numerous Sub Windows Repeatedly Appear
84
Displaying the Items in the Contents Frame Takes a Long Time
84
Error Messages
85
Chapter 6 TROUBLESHOOTING for NETWORK CONNECTIONS
88
Locating the Equipment in the Network
88
Cannot Locate the Equipment in the Network
88
Cannot Locate the Equipment with Local Discovery
89
Equipment Does Not Respond to Ping Command
90
LDAP Search and Authentication Problems
91
Network Shutdown Occurs or Touch Panel Disabled after LDAP Search
91
LDAP Authentication Takes a Long Time
91
Printing Problems (Network Related)
92
SMB Print in a Windows Operating System Environment
92
Raw TCP or LPR Print in a Windows Operating System Environment
92
IPP Print in a Windows Operating System Environment
93
Novell Print in a Netware Environment
93
Macintosh Environment
94
Unix/Linux Environment
94
Network Fax (N/W-Fax) Driver Problems
95
N/W-Fax Driver Installation Error Messages
95
N/W-Fax Driver General Errors
96
Fax Transmission Cannot be Performed with a Cover Sheet
97
Client Software Authentication Problems
98
Cannot Log in Using Client Software
98
Chapter 7 CHECKING the EQUIPMENT STATUS with Topaccess
100
Hardware Status Icons on Topaccess [Device] Tab
100
Error Messages
102
Error Codes
104
Error Codes on Print Jobs
104
Error Codes on Transmission and Reception
105
Error Codes on Scan Jobs
107
Chapter 8 WHEN SOMETHING IS WRONG with the EQUIPMENT
114
When You Think Something Is Wrong with the Equipment
114
General Operations
114
Originals and Paper
115
Regular Maintenance
116
Index
117
Advertisement
Related Products
Toshiba 305
Toshiba e-studio 3055c
Toshiba e-studio 3055cse
Toshiba e-STUDIO 306SE
Toshiba e-STUDIO 3055
Toshiba e-studio 3008a
Toshiba E-STUDIO 3025AC
Toshiba E-STUDIO 3028A
Toshiba e-studio 3005ac
Toshiba e-STUDIO 307LP
Toshiba Categories
Laptop
Air Conditioner
TV
LCD TV
All in One Printer
More Toshiba Manuals
Login
Sign In
OR
Sign in with Facebook
Sign in with Google
Upload manual
Upload from disk
Upload from URL