Sign In
Upload
Manuals
Brands
Zaxcom Manuals
Recording Equipment
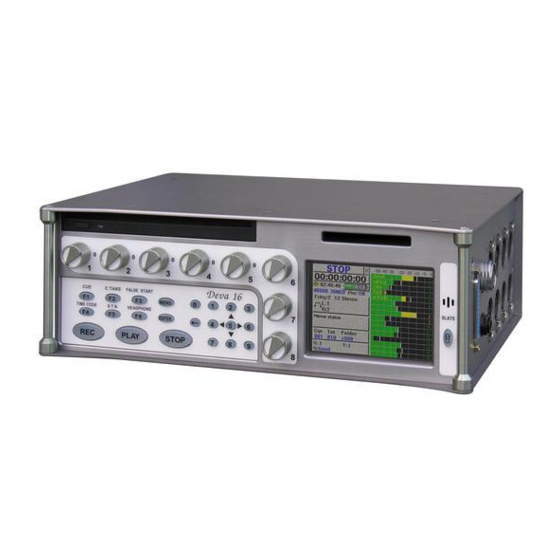
Deva 16
User Manuals: Zaxcom Deva 16 Professional Audio Mixer
Manuals and User Guides for Zaxcom Deva 16 Professional Audio Mixer. We have
2
Zaxcom Deva 16 Professional Audio Mixer manuals available for free PDF download: User Manual, Owner's Manual
Zaxcom Deva 16 User Manual (183 pages)
Portable Multi-track Digital Audio Recorder/Mixer
Brand:
Zaxcom
| Category:
Recording Equipment
| Size: 5.09 MB
Table of Contents
Table of Contents
2
Table of Figures
17
Table of Tables
18
Chapter 1 - Introduction
19
Overview
19
User Manual Conventions
19
System Features
19
Deva-5.8 Specific
19
Deva-16 Specific
19
Common Features
20
Hats Included with the Eva -5.8
20
Deva-5.8 Options
20
Hats Included with the Eva -16
21
Deva-16 Options
21
Deva Software Recommendations
21
Media / Accessory Recommendations
21
Hard Disk Drives
21
Compactflash Cards
21
Firewire Devices
22
Compactflash Reader/Drive
22
Harddisk Drive
22
Keyboards
22
Touchscreen Interface
22
Analog Inputs
22
Analog Input Limiter
22
Digital Inputs
22
Mixing
22
Recording
22
Deva-16
23
Metering
23
Firewire Port
23
Rf Interference Protection
23
Timecode
23
Input Sampling-Rate Conversion
23
Sequence of Deva Components
23
Product Support
24
Chapter 2 - Exterior Description
25
Front Panel Description
25
Figure 2-1 Front Panel Image
25
Left Side Description
27
Figure 2-2 Left Side Image
27
Right Side Description
29
Figure 2-3 Deva-16 & Deva-5.8 Right Side Images
29
Chapter 3 - Software Guide
30
Boot-Up Sequence Page
30
Page Notes
30
Page Level Shortcuts
30
Boot Keys
30
Figure 3-1 Boot-Up Sequence Page
30
Menu Navigation
31
Index of Nomad Pages
31
Index of Deva Screen Objects
32
Home Page
35
Page Notes
35
Page Level Shortcuts
35
Zaxcom Deva User's Manual
35
Using the Deva Front Panel
35
Figure 3-2 Home Page
35
Using the MIX-12 Embedded Keyboard
36
Using an Attached Keyboard
36
Enter Segment Data Entry Field
37
Enter Segment Data Entry Field Shortcuts
37
Mode Status Button
37
View Button
37
Timecode Button
37
Disk Icon
37
Remaining Recording Time Field
37
Battery Icon Button
37
Sampling-Rate Field
37
Timecode Frame-Rate Field
38
Pre-Record Duration Field
38
Headphone Button
38
Mirror Drive Status Button
38
Cur Segs Folder Button
38
Cur Field
38
Folder Field
38
Segs Field
38
S: T: N: Button
39
Input (#) Meters & Buttons
39
Arm / Disarm a Recording Track
39
Solo Mode
39
Main Menu Page
40
Page Notes
40
Page Level Shortcuts
40
Mode Status Button
40
Disk MIX Button
40
Output MIX Button
40
Faders Button
40
Time Code Button
40
Setup Button
40
Input Configure Button
40
My Deva Button
41
Cue Mode Button
41
Tone Button
41
Head Phone MIX Button
41
Scene Take Note Button
41
About Deva Button
41
Additional Functionality
41
Disk MIX Page
42
Page Notes
42
Page Level Shortcuts
42
Disk MIX Matrix Buttons
42
Slate Buttons
42
Tone Buttons
42
Figure 3-4 Disk MIX Page
42
Preset Button
43
(Analog / Digital) in Toggle Button
43
(Pre- / Post-) Fader Button
43
MORE- Button
43
Clear All Button
43
Phase Invert Button
43
Limiter Settings Button
43
Limiting Button
44
(Up / Down) Arrow Button (Deva-16 Only)
44
Limit Buttons
44
Figure 3-5 Disk MIX - Limiter Column Page
44
Disk Limiter Settings Page
45
Page Notes
45
Page Level Shortcuts
45
Figure 3-6 Disk Limiter Settings Page
45
Decay Button
46
Figure 3-7 Output MIX Page
47
Page Notes
47
Output MIX Matrix Buttons
47
Preset Button
48
Output Limiting Button
48
Figure 3-8 Output MIX - Limit Column Page
49
Figure 3-9 Output MIX - Output Routing Columns Page
49
Limit Buttons
49
Routing Presets Button
49
Output Routing Button
49
Play Buttons
49
Rec Buttons
50
Stop Buttons
50
Figure 3-10 Output Limiter Settings Page
51
Page Notes
51
Decay Button
52
Figure 3-11 Output Routing Presets Page
53
Normal Button
53
Play Switches Button
53
Mute Play Button
53
Figure 3-12 Touch Fader Page
54
Faders Page
54
Input Graphic Faders
54
Fader Assign Button
54
Lock Faders Button
54
Zaxcom Deva User's Manual
55
Page Notes
55
Figure 3-13 Knob / Touch Fader Assign Page
55
Page Level Shortcuts
56
Knob Assign Matrix Buttons
56
Touch Fader Assign Matrix Buttons
56
Fader / Zaxnet Trim) Button
56
Fader Assign Toggle Button
56
Figure 3-14 Timecode Page
57
Timecode Displayed Button
58
Timecode Run Mode Button
58
Frame Rate Button
58
Enter Timecode Button
58
Enter User Bits Button
58
Enter User-Bits Button Shortcuts
58
Increment User Bits Button
58
Jam Date Button
58
Jam T.C. Button
58
Jam U.b. Button
58
Auto Jam Date at Midnight Button
59
Figure 3-15 Timecode Run Mode Page
59
Timecode Runmode Buttons
59
Clock Button
60
Figure 3-16 Setup Page
60
Headphone Options Button
60
Meters Button
60
Operating Modes Button
60
Page Notes
60
Pre-Record Time Button
60
Record Channels Button
60
Sample Rate Button
60
Tone Level Button
60
Memory Button
61
Mix12 Button
61
Service Button
61
User Interface Button
61
Zaxnet Button
61
Sample Rate Page
62
Figure 3-17 Sample Rate Page
62
Page Level Shortcuts
62
Page Notes
62
Sample Rate Reference Button
62
Sample-Rate Buttons
62
Record Track Select Page
63
All Tracks Button
63
Figure 3-18 Record Track Select Page
63
Four Track Button
63
Page Level Shortcuts
63
Page Notes
63
Tracks Mixed to Button
63
Tracks to Record Buttons
63
Two Track Button
63
Operating Mode Page
64
Figure 3-19 Operating Mode Page
64
Gpi1 Remote Roll Button
64
Page Level Shortcuts
64
Page Notes
64
Serial Port Mode Button
64
Serial Remote Roll Button
64
Transport Operation Button
64
B-Format Button
65
Command Monitor Button
65
Slate Source Button
65
Remote Command Monitor Page
66
Figure 3-20 Command Monitor Page
66
Page Level Shortcuts
66
Page Notes
66
Meter Menu Page
67
Figure 3-21 Meter Menu Page
67
Figure 3-22 Examples of Home Page Layouts
67
Meter Vertical / Horizontal Button
67
Number of Home Screen Meters Button
67
Page Level Shortcuts
67
Page Notes
67
Color Schemes Button
68
Display Inputs Button
68
Display Outputs Button
68
Figure 3-23 Effects of the Color Schemes Button
68
Meter Assigns Button
68
Meter Labels Button
68
Meter Mode Button
68
Meter Labels Page
69
Figure 3-24 Meter Labels Page
69
Meter (#) Label Buttons
69
Meter (#) Label Buttons Shortcuts
69
Page Level Shortcuts
69
Page Notes
69
Input Meter Menu Page
70
Figure 3-25 Input Meter Menu Page
70
Input Level Meters
70
Page Level Shortcuts
70
Page Notes
70
Output Meter Menu Page
71
Figure 3-26 Output Meter Menu Page
71
Output Level Meters
71
Page Level Shortcuts
71
Page Notes
71
Meter Assignments Page
72
Figure 3-27 Meter Assignments Page
72
Meter (#) Assignment Buttons
72
Page Level Shortcuts
72
Page Notes
72
Meter (#) Assignment Page
73
Page Level Shortcuts
73
Page Notes
73
Zaxcom Deva User's Manual
73
Meter Insertion Point Buttons
73
Channel to Meter Buttons
73
Figure 3-28 Meter (#) Assignment Page
73
Headphone Options Page
74
Page Notes
74
Page Level Shortcuts
74
Headphone Alarm Tone Button
74
Headphone MIX Button
74
Mute Unrecorded Tracks Button
74
Figure 3-29 Headphone Options Page
74
Headphone MIX Page
75
Figure 3-30 Headphone MIX Page (Part 1)
75
(Disk Tracks / Outputs / Camera Returns) Toggle Button
76
Camera Returns Matrix Buttons
76
Disk Tracks Matrix Buttons
76
Factory Presets Button
76
Figure 3-31 Headphone MIX Page (Part 2)
76
Outputs Matrix Buttons
76
Page Level Shortcuts
76
Page Notes
76
Preset Loaded Name Field
76
User Presets Button
76
Phase Invert Button
77
Toggle on Recorded Tracks Button
77
Factory Presets Page
78
Page Notes
78
Page Level Shortcuts
78
Preset (#) Buttons
78
Figure 3-32 Factory Presets Page
78
(Load / Save) User Presets Page
79
Page Notes
79
Page Level Shortcuts
79
Preset (#) Buttons
79
Load/Save Toggle Button
79
Figure 3-33 (Load / Save) User Presets Page
79
Time/Date Page
80
Page Notes
80
Page Level Shortcuts
80
Time Field
80
Date Field
80
Set Time Button
80
Set Time Button Shortcuts
80
Set Date Button
80
Figure 3-34 Time/Date Page
80
Set Date Button Shortcuts
80
Time Mode Button
81
Date Mode Button
81
Daylight Savings Time Button
81
Memory Page
82
Page Notes
82
Page Level Shortcuts
82
Restore Factory Defaults Button
82
Figure 3-35 Memory Page
82
MIX 12 Setup Page
83
Page Notes
83
Page Level Shortcuts
83
MIX-12 Support Button
83
Meter Brightness Button
83
Tone Button Assign Button
83
Fader Channel Assignment Button
83
Figure 3-36 MIX-12 Setup Page
83
Zax Net Setup Page
84
Page Notes
84
Page Level Shortcuts
84
Zaxnet Enable Button
84
Transport Slaved Button
84
Power Roll Button
84
Figure 3-37 Zaxnet Setup Page
84
Page Notes
85
User Interface Settings Page
85
Default Stn Edit Position Button
85
False Start Button
85
Figure 3-38 User Interface Settings Page
85
Hold Key Time Button
85
Start-Up Screen Button
85
Backlight Brightness Button
86
Figure 3-39 Effects of the Color Theme Button
86
Figure 3-40 Effects of the Big Stn Button
86
Location Button
86
Analog (#) Buttons
87
Figure 3-41 Input Configure Page (Analog Inputs Selected)
87
Page Notes
87
MIC/Line Level Button
88
Figure 3-42 Analog Input (#) Page
89
MIC / Line) Level Button
89
Page Notes
89
V (on / Off) Button
89
Setting Phantom Power
89
HPF Button
90
Figure 3-43 Analog Input (#) - Dynamics Page
91
Page Notes
91
Decay Button
92
Zaxcom Deva User's Manual
93
Dec Button
93
Analog Input (#) - Eq Page
94
EQ Page Level Shortcuts
94
Figure 3-44 Analog Input (#) - Eq Page
94
Page Notes
94
(Band / Notch) (#) Field
95
(BYPASSED / INLINE) Flag
95
Band Type Flag
95
EQ Memory View Shortcuts
95
Freq Field
95
Freq Field Shortcuts
95
Level Field
95
Level Field Shortcuts
95
Q Field
95
Q Field Shortcuts
95
Band (#) Buttons
96
Entry Mode Button
96
Notch (#) Buttons
96
Analog Input (#) - Bus Page
97
Disk Channel (#) Buttons
97
Figure 3-45 Analog Input (#) - Bus Page
97
Output Channel (#) Buttons
97
Page Level Shortcuts
97
Page Notes
97
Input Configure Page (Digital Inputs Selected)
98
(Analog / Digital / Line Lvl) Inputs Toggle Button
98
Clear All Button
98
Digital (#) Buttons
98
Enabling the Highpass Filter
98
Figure 3-46 Input Configure Page
98
High Pass Filter Button
98
Page Level Shortcuts
98
Page Notes
98
Adjust Delay Button
99
Adjust Trim Button
99
High Pass (#) Hz Button
99
High Pass Button Shortcuts
99
Digital Input (#) Page
100
Delay Button
100
Delay Button Shortcuts
100
Figure 3-47 Digital Input (#)
100
HPF Button
100
HPF Button Shortcuts
100
Page Level Shortcuts
100
Page Notes
100
Trimmer Graphic Fader
100
BUS Button
101
Dynamics Button
101
EQ Button
101
Level Meter
101
Mix12 Input Trim Select Button
101
Digital Input (#) - Dynamics Page
102
Attack Button
102
Attack Button Shortcuts
102
Compress (on / Off) Button
102
Decay Button
102
Figure 3-48 Digital Input (#) - D
102
Gain Meter
102
Level Meter
102
Page Level Shortcuts
102
Page Notes
102
Copy Compress Button
103
Dec Button
103
Decay Button Shortcuts
103
Gain Button
103
Gain Button Shortcuts
103
Inc Button
103
Ratio Button
103
Ratio Button Shortcuts
103
Thresh Button
103
Thresh Button Shortcuts
103
Digital Input (#) - Eq Page
104
EQ Page Level Shortcuts
104
Figure 3-49 Digital Input (#) - Eq
104
Page Notes
104
(Band / Notch) (#) Field
105
(BYPASSED / INLINE) Flag
105
Band Type Flag
105
EQ Memory View Shortcuts
105
Freq Field
105
Freq Field Shortcuts
105
Level Field
105
Level Field Shortcuts
105
Q Field
105
Q Field Shortcuts
105
Entry Mode Button
106
Notch (#) Buttons
106
Digital Input (#) - Bus Page
107
Disk Channel (#) Buttons
107
Figure 3-50 Digital Input (#) - Bus
107
Output Channel (#) Buttons
107
Page Level Shortcuts
107
Page Notes
107
Input Configure Page
108
(Analog / Digital / Line Lvl) Inputs Toggle Button
108
Clear All Button
108
Figure 3-51 Input Configure Page
108
Line Level Channel Buttons
108
Only)
108
Page Level Shortcuts
108
Page Notes
108
Route Line Lvl Input Button
108
(Analog / Digital) Input Delay Page
109
Channel (#) Buttons
109
Clear Delay Button
109
Enter Delay Button
109
Enter Delay Button Shortcuts
109
Figure 3-52 (Analog / Digital ) I
109
Less Delay Button
109
More Delay Button
109
Page Level Shortcuts
109
Page Notes
109
Adjusting the Delay
110
Delay Mode Button
110
(Analog / Digital) Input Trim Page
111
Adjusting the Trim
111
Clear Trim Button
111
Input (#) Level Meters
111
Input (#) Trim Fields
111
Less Gain Button
111
More Gain Button
111
Page Level Shortcuts
111
Page Notes
111
Select All Button
111
My Deva Page
112
Figure 3-54 M Ydeva Page
112
Firewire Power Button
112
Internal HD Drive Button
112
Internal HD Drive Status Button
112
Mirror Drive Button
112
Mirror Drive Select Button
112
Mirror Drive Status Button
112
Page Level Shortcuts
112
Page Notes
112
Internal Disk Utilities Page
113
Current Folder Button
113
Delete Last Segment Button
113
Erase Current Folder Button
113
Figure 3-55 Internal Disku
113
Format Drive Button
113
Page Level Shortcuts
113
Page Notes
113
Disk Folders Page
114
Enable Mirror Playback Button
114
Figure 3-56 Disk Folders Page
114
Folder Buttons
114
Page Level Shortcuts
114
Page Notes
114
Page up Button
114
Sort Order Button
114
Up Arrow Button
114
Down Arrow Button
115
Erase Folder Button
115
Name Folder Button
115
Name Folder Button Shortcuts
115
Page down Button
115
Folder "???" Contents Page
116
Enter Seg # Button
116
Enter Seg # Button Shortcuts
116
Page down Button
116
Page Level Shortcuts
116
Page Notes
116
Page up Button
116
Segs Field
116
Take Buttons
116
Up Arrow Button
116
Down Arrow Button
117
Format Menu Warning Page
118
Do Not Format Drive Button
118
Figure 3-58 Format Menuw
118
Format Drive Button
118
Page Level Shortcuts
118
Page Notes
118
Formatting Dialog Box
119
Figure 3-59 Formatting Dialog Box on Top of
119
Page Level Shortcuts
119
Page Notes
119
Mirror Drive Page
120
File Resolution Button
120
File Type Button
120
Format Drive Button
120
Page Level Shortcuts
120
Page Notes
120
Segment Number Data Entry Field
120
Segment Number Data Entry Field Shortcuts
120
Tracks to Mirror Button
120
Advanced Options Button
121
End Seg Button
121
Folder to Mirror Button
121
Mirror Drive Status Button
121
Mirror Mode Button
121
Start Seg Button
121
Mirror File Type Page
122
Figure 3-62 Mirror File Type Page
122
File Type Buttons
122
Page Level Shortcuts
122
Page Notes
122
Pull up / down Buttons
122
Format Mirror Drive Caution Page
123
Do Not Format Drive Button
123
Figure 3-63 Format Mirrord
123
Format Drive FAT32 Button
123
Page Level Shortcuts
123
Page Notes
123
Tracks to Mirror Page
124
Figure 3-64 Tracks to Mirror Page
124
Page Level Shortcuts
124
Page Notes
124
Tracks to Mirror Buttons
124
Mirror Folders Page
125
Down Arrow Button
125
Folder Buttons
125
Mirroring Mode Button
125
Page down Button
125
Page Level Shortcuts
125
Page Notes
125
Page up Button
125
Sort Order Button
125
Up Arrow Button
125
Advanced Mirror Options Page
126
Figure 3-66 Advanced Mirror
126
Page Level Shortcuts
126
Page Notes
126
Timecode Offset Button
126
Write Sound Report Button
126
Cue Mode Page
127
Enter Segment Data Entry Field
127
Enter Segment Data Entry Field Shortcuts
127
Figure 3-67 Cue Mode Page
127
Mode Status Button
127
Page Level Shortcuts
127
Page Notes
127
Battery Icon Button
128
Disk Icon
128
Enter Seg Button
128
Next Seg Button
128
Prev Seg Button
128
Remaining Recording Time Field
128
REW Button
128
Timecode Button
128
View Button
128
Cue Toggle Button
129
Cur Field
129
Cur Segs Folder Button
129
FFWD Button
129
Folder Field
129
S: T: N: Button
129
Segs Field
129
Set Zaxnet UB Button
129
Wireless Audition Button
129
Wireless Rerec Button
129
Arm / Disarm a Recording Track
130
Scene Take Note Page
131
Figure 3-68 Scene Take Note Page
131
Segs Field
132
Scene Button
132
Inc Scene Button
132
Take Button
132
Reset Take Button
132
Note Button
132
Store Note Button
132
Clear Note Button
132
Segment Button
132
Stored Note Buttons
132
Up Arrow Button
133
Page Notes
134
Figure 3-69 about Deva Page
134
Figure 3-70 Generic Keyboard Page
135
Bsp Button
135
Ent Button (Enter)
135
Shift Button
135
Caps Button
135
Right Arrow Button
136
Page Notes
137
Figure 3-71 Battery Menu Page
137
Low Battery Voltage Button
137
Reset Graph Button
137
Battery Type Field
137
Voltage Field
137
Voltage Vs. Time Graph
137
Figure 3-72 Headphonev
138
Headphone Linear Graphic Fader
138
Page Notes
139
Figure 3-73 False Start Dialog on Top of
139
Segment Field
139
Duration Field
139
Scene Field
139
Take Field
139
Mark It Button
139
Cancel Button
139
Delete It Button
139
Page Notes
140
Page Level Shortcuts
140
Software Options Button
140
Processor Speed Button
140
Load Progfile Button
140
Load from CD-R Button
140
Burn Program ROM Button
140
Figure 3-74 Deva Servicem
140
Debug Screen Dialog Box
141
Figure 3-75 Debug Screen Page
141
Page Level Shortcuts
141
Page Notes
141
*B and *P Diagnostic Flags
142
B Flag
142
P Flag
142
Advertisement
Zaxcom Deva 16 Owner's Manual (98 pages)
High Resolution Digital Audio Recorders
Brand:
Zaxcom
| Category:
Recording Equipment
| Size: 5.12 MB
Table of Contents
Change History
2
Table of Contents
3
Options Available
9
Overview
9
What's in the Box
9
Features
10
Hints on Using Your Deva
11
Getting to Know Your Deva Recorder
12
Front Panel Descriptions
12
Left Panel Descriptions
14
Right Side Panel Description
15
Power
17
Internal Batteries
17
External Batteries
17
Battery Display
17
Battery Chemistry
18
Setting the Battery Threshold
18
Current Draw
18
Audio Input
18
Microphone/Analog Line Input
19
Setting up the Analog Inputs
19
Switching between Microphone and Line Input
20
Enabling the High Pass Filter
21
Setting the High Pass Filter Frequency on Multiple Channels
21
Enabling Phantom Power (48 VDC)
22
Adjusting the Trim
23
Adjusting the Trim Using the Analog Trim Menu
23
Adjusting Individual Trim Levels Using the Analog Input Channel Menu
24
Adjusting the Delay
24
Adjusting the Delay Using the Input Delay Menu
25
Adjusting Delay Using the Analog Input Menu
26
Analog Outputs
26
Digital Inputs
26
Assigning Inputs and Outputs to Tracks
27
Assigning Inputs to the Recording Tracks
27
Setting the Number of Tracks Recorded
29
Setting Sampling Rate for Recorded Tracks
30
Setting up 192 Khz Recording
30
Assigning Inputs to Output Channnels
31
Camera Connector
27
Digital Outputs
27
Overview of Input Signals
31
Overview of Output Signals
32
Storing the Data
34
Formatting a Drive
34
Selecting a Partition
35
Setting the Pre-Record Time
36
Setting the Tone Levels and Outputs
37
Setting Tone Output
37
Enabling Tone
38
Home Screen Meters
38
Setting the Number of Meters
38
Setting the Meter Labels
39
Changing the Appearance of the Meters
40
Changing the Meter Orientation from the Home Screen
41
Meter Color Schemes
41
Headphone Monitoring
41
Fader 8
42
Loading a Factory Preset
42
Building Your Own Headphone MIX (Working Preset)
43
Invert Phase
43
Camera Input
43
Building Your Own Presets
44
Store User Presets
44
Changing Preset; Get User Presets
45
Time Code
45
Static Time Code Settings
45
Reader T.C
45
Reader U.B
46
Generator T.C
46
Time Code Options
46
Time Code out
46
Time Code Run Mode
46
Free Run
46
Record Run
46
Jam All
46
Jam T.C
46
Jam. U.b
46
Jam Timecode (User Bits)
47
ENTER TIMECODE (or USER BITS)
47
Inc User Bits On/Off
47
Dual Rate Time Code
47
Analog out - DB25
49
Camera Connector, 10 Pin (Deva 5.8)
50
Power Connector
50
Time Code Connector
51
Analog Input Channels 9 through 12 (Deva 16)
51
AES Digital Input
52
AES Digital Output
52
Home Screen
54
TIME CODE Button
54
Headphone Button
54
Mirror Status
54
CUR Total Folder
55
Scene Take Notes
55
View ('V')
55
Meters
55
Solo Mode
55
Battery Display
55
Pre
55
Sampling Rate
55
Time Code Frame Rate
56
Mirroring Button
56
Cur
56
Total
56
Folder
56
Metadata
56
Status Button
56
Main Menu
57
Disk MIX
57
Output MIX
57
Faders
57
Time Code
57
Deva Setup
57
Input Control
57
My Deva
58
Cue Mode
58
Tone On/Off
58
Headphone
58
Scene Take Note
58
About Deva
58
Disk MIX Menu
59
Analog/Digital Toggle
59
Pre-Fader / Post-Fader
59
Preset
59
Phase Invert
60
Clear All
60
Faders
61
Fader Assign
62
Preset
62
Analog/Digital Toggle
62
Clear All
62
Touch Faders Toggle
63
Output MIX Menu
61
Time Code
63
Time Code out
63
Timecode Run Mode
63
Free Run
64
Record Run
64
Jam All
64
Jam T.C
64
Jam. U.b
64
Frame Rate
64
Timecode Reference
64
Xtal
64
Aes
64
Toggle Timecode Type
64
Enter Timecode (or User Bits)
65
INC User Bits ON/OFF
65
Deva Setup
65
Internal Sample Rate
65
Reference Select
65
Internal Reference
65
Auto
66
Record Channels
66
Two Track
66
Four Track
66
Tracks Mixed to
66
Pre-Record Time
66
Tone and Reference Setup
66
Operating Mode
67
Transport Operation
67
Normal
67
T.C. Chase
67
Auto-Load
67
GPI Remote Roll
67
Off
67
Rising Edge
67
Falling Edge
67
Serial Remote Roll
68
Serial Port Mode
68
Command Monitor
68
Master Output Mode
68
Slate Source
68
Headphone Options
68
Headphone Alarm Tone
68
Mute Unrecorded Tracks
68
Headphone MIX Menu
69
Camera Input
69
Get Factory Presets
69
Store User Presets
69
Get User Presets
69
Phase Invert
69
Meters
70
Display # of Home Screen Meters
70
Meter Vertical / Horizontal
70
Meter Labels
70
Display Inputs
71
Display Outputs
72
Clock
72
Enter Time
72
Set Date
73
Time Mode
73
Date Mode
73
Memory
73
Restore Factory Defaults
73
Save Deva State
73
Restore Deva State
73
User Interface
73
Startup Screen
74
Hold Key Time
74
False Start
74
Default STN Edit Position
74
Color Theme
74
Big STN
74
MIX-12
75
MIX-12 Support
75
Meter Brightness
75
Tone Button Assign
75
Input Control Menu
76
Phantom Power
76
Setting Phantom Power
76
High Pass Filter
76
Enabling the High Pass Filter
76
Setting High Pass Frequency
77
MIC/Line Level
77
Clear All
77
Adjust Delay
78
Adjusting the Delay
78
Clear Delay
78
Adjust Trim
78
My Deva Menu
79
Internal HD
80
Erase Current Folder
80
Delete Last Segment
80
Format Drive
80
Current Folder
81
Name Selected Folder
81
Erase Current Folder
81
Enable DVD Playback
81
Sort Order
81
Folder Contents
82
Edit STN (Scene, Take, Note)
82
Mirror Drive
82
File Type
83
File Resolution
83
Sampling Rate
83
Erase Disk
83
Mirror Mode
84
Folder to Mirror
84
Start Seg
84
End Seg
84
Tracks to Mirror
84
Advertisement
Related Products
Zaxcom Deva 5.8
Zaxcom Deva 24
Zaxcom Fusion 10
Zaxcom Fusion 12
Zaxcom Nomad
Zaxcom Nomad FP8
Zaxcom RX-4
Zaxcom ZFR100
Zaxcom ZFR200
Zaxcom Categories
Transmitter
Receiver
Recording Equipment
Music Mixer
Voice Recorder
More Zaxcom Manuals
Login
Sign In
OR
Sign in with Facebook
Sign in with Google
Upload manual
Upload from disk
Upload from URL