Advertisement
Owner's Manual & Safety Instructions
Save This Manual
operating, inspection, maintenance and cleaning procedures. Write the product's serial number in the
back of the manual near the assembly diagram (or month and year of purchase if product has no number).
Keep this manual and the receipt in a safe and dry place for future reference.
email our technical support at: productsupport@harborfreight.com
When unpacking, make sure that the product is intact
and undamaged. If any parts are missing or broken,
please call 1-888-866-5797 as soon as possible.
©
Copyright
2023 by Harbor Freight Tools
No portion of this manual or any artwork contained herein may be reproduced in
any shape or form without the express written consent of Harbor Freight Tools.
Diagrams within this manual may not be drawn proportionally. Due to continuing
improvements, actual product may differ slightly from the product described herein.
Tools required for assembly and service may not be included.
Keep this manual for the safety warnings and precautions, assembly,
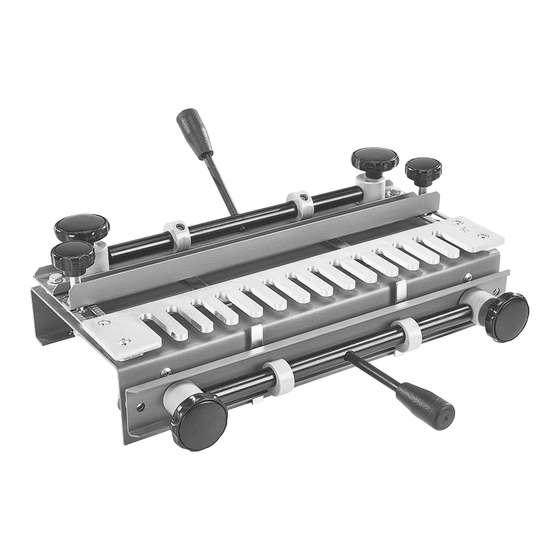
DOVETAIL JIG
Visit our website at: http://www.harborfreight.com
®
. All rights reserved.
read this material before using this product.
Failure to do so can result in serious injury.
SaVe tHiS ManuaL.
23h
59785
Advertisement
Table of Contents

Summary of Contents for Harbor Freight Tools WARRIOR 59785
- Page 1 No portion of this manual or any artwork contained herein may be reproduced in Failure to do so can result in serious injury. any shape or form without the express written consent of Harbor Freight Tools. Diagrams within this manual may not be drawn proportionally. Due to continuing SaVe tHiS ManuaL.
-
Page 2: Table Of Contents
It will do the job better and more are available from Harbor Freight Tools. safely at the rate for which it was intended. Do not modify this tool, and do not use this tool 6. -
Page 3: Specifications
Specifications Dovetail Jig Style 1/2" Half-Blind Joints Workpiece Capacity 1-1/4" Thick and 10" Wide 1/4" Collet, 7" max Base, Router Requirements 7/16" Template Guide (sold separately) Router Dovetail Bit Ø1/4" Shank, Ø1/2" x 14° (sold separately) Setup - Before use: read the entire iMpOrtant SaFety inFOrMatiOn section at the beginning of this document including all text under subheadings therein before set up or use of this product. - Page 4 assembly Thread Levers into Rods. Lever Front Lever Mounting Mounting Mounting cautiOn! tO preVent inJury Or Hole Hole prOperty DaMaGe: Mount the Jig on a flat, level, sturdy, surface capable of supporting the weight of Jig, workpieces, and tools. 1. Position Jig on front edge of mounting surface. 2.
- Page 5 Setting clamp pressure clamp Knobs clamp Knobs 1. Open Levers (shown closed). Horizontal Horizontal 2. Loosen Clamp Knobs. Workpiece Workpiece template 3. With markings facing out, mount side workpiece vertically, flush against Template. Tighten Clamp Lever Lever Knobs until Clamp just touches workpiece. 4.
- Page 6 rabbeted Front and Standard Back 1. Loosen Top Stop Bolt. 6. Loosen Front Stop Bolt. Front Front Stop Stop Stop Stop Stop Stop Stop Stop Bolt Bolt Bolt Bolt 2. Open Top Lever and center horizontal (front/back) 7. Cut bottom spacer for vertical workpiece workpiece under Template and flush against the same width as top rabbet notch.
- Page 7 adjusting template 1. Slightly loosen Template Bolts with 12mm wrench. 3. Vertical workpiece more than 7/8" thick: Determine amount thickness exceeds 7/8" (X), template and add 1/8". Set Template front edge back Bolts from vertical workpiece edge by that amount. 2.
- Page 8 adjusting Fence 1. Using a combination square measure distance 4. Loosen Fence Knobs, set distance between from template guide edge to router base edge. Template front edge and Fence, then tighten Knobs. 5. Measure at both ends and verify Fence is parallel with Template front edge.
-
Page 9: Operation
Operating instructions read the entire iMpOrtant SaFety inFOrMatiOn section at the beginning of this manual including all text under subheadings therein before set up or use of this product. 1. Plug router into 120VAC grounded outlet. 6. When finished, turn off and unplug router. 2. -
Page 10: Maintenance
Maintenance and Servicing procedures not specifically explained in this manual must be performed only by a qualified technician. 1. BeFOre eacH uSe, inspect the general 2. aFter uSe, wipe external surfaces condition of the tool. Check for: of the tool with clean cloth. •... -
Page 11: Parts List And Diagram
parts List and Diagram pLeaSe reaD tHe FOLLOWinG careFuLLy THE MANUFACTURER AND/OR DISTRIBUTOR HAS PROVIDED THE PARTS LIST AND ASSEMBLY DIAGRAM IN THIS MANUAL AS A REFERENCE TOOL ONLY. NEITHER THE MANUFACTURER OR DISTRIBUTOR MAKES ANY REPRESENTATION OR WARRANTY OF ANY KIND TO THE BUYER THAT HE OR SHE IS QUALIFIED TO MAKE ANY REPAIRS TO THE PRODUCT, OR THAT HE OR SHE IS QUALIFIED TO REPLACE ANY PARTS OF THE PRODUCT. -
Page 12: Warranty
Limited 90 Day Warranty Harbor Freight Tools Co. makes every effort to assure that its products meet high quality and durability standards, and warrants to the original purchaser that this product is free from defects in materials and workmanship for the period of 90 days from the date of purchase.


