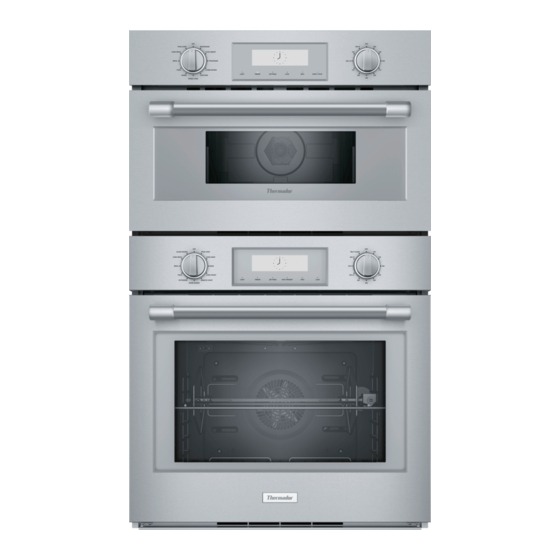
Thermador Professional Series Installation Insert Manual
Combination built in ovens, speed ovens, microwaves
Hide thumbs
Also See for Professional Series:
- Recipes (148 pages) ,
- Use and care manual (104 pages) ,
- Installation manual (76 pages)
Advertisement
Available languages
Available languages
Quick Links
Installation Insert
G U I D E
Professional and Masterpiece ® Combination Built In Ovens
POM301W, PODMC301W, PODMCW31W,
MEM301WS, MEDMC301WS, MEDMCW31WS
IMPORTANT:
9
This insert is in addition to the Installation Guide and is not a substitute. Read and consult the appliance
Installation Guide for important safety messages and additional information regarding the use of your new appliance.
Parts Provided
Universal connector
bracket (2)--in parts box
on top of oven
Screws (16)--in red bag
inside parts box on top
of oven.
Oven Mounting Screws
(8)--screws are included
to secure the oven trim
to the cabinet. The
screws are located in a
small plastic bag affixed
to the literature pack
bag.
Trim Piece--in plastic
bag on top of oven.
Pre-Assembly of the Combination Oven
Combination ovens require the two components to be
assembled prior to installing the combination unit into the
wall cabinet.
Note: The installation procedures differ between the
microwave and speed oven combination units. The parts
contained in the square tube parts box are common to all
installations.
Mounting the Speed Oven or
Microwave to the Lower Oven
•
Do not place the oven into the wall cabinet until after
mounting the speed oven on top of the lower oven and
securing it with the universal connector brackets.
•
The universal connector brackets are interchangeable
for the left and right sides of the oven. Be sure the taller
vertical edge of the bracket is positioned to the outside
of the oven.
1. Install both universal connector brackets on top of the
lower oven using six (6) of the screws provided.
Tighten screws securely, but do not overtighten.
2. Install decorative trim.
Position the decorative
trim piece so the flanges
with the holes in them
face to the rear of the
oven.
Advertisement

Summary of Contents for Thermador Professional Series
- Page 1 Installation Insert G U I D E Professional and Masterpiece ® Combination Built In Ovens POM301W, PODMC301W, PODMCW31W, MEM301WS, MEDMC301WS, MEDMCW31WS IMPORTANT: This insert is in addition to the Installation Guide and is not a substitute. Read and consult the appliance Installation Guide for important safety messages and additional information regarding the use of your new appliance.
- Page 2 Align the outer flanges Speed Oven Models with the outside of the universal brackets. Fasten MEDMC301WS with one ( 1 ) screw each PODMC301W into the end hole of each MEDMCW31WS universal bracket. PODMCW31W Tighten screws securely, 1. Remove the oven-mounted junction box cover located but do not overtighten.
-
Page 3: Customer Service
The model number and the FD number of your appliance are found on the rating label. Make a note of these numbers to save time in the event further customer service is needed. Consult your Use and Care Guide for the specific label location. To contact Customer Service: US: 800-735-4328 Web: www.thermador.com/support Parts & Accessories: www.thermador-eshop.com... -
Page 4: Pièces Fournies
Fours combinés encastrables Professional et Masterpiece® POM301W, PODMC301W, PODMCW31W, MEM301WS, MEDMC301WS, MEDMCW31WS IMPORTANT: Cet encart est un complément au Guide d’installation; il ne le remplace pas. Veuillez lire et consulter le Guide d’installation de l’appareil pour d’importants conseils de sécurité et de l’information supplémentaire sur le mode d’emploi de votre nouveau four. - Page 5 Alignez les brides Modèles de four à micro-ondes extérieures avec la partie à cuisson rapide extérieure des supports universels. Fixez à l'aide MEDMC301WS d'une vis insérée dans le PODMC301W trou à l'extrémité du MEDMCW31WS support universel. PODMCW31W Serrez les vis à fond, mais 1.
- Page 6 économiser du temps, au cas où l’appareil électroménager aurait besoin de réparations. Consultez votre Guide d'utilisation et d'entretien pour connaître l'emplacement exact de la plaque. Pour communiquer avec le service après-vente : É.-U. : 800-735-4328 URL : www.thermador.com/support Pièces et accessoires : www.thermador-eshop.com...
-
Page 7: Piezas Suministradas
Hornos integrados de funcionamiento combinado Professional y Masterpiece® POM301W, PODMC301W, PODMCW31W, MEM301WS, MEDMC301WS, MEDMCW31WS IMPORTANTE: Este volante adicional no reemplaza la Guía de instalación. Lea y consulte la Guía de Instalación del aparato para ver importantes mensajes de seguridad e información adicional sobre el uso de su nuevo aparato. Piezas Montaje del horno rápido o microondas en suministradas... - Page 8 Alinear los bordes Modelos de hornos exteriores con el exterior rápidos de las guías universales. Fijar con un (1) tornillo MEDMC301WS cada uno en el orificio PODMC301W final de cada guía MEDMCW31WS universal. PODMCW31W Apretar tornillos 1. Quitar la tapa de la caja de conexiones montada en el firmemente pero horno que se encuentra en la parte trasera del...
- Page 9 Consulte la ubicación específica de las etiquetas en su Guía de uso y cuidado. Para comunicarse con servicio al cliente: EE. UU.: 800-735-4328 Web: www.thermador.com/support Piezas y accesorios: Store.thermador.com/us...
- Page 12 1 9 0 1 M A I N S T R E E T , S U I T E 6 0 0 I R V I N E , C A 9 2 6 1 4 / / 1 - 8 0 0 - 7 3 5 - 4 3 2 8 / / W W W . T H E R M A D O R . C O M ©...


