Summary of Contents for Thermador MET27B
-
Page 1: Installation Instructions
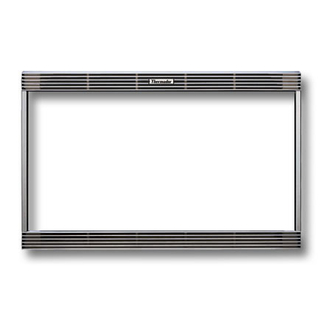
INSTALLATION INSTRUCTIONS For Built - in Microwave Ovens Oven M o d e l M B B Built-In Trim Kits Models: MET27B MET30B (Sold Separately) -
Page 2: Table Of Contents
Please read this entire manual before proceeding IMPORTANT Local codes vary. Installation, electrical connections, circuit breakers and grounding must comply with all applicable codes. Save these instructions for your local electrical inspector's use. INSTALLER: Please leave these Installation Instructions with this unit for the owner. -
Page 3: Step 1: Unpacking
• Care & Use manual (1) • Warranty Card (1) • Plastic Turntable (1) • Glass Tray (1) B. Trim Kit Models MET27B & MET30B Remove and discard all packing materials. Parts Included: • Trim Frame (1) • Base Pan (1) •... -
Page 4: Step 2: Preparing The Cabinet
• Your microwave oven can be installed into a cabinet or wall by itself or above any of the following Thermador wall ovens: C271, C301, CM301, S301, SC301. Or, Thermador Warming Drawers WD27 and WD30 (see Figures 2a and 2b). -
Page 5: Step 3: Preparing The Electric
Step 3: Preparing the Electric The Thermador microwave oven is equipped with a grounded cord. The wall receptacle must be installed and grounded in accordance with the national electrical code. It can be installed anywhere in the shaded area in Figure 1 (previous page). Electrical connections and grounding must comply with all applicable local codes. -
Page 6: Step 5: Installing The Ducts
Step 5: Installing The Ducts Remove and discard the protective plastic film from the 4 ducts. CAUTION The ducts have sharp edges. Be careful when handling. Set microwave upside down in stable loca- tion. Use pliers to remove and discard all four (4) black plastic feet from bottom of microwave. -
Page 7: Step 6: Completing The Installation
Step 6: Completing the Installation Caution: The microwave oven is heavy. Al- ways use at least two people to lift the unit. Lift oven into position and rest right rear cor- ner in cabinet cutout. Reach past microwave on left side to insert electrical cord into outlet. -
Page 8: Bsh Home Appliances Corporation
Thermador reserves the right to change specifications or design without notice. Some models are certified for use in Canada. Thermador is not responsible for products which are transported from the United States for use in Canada. Check with your local Canadian distributor or dealer. Thermador, 5551 McFadden Avenue, Huntington Beach, CA 92649.


