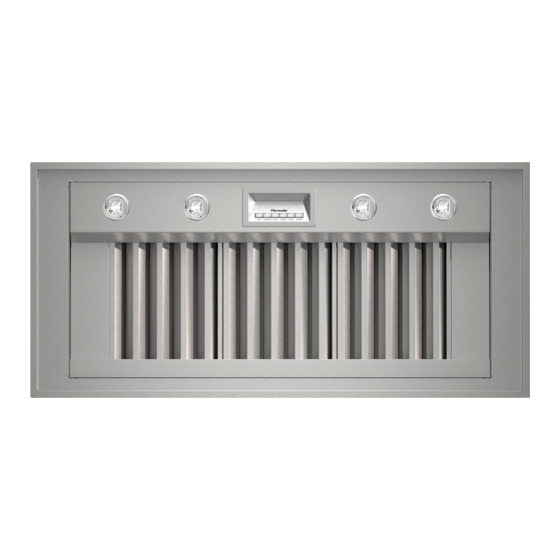
Thermador VCIB36JP Service Manual
Professional series custom inserts
Hide thumbs
Also See for VCIB36JP:
- Installation manual (96 pages) ,
- Use and care manual (38 pages) ,
- Design manual (62 pages)
Table of Contents
Advertisement
S
ERVICE
Error! No index entries found.
Professional Series
Custom Inserts
VCIB36JP
VCIB48JP
VCIB54JP
VCIN36JP
VCIN48JP
VCIN54JP
VCIN60RP
M
ANUAL
for
Models:
WARNING
!
The information provided in this document is intended for
trained, qualified personnel only. The proper function and the
safety of the appliance can be affected by an improper repair,
and even serious threats to life or physical condition may arise.
BSH Home Appliances Corporation is not liable for damages
caused by improper repairs performed by unauthorized parties.
Local codes and standards apply and must be observed.
Authorized servicers may contact the Technical Support Team
for further assistance.
Advertisement
Table of Contents

Summary of Contents for Thermador VCIB36JP
- Page 1 Models: The information provided in this document is intended for trained, qualified personnel only. The proper function and the VCIB36JP safety of the appliance can be affected by an improper repair, VCIB48JP and even serious threats to life or physical condition may arise.
-
Page 2: Table Of Contents
Service Manual for Thermador Professional Series Custom Inserts SYMBOLS USED IN THIS MANUAL ..........3 IMPORTANT SAFETY INFORMATION ........4 Safety Before Servicing the Appliance........4 GENERAL...................6 Specifications ............... 6 Blower Options for VCINxxJP Models* ......... 6 Accessories................7 Data Plate ................7 Warranty................ -
Page 3: Symbols Used In This Manual
Service Manual for Thermador Professional Series Custom Inserts SYMBOLS USED IN THIS MANUAL Symbols used within this manual are illustrated and defined in the table below. WARNING – this symbol alerts you to dangers that may result in bodily injury or death CAUTION –... -
Page 4: Important Safety Information
Service Manual for Thermador Professional Series Custom Inserts IMPORTANT SAFETY INFORMATION WARNING Before starting to service an appliance, familiarize yourself with all safety information and precautions included in this manual. Electrical hazards… Safety Before Servicing the Appliance Before servicing the appliance, remove electrical power by... - Page 5 Service Manual for Thermador Professional Series Custom Inserts WARNING Clean-up hazards… Do not allow any cleaning or polishing solutions/compounds, disinfectants, or bleaches to remain in contact with the stainless steel surfaces for long periods, or after clean-up. These may contain chemicals or materials which could release harmful inhalants and may cause damage to the appliance.
-
Page 6: General
Service Manual for Thermador Professional Series Custom Inserts Specifications GENERAL Three fan speeds The Thermador VCINxxJP and VCIBxxJP Professional Series Custom 10” round duct size at discharge Inserts are available in 36-, 48-, and 54-inch widths, and are designed Requires vertical ducting for installation with all professional-style cooktops and ranges. -
Page 7: Accessories
Service Manual for Thermador Professional Series Custom Inserts Accessories The first 4 positions of the FD number reflect the year/month the product was built. FD numbers that begin with 92 were built in 2012, Accessories include a stainless steel backsplash for the 36” and 48”... -
Page 8: Operation
Service Manual for Thermador Professional Series Custom Inserts OPERATION TEMPERATURE READING BLOWER ACTION < 86° F (30°C) Disabled Control and Control Panel 86° - 103° F (30 - 39°C) Low speed 104° - 121° F (40 - 49°C) Medium speed The 120V /60Hz / 60A control board is populated by 6 push-buttons 122°... -
Page 9: Ventilator / Power Harness
Service Manual for Thermador Professional Series Custom Inserts (60º C), the control will revert back to the operational state prior to the control the ventilator and lights. The relays react to input and over-temperature condition. commands from the control board and activate the components in the hood. -
Page 10: Resistor
Service Manual for Thermador Professional Series Custom Inserts To replace a halogen bulb, use a flat-blade screwdriver to gently pry the lens cover off the lamp assembly. Remove the damaged bulb from the receptacle. Wearing gloves or using a cloth, insert the new 120V 40W G-9 bulb into the receptacle. -
Page 11: Disassembly
Service Manual for Thermador Professional Series Custom Inserts Filter Top Trim DISASSEMBLY To detach the stainless steel filter top trim from the stainless control/light panel, remove the filters, spacer panels, and grease trays, then remove the 3 screws and washers which secure the filter top trim WARNING panel. -
Page 12: Resistor(S) And Relay Board / Power Supply
Service Manual for Thermador Professional Series Custom Inserts Remove the 4 side screws securing the core partition to brackets, and To remove the power supply, first remove the screw, then press the 4-6 screws securing the core partition to top mounting plate. (Filter two leftmost tabs forward to release the module. -
Page 13: Halogen Lamp Assemblies
Service Manual for Thermador Professional Series Custom Inserts Figure 16 Control module with buttons 7 and 8 removed The control mounting panel assembly is secured to the stainless steel control/light panel by 4 corner studs (which are permanently affixed to Figure 18 Removing a halogen lamp receptacle. -
Page 14: Troubleshooting
Service Manual for Thermador Professional Series Custom Inserts TROUBLESHOOTING The procedures below are recommended if the custom insert malfunctions… Self-test Program Press the buttons simultaneously for 3 seconds to DELAY enable the test program, which activates the following sequence... 1. LEDs switch on simultaneously 2. -
Page 15: Additional References
Technical Support Additional assistance is available to authorized servicers by contacting the Thermador Technical Support Team at 800 444-9091. Technicians are available Monday – Friday, between the hours of 5am and 5pm, Pacific Time. -
Page 16: Notes
NOTES 58300000167356 ARA EN B BSH Home Appliances Corporation Page 1901 Main Street, Suite 600, Irvine, CA 92614 July 2016...


